European ASP.NET MVC 4 and MVC 5 Hosting

BLOG about ASP.NET MVC 3, ASP.NET MVC 4, and ASP.NET MVC 5 Hosting and Its Technology - Dedicated to European Windows Hosting Customer

ASP.NET MVC 6 Hosting - HostForLIFE.eu :: How To Use C# To Send Emails with Mail Helper

clock February 27, 2016 00:28 by author Rebecca

In this post, I will create simple mail helper class for sending emails in ASP.NET MVC using C#.

IMPLEMENTATION

Step 1

Create a class name MailHelper and the add the following code:

public class MailHelper
    {
        private const int Timeout = 180000;
        private readonly string _host;
        private readonly int _port;
        private readonly string _user;
        private readonly string _pass;
        private readonly bool _ssl;

        public string Sender { get; set; }
        public string Recipient { get; set; }
        public string RecipientCC { get; set; }
        public string Subject { get; set; }
        public string Body { get; set; }
        public string AttachmentFile { get; set; }

        public MailHelper()
        {
            //MailServer - Represents the SMTP Server
            _host = ConfigurationManager.AppSettings["MailServer"];
            //Port- Represents the port number
            _port = int.Parse(ConfigurationManager.AppSettings["Port"]);
            //MailAuthUser and MailAuthPass - Used for Authentication for sending email
            _user = ConfigurationManager.AppSettings["MailAuthUser"];
            _pass = ConfigurationManager.AppSettings["MailAuthPass"];
            _ssl = Convert.ToBoolean(ConfigurationManager.AppSettings["EnableSSL"]);
        }

        public void Send()
        {
            try
            {

// We do not catch the error here... let it pass direct to the caller
                Attachment att = null;
                var message = new MailMessage(Sender, Recipient, Subject, Body) { IsBodyHtml = true };
                if (RecipientCC != null)
                {
                    message.Bcc.Add(RecipientCC);
                }
                var smtp = new SmtpClient(_host, _port);

                if (!String.IsNullOrEmpty(AttachmentFile))
                {
                    if (File.Exists(AttachmentFile))
                    {
                        att = new Attachment(AttachmentFile);
                        message.Attachments.Add(att);
                    }
                }

                if (_user.Length > 0 && _pass.Length > 0)
                {
                    smtp.UseDefaultCredentials = false;
                    smtp.Credentials = new NetworkCredential(_user, _pass);
                    smtp.EnableSsl = _ssl;
                }

                smtp.Send(message);

                if (att != null)
                    att.Dispose();
                message.Dispose();
                smtp.Dispose();
            }

            catch (Exception ex)
            {
            }
        }
    }

Step 2

Place the following code in the app settings of your application:

appSettings>
<add key=”MailServer” value=”smtp.gmail.com”/>
<add key=”Port” value=”587″/>
<add key=”EnableSSL” value=”true”/>
<add key=”EmailFromAddress” value=”[email protected]”/>
<add key=”MailAuthUser” value=”[email protected]”/>
<add key=”MailAuthPass” value=”xxxxxxxx”/>
</appSettings>

Step 3

If you don’t have authentication for sending emails you can pass the emtpy string in MailAuthUser and MailAuthPass.

<appSettings>
<add key=”MailServer” value=”smtp.gmail.com”/>
<add key=”Port” value=”587″/>
<add key=”EnableSSL” value=”true”/>
<add key=”EmailFromAddress” value=”[email protected]”/>
<add key=”MailAuthUser” value=””/>
<add key=”MailAuthPass” value=””/>
</appSettings>

USAGE

Add the following code snippet in your controller to call Mail Helper class for sending emails:

var MailHelper = new MailHelper
   {
      Sender = sender, //email.Sender,
      Recipient = useremail,
      RecipientCC = null,
      Subject = emailSubject,
      Body = messageBody
   };
 MailHelper.Send();

HostForLIFE.eu ASP.NET MVC 6 Hosting
HostForLIFE.eu is European Windows Hosting Provider which focuses on Windows Platform only. We deliver on-demand hosting solutions including Shared hosting, Reseller Hosting, Cloud Hosting, Dedicated Servers, and IT as a Service for companies of all sizes. We have customers from around the globe, spread across every continent. We serve the hosting needs of the business and professional, government and nonprofit, entertainment and personal use market segments.


ASP.NET MVC 6 Hosting - HostForLIFE.eu :: How To Perform CSV Files (Upload & Read) in ASP.NET MVC

clock February 20, 2016 00:39 by author Rebecca

To read CSV file doesn’t mean to use String.Split(). CSV files may contain commas, carriage returns, speechmarks…etc within strings. In this post, we will learn how to upload and read CSV File in ASP.NET MVC WITHOUT using Jet/ACE OLEDB provider. It is helpful when you have to deploy your code on shared hosting, Azure website or any server where ACE Database engine is not available. In this post, we will use a fast CSV Reader.

Step 1

Create ASP.NET MVC Empty Project

Step 2

To install CSVReader, run the following command in the Package Manager Console:

Install-Package LumenWorksCsvReader

Step 3

Add New Controller say HomeController and add following action:

public ActionResult Upload()
       {
           return View();
       }

Step 4

Add View of Upload action and use following code:

@model System.Data.DataTable
@using System.Data;
 
<h2>Upload File</h2>
 
@using (Html.BeginForm("Upload", "Home", null, FormMethod.Post, new { enctype = "multipart/form-data" }))
{
    @Html.AntiForgeryToken()   
    @Html.ValidationSummary()
    
    <div class="form-group">
        <input type="file" id="dataFile" name="upload" />
    </div>
    
    <div class="form-group">
        <input type="submit" value="Upload" class="btn btn-default" />
    </div>
    
    if (Model != null)
    {
        <table>
            <thead>
                <tr>
                    @foreach (DataColumn col in Model.Columns)
                    {        
                        <th>@col.ColumnName</th>
                    }
                </tr>
            </thead>
            <tbody>
                @foreach (DataRow row in Model.Rows)
                {       
                    <tr>
                        @foreach (DataColumn col in Model.Columns)
                        {            
                            <td>@row[col.ColumnName]</td>
                        }
                    </tr>
                }
            </tbody>
        </table>
    }
}

We will read CSV file, get data in DataTable and show DataTable in View.

Step 5

Here's how to read submitted CSV file:

[HttpPost]
[ValidateAntiForgeryToken]
 public ActionResult Upload(HttpPostedFileBase upload)
{
    if (ModelState.IsValid)
    {
 
        if (upload != null && upload.ContentLength > 0)
        {                  
 
            if (upload.FileName.EndsWith(".csv"))
            {
                Stream stream = upload.InputStream;
                DataTable csvTable = new DataTable();
                using (CsvReader csvReader =
                    new CsvReader(new StreamReader(stream), true))
                {
                    csvTable.Load(csvReader);
                }
                return View(csvTable);
            }
            else
            {
                ModelState.AddModelError("File", "This file format is not supported");
                return View();
            }
        }
        else
        {
            ModelState.AddModelError("File", "Please Upload Your file");
        }
    }
    return View();
}

It is assumed the file will have column names in first row.

Output

HostForLIFE.eu ASP.NET MVC 6 Hosting
HostForLIFE.eu is European Windows Hosting Provider which focuses on Windows Platform only. We deliver on-demand hosting solutions including Shared hosting, Reseller Hosting, Cloud Hosting, Dedicated Servers, and IT as a Service for companies of all sizes. We have customers from around the globe, spread across every continent. We serve the hosting needs of the business and professional, government and nonprofit, entertainment and personal use market segments.


ASP.NET MVC 6 Hosting - HostForLIFE.eu :: How To Use ASP.NET MVC To Increase Website Performance

clock February 12, 2016 23:50 by author Rebecca

In this tutorial, we will discuss about how you can increase the performance of website using ASP.NET MVC.

1. Remove Unused view engines

protected void Application_Start()
{
    ViewEngines.Engines.Clear();
    ViewEngines.Engines.Add(new RazorViewEngine());
}

2. Deploying Production Code in Release Mode

Make sure your production application always runs in release mode in the web.config
<compilation debug=”false”></compilation>

<configuration> <system.web> <deployment retail=”true”></deployment> </system.web> </configuration>

3. Use OutputCacheAttribute When Appropriate

MVC will not do any View Look-up Caching if you are running your application in Debug Mode

[OutputCache(VaryByParam = "none", Duration = 3600)]
public ActionResult Categories()
{
    return View(new Categories());
}

4. Use HTTP Compression

Add gzip (HTTP compression) and static cache (images, css, …) in your web.config:

<system.webserver><urlcompression dodynamiccompression=”true” dostaticcompression=”true” dynamiccompressionbeforecache=”true”></urlcompression>
</system.webserver>

5. Add an Expires or a Cache-Control Header

<configuration><system.webServer>
<staticContent>
<clientCache cacheControlMode=”UseExpires”
httpExpires=”Mon, 06 May 2013 00:00:00 GMT” />
</staticContent>
</system.webServer>
</configuration>

6. Uncontrolled Actions

protected override void HandleUnknownAction(string actionName)
{
       RedirectToAction("Index").ExecuteResult(this.ControllerContext);
}

7. Other Ways

  • Avoid passing null models to views
  • Remove unused HTTP Modules
  • Put repetitive code inside your PartialViews
  • Put Stylesheets at the Top
  • Put Scripts at the Bottom
  • Make JavaScript and CSS External
  • Minify JavaScript and CSS
  • Remove Duplicate Scripts
  • No 404s
  • Avoid Empty Image src
  • Use a Content Delivery Network
  • Use either Microsoft, Google CDN for referencing the Javascript or Css libraries
  • Use GET for AJAX Requests
  • Optimize Images

HostForLIFE.eu ASP.NET MVC 6 Hosting
HostForLIFE.eu is European Windows Hosting Provider which focuses on Windows Platform only. We deliver on-demand hosting solutions including Shared hosting, Reseller Hosting, Cloud Hosting, Dedicated Servers, and IT as a Service for companies of all sizes. We have customers from around the globe, spread across every continent. We serve the hosting needs of the business and professional, government and nonprofit, entertainment and personal use market segments.


ASP.NET MVC 6 Hosting - HostForLIFE.eu :: How To Show The Progress of The Controller

clock January 22, 2016 23:52 by author Rebecca

Sometimes, the controller actions can trigger a long running background process. For example, when the user clicks a link in the page, a word document is generated in the background, and the properties of the word document is shown in the subsequent page. Generation of word documents can take anywhere between 3 seconds to 30 seconds. During this time, the user needs some feedback about the progress of the operation. This post shows how you can provide progress information to the page which triggered the long running background process.

Step 1

Consider a MVC application with two pages: Index.cshtml and Generate.cshtml. The Index.cshtml has a link - Generate. When the user clicks the link, the Generate page is shown. The Generate action is a long running operation that happens in the background. To execute long running operations from a MVC controller, we derive the controller from AsyncController. The following code snippet shows the HomeController with the background operations:

public class HomeController : AsyncController
{
    //
    // GET: /Home/

    private BackgroundWorker worker = default(BackgroundWorker);
    private static int progress = default(int);

    public ActionResult Index()
    {
        return View();
    }

    public void GenerateAsync()
    {
        worker = new BackgroundWorker();
        worker.WorkerReportsProgress = true;
        worker.DoWork += worker_DoWork;
        worker.ProgressChanged += worker_ProgressChanged;
        AsyncManager.OutstandingOperations.Increment();
        worker.RunWorkerAsync();
    }

    void worker_ProgressChanged(object sender, ProgressChangedEventArgs e)
    {
        progress = e.ProgressPercentage;
    }

    void worker_DoWork(object sender, DoWorkEventArgs e)
    {
        for (int i = 0; i < 100; i++)
        {
            Thread.Sleep(300);
            worker.ReportProgress(i+1);
        }

        AsyncManager.OutstandingOperations.Decrement();
    }

    public ActionResult GenerateCompleted()
    {
        return View();
    }

    public ActionResult GetProgress()
    {
        return this.Json(progress, JsonRequestBehavior.AllowGet);
    }
}

The three main action methods in the above controller are - Index(), GenerateAsync(), GetProgress(). Index() displays the Index page. GenerateAsync() triggers the background operation. The background operation loops 100 times and sleeps for 300 ms in each iteration. At the end of each iteration, it reports progress as a percentage.

Step 2

The GetProgress() action gets the reported progress which is stored as a static variable. The GetProgress() is triggered when the user clicks the link. The javascript in the Index page shows how the GetProgress() action method is called:

$(document).ready(
    function () {
        $("#genLink").click(
            function (e) {
                setInterval(
                    function () {
                        $.get("/Home/GetProgress",
                            function (data) {
                                $("#progress").text(data);
                        });
                    }, 1000);
            });
    });

Here's the HTML

<body>
    <h1>Progress</h1>
    <h2 id="progress"></h2>
    <div>
        @Html.ActionLink("Generate", "Generate", null,
            new { id = "genLink" })
    </div>
</body>

On clicking the link, you have caledl the setInterval() function that is triggered every second. In the recurring function, we call the action method - GetProgress(). You have displayed the progress data in the page in the progress tag.

HostForLIFE.eu ASP.NET MVC 6 Hosting
HostForLIFE.eu is European Windows Hosting Provider which focuses on Windows Platform only. We deliver on-demand hosting solutions including Shared hosting, Reseller Hosting, Cloud Hosting, Dedicated Servers, and IT as a Service for companies of all sizes. We have customers from around the globe, spread across every continent. We serve the hosting needs of the business and professional, government and nonprofit, entertainment and personal use market segments.


ASP.NET MVC 6 Hosting France - HostForLIFE.eu :: How To Clear Thumbnails After It Has Uploaded

clock October 24, 2015 00:23 by author Rebecca

Sometimes, we need to clear the thumbnails from dropzone.js after the file is uploaded. In this article, I will tell you how to do it.

You need to call addedfile function once the file is uploaded. After that, you have to to generate remove button for the thumbnail.

Look at this example code:

Step 1: File Upload response from the server

Dropzone.options.dropzoneForm = {
maxFiles: 2,
init: function () {
this.on("maxfilesexceeded", function (data) {
var res = eval('(' + data.xhr.responseText + ')');

});
this.on("addedfile", function (file) {

Step 2: Create the remove/clear button

var removeButton = Dropzone.createElement("
<button>Remove file</button>
");

Step 3: Capturing the Dropzone.js instance as closure

var _this = this;

Step 4: Listen to the click event

removeButton.addEventListener("click", function (e) {

Make sure the button click doesn't submit the form:

e.preventDefault();
e.stopPropagation();

Step 5: Remove the file preview

_this.removeFile(file);

If you want to the delete the file on the server as well, you can do the AJAX request here:

});

Step 6: Add the button to the file preview element

file.previewElement.appendChild(removeButton);
});
}
};

That's it! Simple right?

HostForLIFE.eu ASP.NET MVC 6 Hosting
HostForLIFE.eu is European Windows Hosting Provider which focuses on Windows Platform only. We deliver on-demand hosting solutions including Shared hosting, Reseller Hosting, Cloud Hosting, Dedicated Servers, and IT as a Service for companies of all sizes. We have customers from around the globe, spread across every continent. We serve the hosting needs of the business and professional, government and nonprofit, entertainment and personal use market segments.


ASP.NET MVC 6 Hosting France - HostForLIFE.eu :: How to Avoid XSS (Cross Site-Scripting) in MVC Project

clock October 16, 2015 11:09 by author Rebecca

Cross-site scripting (XSS) is a type of computer security vulnerability typically found in web applications. XSS enables attackers to inject client-side script into web pages viewed by other users. Cross-Site Scripting (XSS) attacks are a type of injection, in which malicious scripts are injected into otherwise trusted web sites. In this article, I will show you how to avoid XSS while allowing only the HTML that you want to accept. In example, only <b> and <u> tags.

Firstly, let's filter the user input, and accept only <b></b> and <u></u> tags.

Step 1: Disables input validation

Step 2: Encodes all the input that is coming from the user

Step 3: Replace the encoded html with the HTML elements that you want to allow

Here is the full code snippet:

[HttpPost]
// Input validation is disabled, so the users can submit HTML
[ValidateInput(false)]
public ActionResult Create(Comment comment)
{
    StringBuilder sbComments = new StringBuilder();
   
    // Encode the text that is coming from comments textbox
    sbComments.Append(HttpUtility.HtmlEncode(comment.Comments));
   
    // Only decode bold and underline tags
    sbComments.Replace("&lt;b&gt;", "<b>");
    sbComments.Replace("&lt;/b&gt;", "</b>");
    sbComments.Replace("&lt;u&gt;", "<u>");
    sbComments.Replace("&lt;/u&gt;", "</u>");
    comment.Comments = sbComments.ToString();

    // HTML encode the text that is coming from name textbox
    string strEncodedName = HttpUtility.HtmlEncode(comment.Name);
    comment.Name = strEncodedName;

    if (ModelState.IsValid)
    {
        db.Comments.AddObject(comment);
        db.SaveChanges();
        return RedirectToAction("Index");
    }

    return View(comment);
}

This is just one example. Only filtering the user input can't guarantee XSS elimination. XSS can happen in different ways and forms.

Hope you did it!

HostForLIFE.eu ASP.NET MVC 6 Hosting
HostForLIFE.eu is European Windows Hosting Provider which focuses on Windows Platform only. We deliver on-demand hosting solutions including Shared hosting, Reseller Hosting, Cloud Hosting, Dedicated Servers, and IT as a Service for companies of all sizes. We have customers from around the globe, spread across every continent. We serve the hosting needs of the business and professional, government and nonprofit, entertainment and personal use market segments.


ASP.NET MVC 6 Hosting - HostForLIFE.eu :: How to Use Different Actions to Show A Single View

clock October 2, 2015 12:39 by author Rebecca

In this article, you will learn how use different actions to show a single view in ASP.NET MVC.  It’s common situation in project development where you don’t want to create view for each and every action of certain controller. In this situation, we have to use concept of shared view. The solution is very simple, you just have to keep the view in shared folder. Like below:

Now, The question is why need to keep in shared folder? The reason is when you run any controller, by default it check its own directory or shared directory. Every controller will look in shared directory, if it not available in it’s own directory. Let’s have a look on below code, let's create very simple controller class:

sing System;
using System.Collections.Generic;
using System.Linq;
using System.Web;
using System.Web.Mvc;
 
namespace MVC3.Controllers
{
    public class HomeController : Controller
    {
        //
        // GET: /Home/
        public ActionResult Action1()
        {
          
            ViewBag.Controller = "Action1";
            return View("_Common");
        }
        public ActionResult Action2()
        {
          
            ViewBag.Controller = "Action2";
            return View("_Common");
        }
 
    }

Both Action1() and Action2() is calling _Common view and as the view is placed in shared folder, both can able to access. Before calling to view we are assigning action name in ViewBag. From view we can detect which action has invoked it. Here is code for view:

<%@ Page
Language="C#"
Inherits="System.Web.Mvc.ViewPage<MVC3.Models.customer>"
%>
<!DOCTYPE html>
<html>
<head runat="server">
    <title>_Common</title>
</head>
<body>
    <div>
        <% var ActionName = ViewBag.ActionName; %>
        <% if (ActionName == "Action1")
           {%>
          
              This view is called from Action 1
           <%}
           else
           {%>
          
              This view is Called from Action 2
           <%} %>
    </div>
</body>
</html>

 
Here is the output:

Now, the other question my show “Is it possible to call one view from different controller”? Yes, you can call. In below example, you will see how to do that.

You can call one view from different controller. This is your first controller Home1:

using System;
using System.Collections.Generic;
using System.Linq;
using System.Web;
using System.Web.Mvc;
 
namespace MVC3.Controllers
{
    public class Home1Controller : Controller
    {
        public ActionResult Action()
        {
          
            ViewBag.Controller = "Home1";
            return View("_Common");
        }
    }
}

And here is the output.


And for the Home2 controller:

using System;
using System.Collections.Generic;
using System.Linq;
using System.Web;
using System.Web.Mvc;
 
namespace MVC3.Controllers
{
    public class Home2Controller : Controller
    {
        public ActionResult Action()
        {
          
            ViewBag.Controller = "Home2";
            return View("_Common");
        }
 
    }
}

Here is the output:


It’s clear that both Action() (they are in different controller) are calling same view.

HostForLIFE.eu ASP.NET MVC 6 Hosting
HostForLIFE.eu is European Windows Hosting Provider which focuses on Windows Platform only. We deliver on-demand hosting solutions including Shared hosting, Reseller Hosting, Cloud Hosting, Dedicated Servers, and IT as a Service for companies of all sizes. We have customers from around the globe, spread across every continent. We serve the hosting needs of the business and professional, government and nonprofit, entertainment and personal use market segments.


ASP.NET MVC 6 Hosting - HostForLIFE.eu :: How to Show SQL Server Database Update in ASP.NET MVC

clock September 22, 2015 12:19 by author Rebecca

In this post, you will learn how to display real time updates from the SQL Server by using SignalR and SQL Dependency in ASP.NET MVC.

The following are the steps that we need to enable in the SQL Server first.

Step 1- Enable Service Broker on the database

The following is the query that need to enable the service broker

ALTER DATABASE BlogDemos SET ENABLE_BROKER WITH ROLLBACK IMMEDIATE ;


Step 2 - Add Connection string to the Web.Config file

<add name=”DefaultConnection” connectionString=”Server=servername;Database=databasename;User Id=userid;Password=password;” providerName=”System.Data.SqlClient” />
 

Step 3 - Enable SQL Dependency

In Global.asax start the SQL Dependency in App_Start() event and Stop SQL dependency in the Application_End() event

public class MvcApplication : System.Web.HttpApplication
    {
        string connString = ConfigurationManager.ConnectionStrings["DefaultConnection"].ConnectionString;

        protected void Application_Start()
        {
            AreaRegistration.RegisterAllAreas();
            FilterConfig.RegisterGlobalFilters(GlobalFilters.Filters);
            RouteConfig.RegisterRoutes(RouteTable.Routes);
            BundleConfig.RegisterBundles(BundleTable.Bundles);
            GlobalConfiguration.Configure(WebApiConfig.Register);
            //Start SqlDependency with application initialization
            SqlDependency.Start(connString);
        }

        protected void Application_End()
        {
            //Stop SQL dependency
            SqlDependency.Stop(connString);
        }
    }

Step 4 - Install SignalR from the nuget

Run the following command in the Package Manager Console:

Install-Package Microsoft.AspNet.SignalR

Step 5 - Create SignalR Hub Class

Create MessagesHub class in the Hubs folder:

public class MessagesHub : Hub
    {
        private static string conString = ConfigurationManager.ConnectionStrings["DefaultConnection"].ToString();
        public void Hello()
        {
            Clients.All.hello();
        }


        [HubMethodName("sendMessages")]
        public static void SendMessages()
        {
            IHubContext context = GlobalHost.ConnectionManager.GetHubContext<MessagesHub>();
            context.Clients.All.updateMessages();
        }  
    }

Step 6 - Get the  Data from the Repository

Create MessagesRepository to get the messages from the database when data is updated.

public class MessagesRepository
    {
        readonly string _connString = ConfigurationManager.ConnectionStrings["DefaultConnection"].ConnectionString;

        public IEnumerable<Messages> GetAllMessages()
        {
            var messages = new List<Messages>();
            using (var connection = new SqlConnection(_connString))
            {
                connection.Open();
                using (var command = new SqlCommand(@"SELECT [MessageID], [Message], [EmptyMessage], [Date] FROM [dbo].[Messages]", connection))
                {
                    command.Notification = null;

                    var dependency = new SqlDependency(command);
                    dependency.OnChange += new OnChangeEventHandler(dependency_OnChange);

                    if (connection.State == ConnectionState.Closed)
                        connection.Open();

                    var reader = command.ExecuteReader();

                    while (reader.Read())
                    {
                        messages.Add(item: new Messages { MessageID = (int)reader["MessageID"], Message = (string)reader["Message"], EmptyMessage =  reader["EmptyMessage"] != DBNull.Value ? (string) reader["EmptyMessage"] : "", MessageDate = Convert.ToDateTime(reader["Date"]) });
                    }
                }
             
            }
            return messages;
          
           
        }

        private void dependency_OnChange(object sender, SqlNotificationEventArgs e)
        {
            if (e.Type == SqlNotificationType.Change)
            {
                MessagesHub.SendMessages();
            }
        }
    }

Step 7 - Register SignalR at startup class

Add the following code:

app.MapSignalR();

Step 8 - View Page

Create div messagesTable that will append the table data from the database:

<div class="row">
    <div class="col-md-12">
       <div id="messagesTable"></div>
    </div>
</div>

Now Add the SignalR related scripts in the page:

<script src="/Scripts/jquery.signalR-2.1.1.js"></script>
 <!--Reference the autogenerated SignalR hub script. -->
    <script src="/signalr/hubs"></script>

<script type="text/javascript">
    $(function () {
        // Declare a proxy to reference the hub.
        var notifications = $.connection.messagesHub;
      
        //debugger;
        // Create a function that the hub can call to broadcast messages.
        notifications.client.updateMessages = function () {
            getAllMessages()
          
        };
        // Start the connection.
        $.connection.hub.start().done(function () {
            alert("connection started")
            getAllMessages();
        }).fail(function (e) {
            alert(e);
        });
    });


    function getAllMessages()
    {
        var tbl = $('#messagesTable');
        $.ajax({
            url: '/home/GetMessages',
            contentType: 'application/html ; charset:utf-8',
            type: 'GET',
            dataType: 'html'
        }).success(function (result) {
            tbl.empty().append(result);
        }).error(function () {
           
        });
    }
</script>

Step 9 - Create Partial View Page

Create a partial view _MessagesList.cshtml that returns all the messages.

@model IEnumerable<SignalRDbUpdates.Models.Messages>

<p>
    @Html.ActionLink("Create New", "Create")
</p>
<table class="table">
    <tr>
        <th>@Html.DisplayNameFor(model => model.MessageID)</th>
        <th>
            @Html.DisplayNameFor(model => model.Message)
        </th>
        <th>
            @Html.DisplayNameFor(model => model.EmptyMessage)
        </th>
        <th>
            @Html.DisplayNameFor(model => model.MessageDate)
        </th>
       
    </tr>

@foreach (var item in Model) {
    <tr>
        <td>
            @Html.DisplayFor(modelItem => item.MessageID)
        </td>
        <td>
            @Html.DisplayFor(modelItem => item.Message)
        </td>
        <th>
            @Html.DisplayFor(modelItem => item.EmptyMessage)
        </th>
        <td>
            @Html.DisplayFor(modelItem => item.MessageDate)
        </td>
       
    </tr>
}
</table>

Step 10 - Set Up the Database

Create the database called blogdemos and run the following script:

USE [BlogDemos]
GO

/****** Object:  Table [dbo].[Messages]    Script Date: 10/16/2014 12:43:55 ******/
SET ANSI_NULLS ON
GO

SET QUOTED_IDENTIFIER ON
GO

CREATE TABLE [dbo].[Messages](
    [MessageID] [int] IDENTITY(1,1) NOT NULL,
    [Message] [nvarchar](50) NULL,
    [EmptyMessage] [nvarchar](50) NULL,
    [Date] [datetime] NULL,
 CONSTRAINT [PK_Messages] PRIMARY KEY CLUSTERED
(
    [MessageID] ASC
)WITH (PAD_INDEX = OFF, STATISTICS_NORECOMPUTE = OFF, IGNORE_DUP_KEY = OFF, ALLOW_ROW_LOCKS = ON, ALLOW_PAGE_LOCKS = ON) ON [PRIMARY]
) ON [PRIMARY]

GO

ALTER TABLE [dbo].[Messages] ADD  CONSTRAINT [DF_Messages_Date]  DEFAULT (getdate()) FOR [Date]
GO

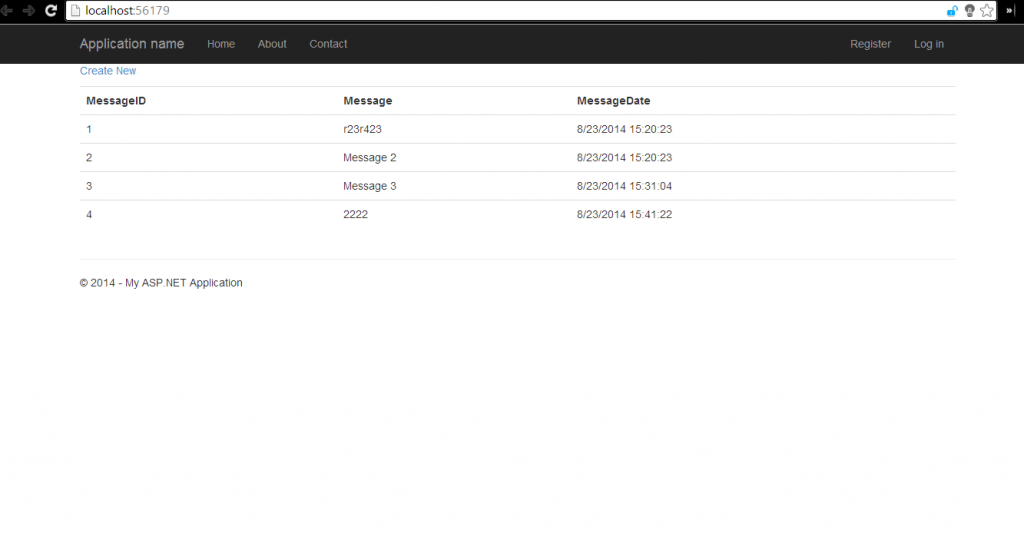
Step 11 - Run the project

Whenever data is inserted into the table the dependency_OnChange method will fire.

HostForLIFE.eu ASP.NET MVC 6 Hosting
HostForLIFE.eu is European Windows Hosting Provider which focuses on Windows Platform only. We deliver on-demand hosting solutions including Shared hosting, Reseller Hosting, Cloud Hosting, Dedicated Servers, and IT as a Service for companies of all sizes. We have customers from around the globe, spread across every continent. We serve the hosting needs of the business and professional, government and nonprofit, entertainment and personal use market segments.


ASP.NET MVC 6 Hosting - HostForLIFE.eu :: How to Create a Hyperlink Between ASP.NET MVC Pages

clock September 11, 2015 11:53 by author Rebecca

In this article, we will discuss about generating hyperlinks using actionlink HTML helper for navigation between MVC pages.

For example, you want to display all the employees in a bulletted list as shown below. Notice that all the employee names are rendered as hyperlinks.

When the hyperlink is clicked, the user will be redirected to employee details page, displaying the full details of the employee as shown below:

Copy and paste the following Index() action method in EmployeeController class. This method retrieves the list of employees, which is then passed on to the view for rendering:

public ActionResult Index()
{
    EmployeeContext employeeContext = new EmployeeContext();
    List<Employee> employees = employeeContext.Employees.ToList();

    return View(employees);
}

At the moment, you don't have a view that can display the list of employees. To add the view, follow this instruction:

1. Right click on the Index() action method
2. Set

  • View name = Index
  • View engine = Razor

Select, Create a stronlgy-typed view checkbox
Select "Employee" from "Model class" dropdownlist
3. Click Add

At this point, "Index.cshtml" view should be generated. Copy and paste the following code in "Index.cshtml":

@model IEnumerable<MVCDemo.Models.Employee>

@using MVCDemo.Models;

<div style="font-family:Arial">
@{
    ViewBag.Title = "Employee List";
}

<h2>Employee List</h2>
<ul>
@foreach (Employee employee in @Model)
{
    <li>@Html.ActionLink(employee.Name, "Details", new { id = employee.EmployeeId })</li>
}
</ul>
</div>

Description:

  • @model is set to IEnumerable<MVCDemo.Models.Employee>
  • Your are using Html.ActionLink html helper to generate links

And the last, please copy and paste the following code in Details.cshtml:

@Html.ActionLink("Back to List", "Index")

Congrats, you're done!

HostForLIFE.eu ASP.NET MVC 6 Hosting
HostForLIFE.eu is European Windows Hosting Provider which focuses on Windows Platform only. We deliver on-demand hosting solutions including Shared hosting, Reseller Hosting, Cloud Hosting, Dedicated Servers, and IT as a Service for companies of all sizes. We have customers from around the globe, spread across every continent. We serve the hosting needs of the business and professional, government and nonprofit, entertainment and personal use market segments.


ASP.NET MVC 6 Hosting - HostForLIFE.eu :: How to Move Data using ViewData or ViewBag

clock September 8, 2015 08:38 by author Rebecca

This article deals with how you can move data from a controller to view. For that you can use either ViewData or ViewBag. Let's see how you can implement it:

Step 1: Adding Controller

1. First of all, we can add a control to the project as we already seen.

2. Give name to the controller and click on Add button.

Step 2: Using ViewData

Double click on the controller and add the following contents to controller.

Step 3: Adding View

1. Add a corresponding view for the controller.

2. By Double click on the view and add the following contents to view.

3. Saving and run the application, we will obtain the result. For example, it shows the current system date and time.

Step 4: Using ViewBag

1. Likewise we can also use ViewBag instead of ViewData.Same procedure repeat again.


2. Double click on the controller and add the following contents to controller.

3. Also by Double click on the view and add the following contents to view.

4. Then run the project and it will show the current system date and time.

HostForLIFE.eu ASP.NET MVC 6 Hosting
HostForLIFE.eu is European Windows Hosting Provider which focuses on Windows Platform only. We deliver on-demand hosting solutions including Shared hosting, Reseller Hosting, Cloud Hosting, Dedicated Servers, and IT as a Service for companies of all sizes. We have customers from around the globe, spread across every continent. We serve the hosting needs of the business and professional, government and nonprofit, entertainment and personal use market segments.


About HostForLIFE.eu

HostForLIFE.eu is European Windows Hosting Provider which focuses on Windows Platform only. We deliver on-demand hosting solutions including Shared hosting, Reseller Hosting, Cloud Hosting, Dedicated Servers, and IT as a Service for companies of all sizes.

We have offered the latest Windows 2016 Hosting, ASP.NET Core 2.2.1 Hosting, ASP.NET MVC 6 Hosting and SQL 2017 Hosting.


Tag cloud

Sign in