Microsoft provides a powerful scaffolding engine for models in ASP.NET MVC applications that use Entity Framework. Scaffolding relieves web developers from the mundane task of writing the create, read, update, and delete (CRUD) code over and over again. The scaffolding engine uses T4 templates to generate basic controllers and views for models. However, scaffolded code is just a starting point, since it often needs to be customized to meet specific business requirements or satisfy specific design patterns.
In this blog post, I’ll provide a walkthrough on how to create project-specific custom scaffold templates for ASP.NET MVC. This can be a huge time-saver in applications with a large number of controllers and views. I will use Visual Studio 2013, ASP.NET MVC 5, Entity Framework 6, and C#.
SETUP
To get started, create a new ASP.NET MVC web application and add a simple Product model with the properties shown below and build the project.
namespace CustomScaffoldingDemo.Models
{
public class Product
{
public int Id { get; set; }
public string Name { get; set; }
public decimal Price { get; set; }
public bool IsDeleted { get; set; }
public DateTime CreatedDate { get; set; }
public DateTime UpdatedDate { get; set; }
}
}
SCAFFOLDING CONTROLLER AND VIEWS
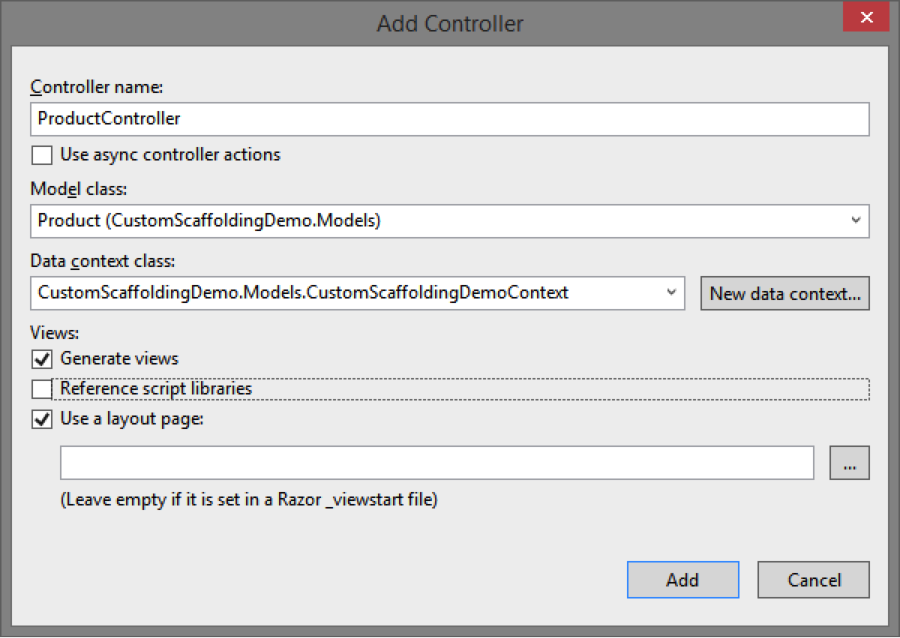
First, let’s use default templates to scaffold a controller and CRUD views for the Product model so we can review the results. To do so, right-click the Controllers folder in Solution Explorer and click Add New Scaffolded Item. In the Add Scaffold dialog, choose the MVC 5 Controller with views, using Entity Framework. On the Add Controller dialog, create a new data context and choose appropriate options that serve as parameters for the scaffolding engine. Then hit the Add button.
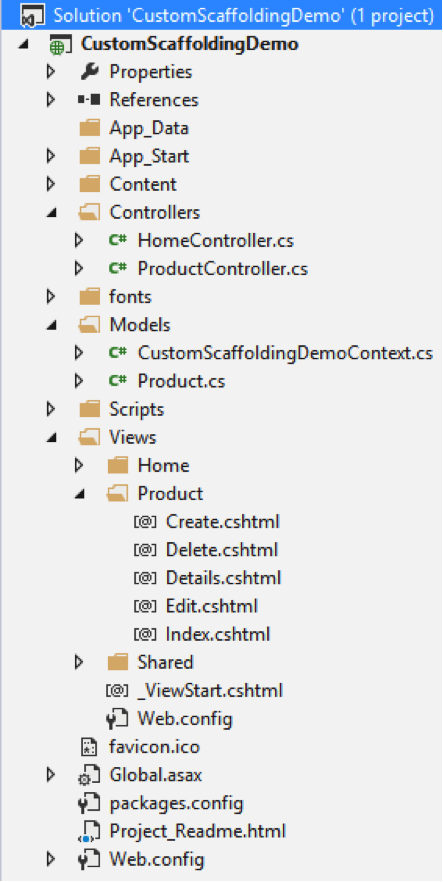
The scaffolding engine will use the default T4 templates to generate code for the controller and five views and add them to the appropriate folders. At this point you have full CRUD functionality for the Product model and can run the application.
As you review the generated code, you may notice that the scaffolding engine is intelligent enough to treat the Product ID properly by not scaffolding the editor for this property on the Create or Edit forms. You may also realize that the default templates do not meet the functional specification or your desired design patterns. For example, you may want to achieve the following:
– Created Date and Updated Date properties should be set automatically by the system on create or update action respectively, and thus should not be editable on the Create and Edit views.
– Products should be soft-deleted, so the Delete action of the Product controller must be changed to set the IsDeleted property and updating the Product instead of deleting it from the database. Index action should only return Products with IsDeleted set to false.
– None of the views should display the IsDeleted property.
– Views should use @ViewBag.Title as the page header instead of the view name.
– You may be using a Unit of Work pattern, so all calls to save changes to the database may need to be tweaked.
You can manually make changes to the generated code, which has several drawbacks, including:
– Typically, you would want most, if not all, controllers and views to be consistent across all models in your application. Making similar manual changes to controllers and views for all models is not an efficient approach.
– When you make changes to a model, you will either have to scaffold these files again and lose your manual changes or manually update all views to match the updated model.
The best way to avoid manual changes and enforce consistency is to customize the scaffold templates.
CUSTOMIZING SCAFFOLD TEMPLATES
The original T4 templates used by the scaffolding engine are located in this folder: %programfiles%\Microsoft Visual Studio 12.0\Common7\IDE\Extensions\Microsoft\Web\Mvc\Scaffolding\Templates.
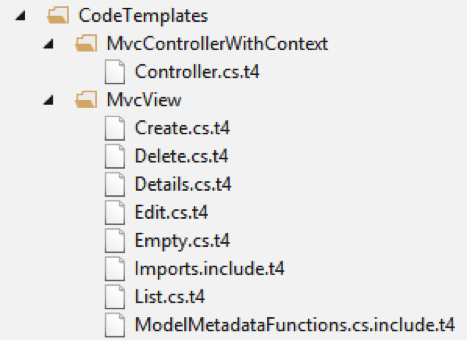
While you can directly edit these templates, this will affect scaffolding for all future projects, which is not recommended. Instead, you can create project-specific copies of these templates so you can customize them. To do so, copy these templates into your MVC project’s CodeTemplates folder, following the same sub-folder structure. You only need to copy either C# or VB.NET templates, based on your project. The template filenames include the language they use. The convention is that the scaffolding engine uses the templates in the CodeTemplates project folder, if one exists, instead of the global templates.
Now you can modify these custom scaffold templates, which would affect scaffolded code only for this project. T4 templates are simply text files and can be edited directly in Visual Studio. Unfortunately, Visual Studio 2013 does not include a good T4 editor—there’s no syntax highlighting or IntelliSense. Fortunately, there are some third party add-on products that provide this functionality. Below is a screenshot of how the templates look in Visual Studio 2013. You can see I modified the header on line 26 to use @ViewBag.Title instead of the view name.
<#@ template language="C#" HostSpecific="True" #>
<#@ output extension=".cshtml" #>
<#@ include file="Imports.include.t4" #>
@model <#= ViewDataTypeName #>
<#
// The following chained if-statement outputs the file header code and
// markup for a partial view, a view using a layout page, or a regular view.
if(IsPartialView) {
#>
<#
} else if(IsLayoutPageSelected) {
#>
@{
ViewBag.Title = "<#= ViewName#>";
<#
if (!String.IsNullOrEmpty(LayoutPageFile)) {
#>
Layout = "<#= LayoutPageFile#>";
<#
}
#>
}
@ViewBag.Title
To learn more about scaffolding check out this walkthrough from Microsoft. To learn more about T4 templates in general, start by reading this MSDN article.