Today, I will write about Button Loader Integration in ASP.NET MVC. User interaction & responsiveness are major aspects in any application. It is always good to tell the user that is happening in the application i.e. whether they have to wait for certain processing or they can proceed with another action, etc.

Today, I shall be demonstrating the integration of a simple button loader plugin called Ladda, you can explore it more by visiting the website.
You can download the complete source code for this tutorial from here or you can follow step by step discussion below. The sample code is developed in Microsoft Visual Studio 2013 Ultimate.
Create new MVC web project and name it "ButtonLoader".
Download the Ladda plugin and incorporate its related JavaScript & CSS files into the project.
Create new controller under "Controller" folder and name it "LoaderController.cs".
Open "RouteConfig.cs" file under "App_Start" folder and change the default controller to "Loader" and action to "Index" as shown below.
using System;
using System.Collections.Generic;
using System.Linq;
using System.Web;
using System.Web.Mvc;
using System.Web.Routing;
namespace ButtonLoader
{
public class RouteConfig
{
public static void RegisterRoutes(RouteCollection routes)
{
routes.IgnoreRoute("{resource}.axd/{*pathInfo}");
routes.MapRoute(name: "Default", url: "{controller}/{action}/{id}", defaults: new
{
controller = "Loader", action = "Index", id = UrlParameter.Optional
});
}
}
}
Create new file "LoaderViewModels.cs" under "Models" folder and place the following code in it:
using System.ComponentModel.DataAnnotations;
namespace ButtonLoader.Models
{
public class LoaderViewModel
{
[Required]
[Display(Name = "Text")]
public string Text
{
get;
set;
}
}
}
Here, we have created a simple model for observing our loader effect.
Now, open "LoaderController.cs" file under "Controller" folder and replace it with the following code:
//-----------------------------------------------------------------------
// <copyright file="LoaderController.cs" company="None">
// Copyright (c) Allow to distribute this code.
// </copyright>
// <author>Asma Khalid</author>
//-----------------------------------------------------------------------
namespace ButtonLoader.Controllers
{
using System;
using System.Collections.Generic;
using System.Linq;
using System.Security.Claims;
using System.Threading;
using System.Threading.Tasks;
using System.Web;
using System.Web.Mvc;
using ButtonLoader.Models;
/// <summary>
/// Loader controller class.
/// </summary>
public class LoaderController: Controller
{
#region Index view method.#region Get: /Loader/Index
method.
/// <summary>
/// Get: /Loader/Index method.
/// </summary>
/// <returns>Return index view</returns>
public ActionResult Index()
{
try
{}
catch (Exception ex)
{
// Info
Console.Write(ex);
}
// Info.
return this.View();
}#endregion# region POST: /Loader/Index
/// <summary>
/// POST: /Loader/Index
/// </summary>
/// <param name="model">Model parameter</param>
/// <returns>Return - Loader content</returns>
[HttpPost]
[AllowAnonymous]
[ValidateAntiForgeryToken]
public ActionResult Index(LoaderViewModel model)
{
try
{
// Verification
if (ModelState.IsValid)
{
// Sleep.
Thread.Sleep(5000); // 5 sec.
// Info.
return this.Json(new
{
EnableSuccess = true, SuccessTitle = "Success", SuccessMsg = model.Text
});
}
}
catch (Exception ex)
{
// Info
Console.Write(ex);
}
// Sleep.
Thread.Sleep(5000); // 5 sec.
// Info
return this.Json(new
{
EnableError = true, ErrorTitle = "Error", ErrorMsg = "Something goes wrong, please try again later"
});
}#endregion# endregion
}
}
In the above code snippet, we have created a simple "HttpGet" & "HttpPost" methods to observer the behavior of the button loader. We have also placed a 5 sec delay in the post method at every response to observer the behavior of the button loader from server side as well.
Now, in "Views->Loader" folder create a new page called "Index.cshtml" and place the following code in it:
@using ButtonLoader.Models
@model ButtonLoader.Models.LoaderViewModel
@{
ViewBag.Title = "ASP.NET MVC5 C#: Button Loader Integration";
}
<div class="row">
<div class="panel-heading">
<div class="col-md-8">
<h3>
<i class="fa fa-file-text-o"></i>
<span>Bootstrap Modal with ASP.NET MVC5 C#</span>
</h3>
</div>
</div>
</div>
<div class="row">
<section class="col-md-4 col-md-push-4">
@using (Ajax.BeginForm("Index", "Loader", new AjaxOptions { HttpMethod = "POST", OnSuccess = "onLoaderSuccess" }, new { @id = "LoaderformId", @class = "form-horizontal", role = "form" }))
{
@Html.AntiForgeryToken()
<div class="well bs-component">
<br />
<div class="row">
<div class="col-md-12 col-md-push-2">
<div class="form-group">
<div class="col-md-10 col-md-pull-1">
@Html.TextBoxFor(m => m.Text, new { placeholder = Html.DisplayNameFor(m => m.Text), @class = "form-control" })
@Html.ValidationMessageFor(m => m.Text, "", new { @class = "text-danger custom-danger" })
</div>
</div>
<div class="form-group">
<div class="col-md-18"></div>
</div>
<div class="form-group">
<div class="col-md-4 col-md-push-2">
<div >
<button type="submit"
class="btn btn-warning ladda-button"
value="Process"
data-style="slide-down">
<span class="ladda-label">Process</span>
</button>
</div>
</div>
</div>
</div>
</div>
</div>
}
</section>
</div>
In the above code snippet, we have created a simple text input box and a button, for Ladda plugin to work however, you have to use following structure on button i.e.
<button type="submit" class="btn btn-warning ladda-button" value="Process" data-style="slide-down">
<span class="ladda-label">Process</span>
</button>
Unfortunately, Ladda plugin does not work with input type buttons.
Under "Scripts" folder, create a new script called "custom-loader.js" and place the following code in it:
$(document).ready(function()
{
Ladda.bind('.ladda-button');
$("#LoaderformId").submit(function(event)
{
var dataString;
event.preventDefault();
event.stopImmediatePropagation();
var action = $("#LoaderformId").attr("action");
// Setting.
dataString = new FormData($("#LoaderformId").get(0));
contentType = false;
processData = false;
$.ajax(
{
type: "POST",
url: action,
data: dataString,
dataType: "json",
contentType: contentType,
processData: processData,
success: function(result)
{
// Result.
onLoaderSuccess(result);
},
error: function(jqXHR, textStatus, errorThrown)
{
//do your own thing
alert("fail");
// Stop Button Loader.
Ladda.stopAll();
}
});
}); //end .submit()
});
var onLoaderSuccess = function(result)
{
if (result.EnableError)
{
// Clear.
$('#ModalTitleId').html("");
$('#ModalContentId').html("");
// Setting.
$('#ModalTitleId').append(result.ErrorTitle);
$('#ModalContentId').append(result.ErrorMsg);
// Show Modal.
$('#ModalMsgBoxId').modal(
{
backdrop: 'static',
keyboard: false
});
}
else if (result.EnableSuccess)
{
// Clear.
$('#ModalTitleId').html("");
$('#ModalContentId').html("");
// Setting.
$('#ModalTitleId').append(result.SuccessTitle);
$('#ModalContentId').append(result.SuccessMsg);
// Show Modal.
$('#ModalMsgBoxId').modal(
{
backdrop: 'static',
keyboard: false
});
// Resetting form.
$('#LoaderformId').get(0).reset();
}
// Stop Button Loader.
Ladda.stopAll();
}
I have also combined modal here to display server response. The following piece of code will bind the button loader plugin with the button i.e.
Ladda.bind('.ladda-button');
So, whenever, I click the button the button loader will start. The following piece of code will stop the button loader effect whenever I receive a response from the server side:
// Stop Button Loader.
Ladda.stopAll();
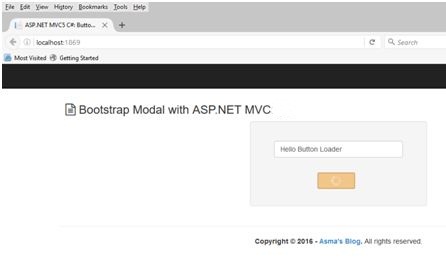
Now, execute the application. I hope it works for you!
HostForLIFE.eu ASP.NET MVC 6 Hosting
HostForLIFE.eu is European Windows Hosting Provider which focuses on Windows Platform only. We deliver on-demand hosting solutions including Shared hosting, Reseller Hosting, Cloud Hosting, Dedicated Servers, and IT as a Service for companies of all sizes. We have customers from around the globe, spread across every continent. We serve the hosting needs of the business and professional, government and nonprofit, entertainment and personal use market segments.