In this article, we are going to learn how to use elastic search with ASP.NET MVC in step by step way.We are already in the fifth part of this article. Till now, we have covered a lot in elastic search starting from how to configure elastic search to how to insert data into elastic search, further using Kibana for visualizing data, and at last, we have learned about Logstash and how to insert a bulk of data from MSSQL and MYSQL into elastic search. Now, it’s time to learn how we can query elastic search documents from ASP.NET MVC because at last, we need to show data to end-users in a fast way as possible.

If you are a beginner and you do not have an idea what is elastic search but you want to know it, then the below links will help you to kick start with elastic search.
Create ASP.NET MVC Application
Let’s create a simple ASP.NET MVC application with the name “WebElasticSearch”.
After entering the name, it will show another window for project selection. There, just choose “MVC” Template and change Authentication to “No Authentication” and click OK to create the project.
Project Structure
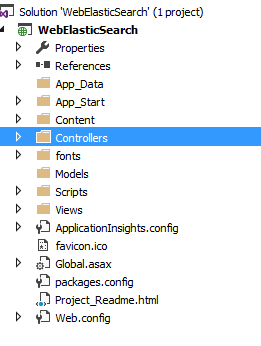
Next, we are going to install NuGet packages.
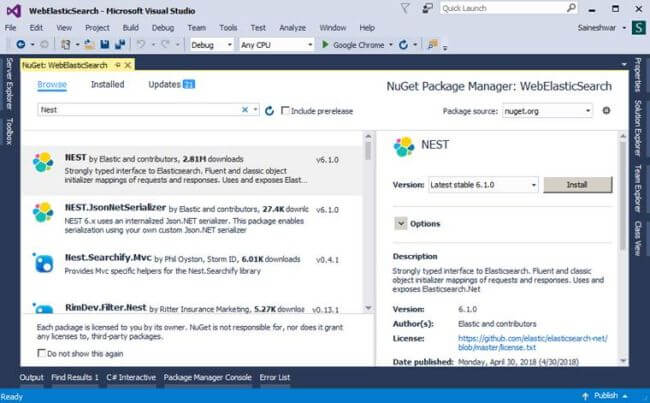
Installing NuGet Packages
We are going to install 2 NuGet packages.
Net
Nest

After installing the NuGet package, next, we are going to add a new connection folder.
Creating Connector folder and adding ConnectionToEs class

After creating the folder, next, we are going to add ConnectionToEs class.
In this class, we are going to create a connection to elastic search instance. As you can see in the below code, we have provided elastic search URI http://localhost:9200/".
Code Snippet
using Elasticsearch.Net;
using Nest;
using System;
using System.Collections.Generic;
using System.Linq;
using System.Web;
namespace WebElasticSearch.Connector
{
public class ConnectionToEs
{
#region Connection string to connect with Elasticsearch
public ElasticClient EsClient()
{
var nodes = new Uri[]
{
new Uri("http://localhost:9200/"),
};
var connectionPool = new StaticConnectionPool(nodes);
var connectionSettings = new ConnectionSettings(connectionPool).DisableDirectStreaming();
var elasticClient = new ElasticClient(connectionSettings);
return elasticClient;
}
#endregion Connection string to connect with Elasticsearch
}
}
After creating the connection class, next, we are going to add a Controller and create View for search.
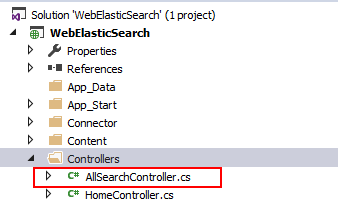
Add Controller “AllSearch”
Adding a controller with name “AllSearch”.
After adding the Controller, next, we are going to add an action method and in the constructor, we are going to instantiate the connection object.
Adding Action Method
In this part, we are going to add Action method “Search” and create an instance of the ConnectionToEs class.
Code Snippet
using System.Web.Mvc;
using WebElasticSearch.Connector;
namespace WebElasticSearch.Controllers
{
public class AllSearchController : Controller
{
private readonly ConnectionToEs _connectionToEs;
public AllSearchController()
{
_connectionToEs = new ConnectionToEs();
}
[HttpGet]
public ActionResult Search()
{
return View("Search");
}
}
}
After adding “Search” Action Method, we are going to add a View for that action method.
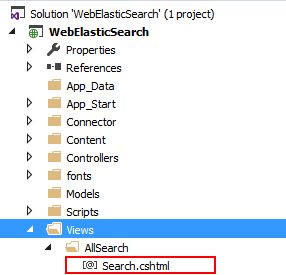
Now, we are going to design the View.
Designing View
In this part, we are going to design the View with 2 textboxes.
jobtitle
nationalidnumber
Below is document of “humanresource” index in which, first we are going to create a search on both these parameters.


After designing the search View, next, we are going to add a class “humanresource” and properties similar to “humanresource” index and type “doc”.
Adding Class similar to “Humanresource” Index and type “Doc”
public class Humanresources
{
public string nationalidnumber { get; set; }
public string LoginID { get; set; }
public string OrganizationNode { get; set; }
public int? OrganizationLevel { get; set; }
public string jobtitle { get; set; }
public string BirthDate { get; set; }
public string MaritalStatus { get; set; }
public string Gender { get; set; }
public DateTime? HireDate { get; set; }
public bool? SalariedFlag { get; set; }
public int? VacationHours { get; set; }
public int? SickLeaveHours { get; set; }
public bool? CurrentFlag { get; set; }
public string rowguid { get; set; }
public DateTime? ModifiedDate { get; set; } }
After adding humanresource class next we are going to add “DataSearch” Action Method which will take both this parameter as input and provide response in json.
Adding DataSearch Action Method
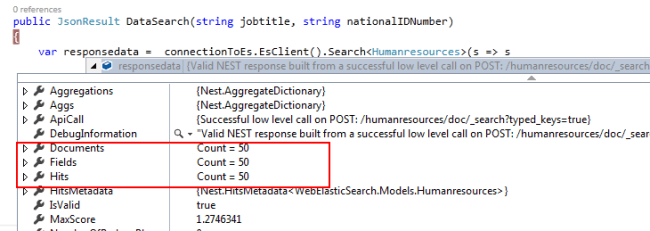
The request to elastic search we are going to send using “Nest” Client.
In this action Method the first thing we have done is to connect to elastic search using connectionEs class, then we have provided index “humanresources” and type “doc”, next we can provide size of document as output I have provided as 50, at last comes query in this we are using “match” query for that we are passing field jobtitle and in query we are going to pass value which we have searched.
Code Snippet
public JsonResult DataSearch(string jobtitle, string nationalIDNumber)
{
var responsedata = _connectionToEs.EsClient().Search<Humanresources>(s => s
.Index("humanresources")
.Type("doc")
.Size(50)
.Query(q => q
.Match(m => m
.Field(f => f.jobtitle)
.Query(jobtitle)
)
)
);
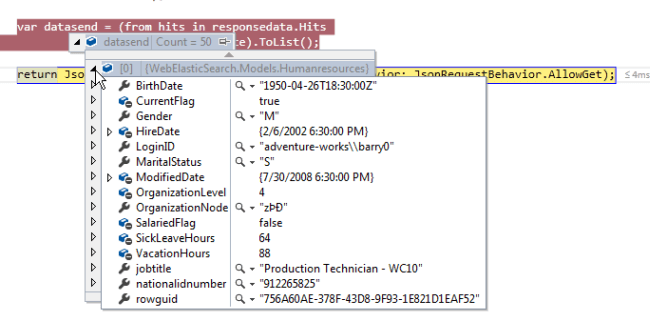
var datasend = (from hits in responsedata.Hits
select hits.Source).ToList();
return Json(new { datasend, responsedata.Took }, behavior: JsonRequestBehavior.AllowGet);
}
After creating Action Method and setting up search with Nest, next we are going to call this Action Method using AJAX and then display this result on View. Since we get the response as JSON, I am going to use a client-side grid from DevExpress.
Calling Datasearch Action Method using Ajax and Displaying Response in Grid
Code Snippet
<script>
$(document).ready(function () {
$("#btnsubmit").on("click", function () {
if ($("#txtjobTitle").val() === "" && $("#txtnationalIDNumber").val() === "") {
alert("Provide Details to Search !");
}
else {
var obj = {};
obj.jobTitle = $.trim($("#txtjobTitle").val());
obj.nationalIDNumber = $.trim($("#txtnationalIDNumber").val());
var apiUrl = "@Url.Action("DataSearch", "AllSearch")";
$.ajax({
type: "POST",
contentType: 'application/json',
url: apiUrl,
dataType: "json",
data: JSON.stringify(obj),
crossDomain: true,
success: function (data) {
var response = data;
if (data.datasend.length <= 0) {
alert("No Data Found!!");
} else {
var timetook = data.Took;
$('div.total-title').text(timetook + " millisecond");
$("#gridContainer").dxDataGrid({
dataSource: data.datasend,
showColumnLines: false,
showRowLines: true,
rowAlternationEnabled: true,
showBorders: true,
paging: {
pageSize: 50
},
scrolling: {
mode: "infinite" // or "virtual" | "infinite"
},
pager: {
showPageSizeSelector: false,
allowedPageSizes: [5, 10, 20],
showInfo: true
},
columns: [
{
caption: "JobTitle",
width: 350,
fixed: true,
dataField: "jobtitle"
},
{
caption: "NationalIDNumber",
width: 300,
fixed: true,
dataField: "nationalidnumber"
},
"MaritalStatus",
"Gender",
"SalariedFlag",
"VacationHours",
"SickLeaveHours",
"CurrentFlag"
]
});
}
},
error: function (xhr, err) {
alert("readyState: " + xhr.readyState + "\nstatus: " + xhr.status);
alert("responseText: " + xhr.responseText);
}
});
}
});
});
</script>
Markup of Grid
<div class="panel panel-default">
<div class="panel-heading">Output</div>
<div class="panel-body">
<div class="row">
<div class="col-lg-12">
<div id="gridContainer"></div>
</div>
</div>
</div>
</div>
We have set up everything. Let’s run the code and see the output.
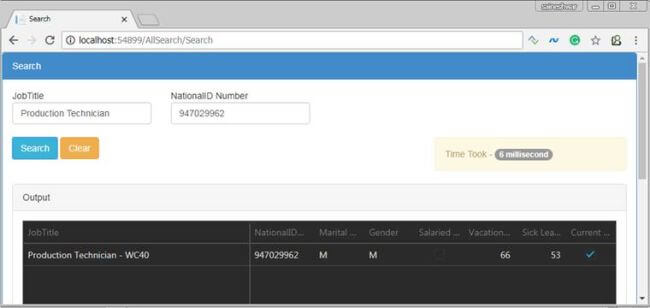
Output
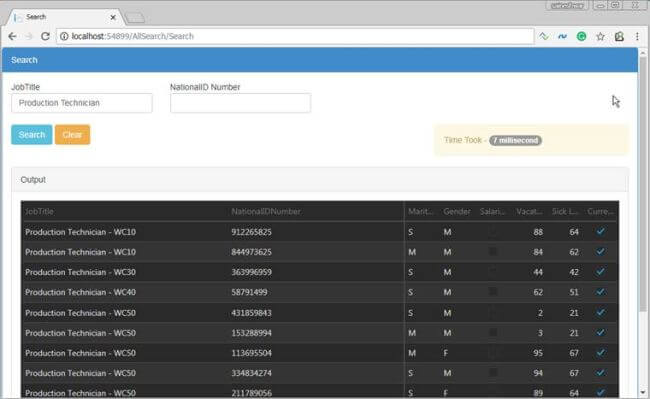
Let’s see in Debug Mode how it works.
Searching Values

Getting Response
Single Document View
Let us now make the search conditional, i.e., the user can use any combination to search.
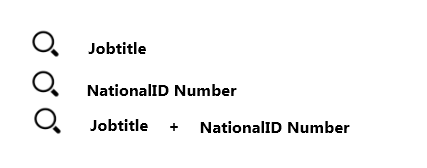
If the user searches data by Jobtitle only, then he will get response according to jobtitle. If a user does search with nationalidnumber, then he will get response according to it. Finally, the combination of both (Jobtitle+ nationalidnumber) can also be used to search, then the user will get response according to it.
Code Snippet
public JsonResult DataSearch(string jobtitle, string nationalIDNumber)
{
if (!string.IsNullOrEmpty(jobtitle) && !string.IsNullOrEmpty(nationalIDNumber))
{
var responsedata = _connectionToEs.EsClient().Search<Humanresources>(s => s
.Index("humanresources")
.Type("doc")
.Size(50)
.Query(q => q
.Match(m => m
.Field(f => f.jobtitle)
.Query(jobtitle)
)
&& q
.Match(m => m
.Field(f => f.nationalidnumber)
.Query(nationalIDNumber)
))
);
var datasend = (from hits in responsedata.Hits
select hits.Source).ToList();
return Json(new { datasend, responsedata.Took }, behavior: JsonRequestBehavior.AllowGet);
}
else if (!string.IsNullOrEmpty(jobtitle))
{
var responsedata = _connectionToEs.EsClient().Search<Humanresources>(s => s
.Index("humanresources")
.Type("doc")
.Size(50)
.Query(q => q
.Match(m => m
.Field(f => f.jobtitle)
.Query(jobtitle)
)));
var datasend = (from hits in responsedata.Hits
select hits.Source).ToList();
return Json(new { datasend, responsedata.Took }, behavior: JsonRequestBehavior.AllowGet);
}
else if (!string.IsNullOrEmpty(nationalIDNumber))
{
var responsedata = _connectionToEs.EsClient().Search<Humanresources>(s => s
.Index("humanresources")
.Type("doc")
.Size(50)
.Query(q => q
.Match(m => m
.Field(f => f.nationalidnumber)
.Query(nationalIDNumber)
)));
var datasend = (from hits in responsedata.Hits
select hits.Source).ToList();
return Json(new { datasend, responsedata.Took }, behavior: JsonRequestBehavior.AllowGet);
}
return Json(data: null, behavior: JsonRequestBehavior.AllowGet);
}
Output
These are simple examples which will help you to start using elastic search with ASP.NET Application. There are lots of filters and ways to write query in Elastic using “Nest” in ASP.NET.
Finally, we have learned how to simply query elastic search using “Nest” Client and display data in grid.