European ASP.NET MVC 4 and MVC 5 Hosting

BLOG about ASP.NET MVC 3, ASP.NET MVC 4, and ASP.NET MVC 5 Hosting and Its Technology - Dedicated to European Windows Hosting Customer

ASP.NET MVC Hosting - HostForLIFE.eu :: Stripe Payment Gateway Integration with ASP.NET Core MVC

clock February 10, 2025 07:09 by author Peter

We'll go over every step of integrating the Stripe Payment Gateway into an ASP.NET Core MVC application in this post. After completing this tutorial, you will have a complete payment system that enables customers to use Stripe's safe checkout to make purchases.

Stripe is a popular payment gateway that allows businesses to accept payments online. It supports credit cards, debit cards, and other payment methods. Stripe provides a secure and easy-to-integrate API for developers. In this article, we’ll use Stripe Checkout, which is a pre-built payment page hosted by Stripe. This approach is secure and requires minimal setup.

Introduction
Before starting, ensure you have the following.

  • Stripe Account: Sign up at Stripe.
  • .NET SDK: Install the latest .NET SDK from here.
  • IDE: Use Visual Studio, Visual Studio Code, or any preferred IDE.
  • Stripe API Keys: Retrieve your Publishable Key and Secret Key from the Stripe Dashboard.

Step 1. Create a Stripe Account

  1. Go to Stripe and sign up for an account.
  2. Once logged in, navigate to Developers > API Keys.
  3. Copy your publishable key and secret key. These will be used in your ASP.NET Core application.

Step 2. Set Up an ASP.NET Core MVC Project

  • Open Visual Studio or your preferred IDE.
  • Create a new ASP.NET Core Web App (Model-View-Controller) project.
    • Name the project (e.g., StripePaymentDemo).
    • Select .NET 6.0 or later as the framework.
  • Build and run the project to ensure it’s set up correctly.

Step 3. Install Stripe.NET NuGet Package
Stripe provides an official .NET library to interact with its API. Install it via the Package Manager Console.
Install-Package Stripe.net

Step 4. Configure Stripe in appsettings.json
Add your Stripe API keys to the appsettings.json file.
{
  "Logging": {
    "LogLevel": {
      "Default": "Information",
      "Microsoft.AspNetCore": "Warning"
    }
  },
  "Stripe": {
    "PublishableKey": "YOUR_STRIPE_PUBLISHED_KEY",
    "SecretKey": "YOUR_SECRET_KEY"
  },
  "AllowedHosts": "*"
}

Step 5. Configure Stripe in the Program.cs
Configure Stripe in the Program.cs file.
using Stripe;

namespace StripePaymentDemoApp
{
    public class Program
    {
        public static void Main(string[] args)
        {
            var builder = WebApplication.CreateBuilder(args);
            // Add services to the container
            builder.Services.AddControllersWithViews();
            StripeConfiguration.ApiKey = builder.Configuration["Stripe:SecretKey"];
            var app = builder.Build();
            // Configure the HTTP request pipeline
            if (!app.Environment.IsDevelopment())
            {
                app.UseExceptionHandler("/Home/Error");
                // The default HSTS value is 30 days. You may want to change this for production scenarios,
                // see https://aka.ms/aspnetcore-hsts.
                app.UseHsts();
            }
            app.UseHttpsRedirection();
            app.UseStaticFiles();
            app.UseRouting();
            app.UseAuthorization();
            app.MapControllerRoute(
                name: "default",
                pattern: "{controller=Home}/{action=Index}/{id?}");
            app.Run();
        }
    }
}

Step 6. Create a Payment Controller
Create a new controller named: PaymentController.cs.using Microsoft.AspNetCore.Mvc;
using Stripe.Checkout;

namespace StripePaymentDemoApp.Controllers
{
    public class PaymentController : Controller
    {
        private readonly IConfiguration _configuration;
        public PaymentController(IConfiguration configuration)
        {
            _configuration = configuration;
        }
        public IActionResult Checkout()
        {
            // Pass the Stripe Publishable Key to the view
            ViewBag.StripePublishableKey = _configuration["Stripe:PublishableKey"];
            return View();
        }
        [HttpPost]
        public async Task<IActionResult> CreateCheckoutSession()
        {
            // Create a Stripe Checkout Session
            var options = new SessionCreateOptions
            {
                PaymentMethodTypes = new List<string> { "card" },
                LineItems = new List<SessionLineItemOptions>
                {
                    new SessionLineItemOptions
                    {
                        PriceData = new SessionLineItemPriceDataOptions
                        {
                            Currency = "usd",
                            ProductData = new SessionLineItemPriceDataProductDataOptions
                            {
                                Name = "Test Product",
                            },
                            UnitAmount = 2000, // $20.00 (in cents)
                        },
                        Quantity = 1,
                    },
                },
                Mode = "payment",
                SuccessUrl = Url.Action("Success", "Payment", null, Request.Scheme),
                CancelUrl = Url.Action("Cancel", "Payment", null, Request.Scheme),
            };
            var service = new SessionService();
            var session = await service.CreateAsync(options);
            // Redirect to Stripe Checkout
            return Redirect(session.Url);
        }
        public IActionResult Success()
        {
            return View();
        }
        public IActionResult Cancel()
        {
            return View();
        }
    }
}
Step 7. Create Views
Checkout View (Views/Payment/Checkout.cshtml).
@{
ViewData["Title"] = "Checkout";
Layout = "~/Views/Shared/_Layout.cshtml";
}
<h1>Checkout</h1>
<form asp-action="CreateCheckoutSession" method="post">
<button type="submit" class="btn btn-primary">Pay with Stripe</button>
</form>


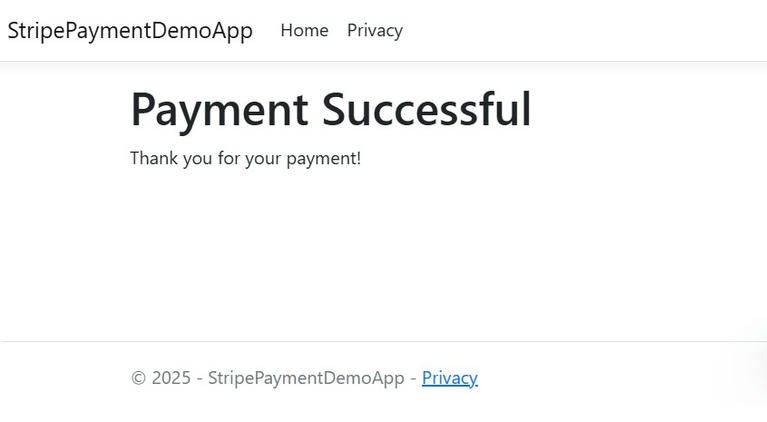
Success View (Views/Payment/Success.cshtml).
@{
ViewData["Title"] = "Payment Successful";
Layout = "~/Views/Shared/_Layout.cshtml";
}

<h1>Payment Successful</h1>
<p>Thank you for your payment!</p>

Cancel View (Views/Payment/Cancel.cshtml).
@{
ViewData["Title"] = "Payment Canceled";
Layout = "~/Views/Shared/_Layout.cshtml";
}

<h1>Payment Canceled</h1>
<p>Your payment was canceled.</p>

Step 8. Run and Test the Application

  • Run the application using dotnet run or your IDE’s run command.
  • Navigate to /Payment/Checkout in your browser.
  • Click the "Pay with Stripe" button to be redirected to the Stripe Checkout page.
  • Use the following test card details.
    • Card Number: 4242 4242 4242 4242.
    • Expiration Date: Any future date.
    • CVC: Any 3 digits.
    • ZIP Code: Any value.

Let's run the application and start the payments with Stripe.

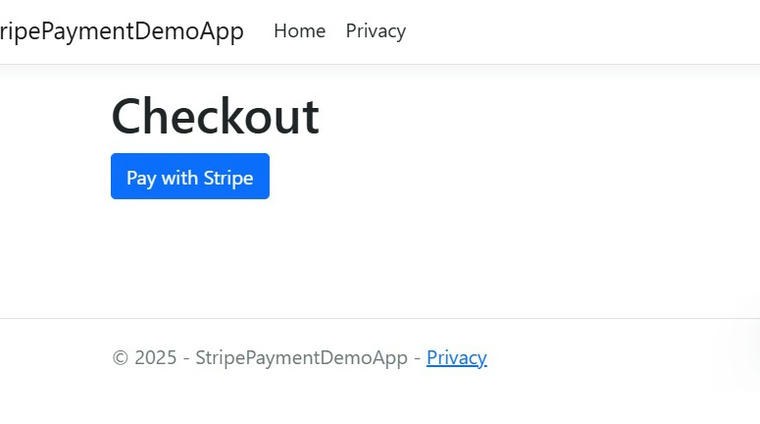
Click the Pay with Stripe Button.


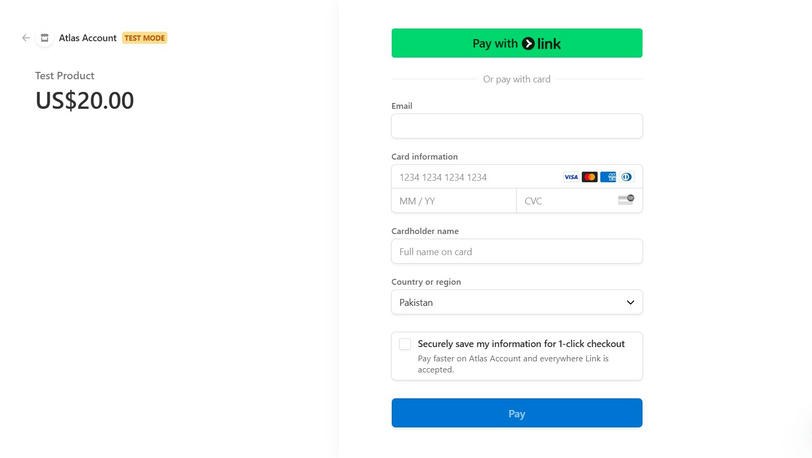
Fill in the payment details with test credentials and click the pay button.

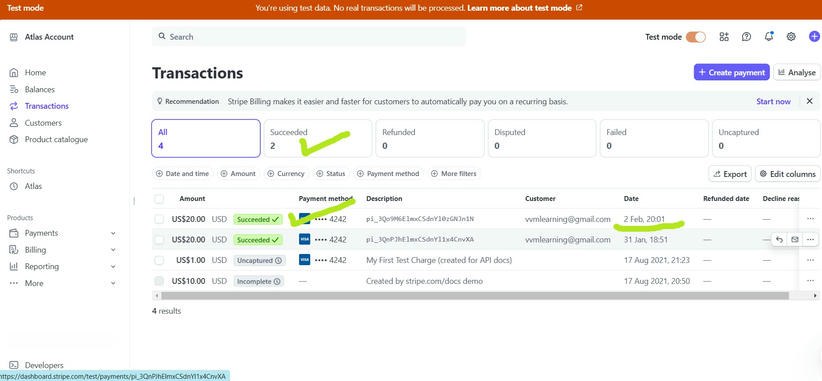
Let's look at our most recent transactions on the Stripe dashboard.


Step 9. Handle Webhooks (Optional)
To handle payment confirmation and other events, set up a webhook endpoint.

Create a Webhook Endpoint in the Stripe Dashboard.

  • Go to Developers > Webhooks in the Stripe Dashboard.
    • Add a new endpoint with your server's URL (e.g., https://yourdomain.com/Payment/Webhook).
    • Add Webhook Secret to:appsettings.json.

{
  "Stripe": {
    "WebhookSecret": "your_webhook_secret_here"
  }
}


Add Webhook Handler in:PaymentController.cs.
[HttpPost]
public async Task<IActionResult> Webhook()
{
    var json = await new StreamReader(HttpContext.Request.Body).ReadToEndAsync();

    try
    {
        var stripeEvent = EventUtility.ConstructEvent(
            json,
            Request.Headers["Stripe-Signature"],
            _configuration["Stripe:WebhookSecret"]
        );
        // Handle events
        if (stripeEvent.Type == Events.CheckoutSessionCompleted)
        {
            var session = stripeEvent.Data.Object as Session;
            // Handle successful payment
        }
        return Ok();
    }
    catch (StripeException e)
    {
        return BadRequest();
    }
}


ASP.NET MVC Hosting - HostForLIFE.eu :: Scalable ASP.NET MVC Application Design Patterns

clock February 3, 2025 06:14 by author Peter

Design patterns are tried-and-true fixes for typical program design issues. Implementing these principles can enhance the scalability, testability, and maintainability of code in ASP.NET MVC projects. This article examines important design patterns seen in ASP.NET MVC projects and offers real-world examples of how to use them.

1. Repository Pattern
The repository pattern abstracts data access logic, providing a clean separation between the business logic and the data layer.

Benefits

  • Promotes loose coupling between the application and data storage.
  • Simplifies unit testing by allowing mocking of the data layer.

Implementation
// IRepository Interface
public interface IRepository<T> where T : class
{
    IEnumerable<T> GetAll();
    T GetById(int id);
    void Insert(T entity);
    void Update(T entity);
    void Delete(int id);
}

// Repository Implementation
public class Repository<T> : IRepository<T> where T : class
{
    private readonly ApplicationDbContext _context;
    private DbSet<T> entities;

    public Repository(ApplicationDbContext context)
    {
        _context = context;
        entities = context.Set<T>();
    }

    public IEnumerable<T> GetAll() => entities.ToList();
    public T GetById(int id) => entities.Find(id);
    public void Insert(T entity) => entities.Add(entity);
    public void Update(T entity) => _context.Entry(entity).State = EntityState.Modified;
    public void Delete(int id) => entities.Remove(GetById(id));
}


2. Unit of Work Pattern
The unit of work pattern helps manage transactions by coordinating changes across multiple repositories in a single transaction.

Benefits

  • Ensures consistency across repositories.
  • Reduces redundant calls to the database.

Implementation
public class UnitOfWork : IDisposable
{
    private readonly ApplicationDbContext _context;
    private IRepository<Product> _productRepository;

    public UnitOfWork(ApplicationDbContext context)
    {
        _context = context;
    }

    public IRepository<Product> ProductRepository
    {
        get
        {
            return _productRepository ??= new Repository<Product>(_context);
        }
    }

    public void Save()
    {
        _context.SaveChanges();
    }

    public void Dispose()
    {
        _context.Dispose();
    }
}


3. Dependency Injection (DI)
Dependency injection (DI) injects dependencies into controllers or classes instead of creating them directly.

Benefits

  • Reduces tight coupling.
  • Simplifies testing by allowing dependency substitution.

Implementation
Configure DI in Startup.cs
public void ConfigureServices(IServiceCollection services)
{
    services.AddScoped<IRepository<Product>, Repository<Product>>();
    services.AddScoped<UnitOfWork>();
    services.AddControllersWithViews();
}


Inject Dependencies in Controller
public class Product
{
    public int Id { get; set; }
    public string Name { get; set; }
    public decimal Price { get; set; }
    public int StockQuantity { get; set; }
}

Products Controller
using System.Linq;
using System.Web.Mvc;
using MVCDesignPatternsApp.Models;
using MVCDesignPatternsApp.Repositories;

public class ProductsController : Controller
{
    private readonly UnitOfWork _unitOfWork;

    public ProductsController(UnitOfWork unitOfWork)
    {
        _unitOfWork = unitOfWork;
    }

    // GET: Products
    public ActionResult Index()
    {
        var products = _unitOfWork.ProductRepository.GetAll().ToList();
        return View(products);
    }

    // GET: Products/Details/5
    public ActionResult Details(int id)
    {
        var product = _unitOfWork.ProductRepository.GetById(id);
        if (product == null)
        {
            return HttpNotFound();
        }
        return View(product);
    }

    // GET: Products/Create
    public ActionResult Create()
    {
        return View();
    }

    // POST: Products/Create
    [HttpPost]
    [ValidateAntiForgeryToken]
    public ActionResult Create(Product product)
    {
        if (ModelState.IsValid)
        {
            _unitOfWork.ProductRepository.Insert(product);
            _unitOfWork.Save();
            return RedirectToAction("Index");
        }
        return View(product);
    }

    // GET: Products/Edit/5
    public ActionResult Edit(int id)
    {
        var product = _unitOfWork.ProductRepository.GetById(id);
        if (product == null)
        {
            return HttpNotFound();
        }
        return View(product);
    }

    // POST: Products/Edit/5
    [HttpPost]
    [ValidateAntiForgeryToken]
    public ActionResult Edit(Product product)
    {
        if (ModelState.IsValid)
        {
            _unitOfWork.ProductRepository.Update(product);
            _unitOfWork.Save();
            return RedirectToAction("Index");
        }
        return View(product);
    }

    // GET: Products/Delete/5
    public ActionResult Delete(int id)
    {
        var product = _unitOfWork.ProductRepository.GetById(id);
        if (product == null)
        {
            return HttpNotFound();
        }
        return View(product);
    }

    // POST: Products/Delete/5
    [HttpPost, ActionName("Delete")]
    [ValidateAntiForgeryToken]
    public ActionResult DeleteConfirmed(int id)
    {
        _unitOfWork.ProductRepository.Delete(id);
        _unitOfWork.Save();
        return RedirectToAction("Index");
    }

    protected override void Dispose(bool disposing)
    {
        if (disposing)
        {
            _unitOfWork.Dispose();
        }
        base.Dispose(disposing);
    }
}

Views
Ensure you have corresponding views in the Views/Products/ folder:

  • Index.cshtml: Display the product list.
  • Details.cshtml: Show product details.
  • Create.cshtml: Form to add a new product.
  • Edit.cshtml: Form to update product information.
  • Delete.cshtml: Confirm product deletion.

View Example for Index.cshtml
@model IEnumerable<YourNamespace.Models.Product>

<h2>Product List</h2>

<p>
    @Html.ActionLink("Create New Product", "Create")
</p>

<table class="table">
    <thead>
        <tr>
            <th>Name</th>
            <th>Price</th>
            <th>Stock Quantity</th>
            <th></th>
        </tr>
    </thead>
    <tbody>
    @foreach (var item in Model) {
        <tr>
            <td>@item.Name</td>
            <td>@item.Price</td>
            <td>@item.StockQuantity</td>
            <td>
                @Html.ActionLink("Edit", "Edit", new { id = item.Id }) |
                @Html.ActionLink("Details", "Details", new { id = item.Id }) |
                @Html.ActionLink("Delete", "Delete", new { id = item.Id })
            </td>
        </tr>
    }
    </tbody>
</table>

4. Factory Pattern
The factory pattern centralizes object creation logic.

Benefits

  • Decouples object creation from usage.
  • Promotes flexibility for varying object requirements.

Implementation
Factory Implementation

public interface IProductService
{
    void ProcessOrder();
}

public class PhysicalProductService : IProductService
{
    public void ProcessOrder() => Console.WriteLine("Processing physical product order.");
}

public class DigitalProductService : IProductService
{
    public void ProcessOrder() => Console.WriteLine("Processing digital product order.");
}

public class ProductServiceFactory
{
    public IProductService GetProductService(string productType)
    {
        return productType switch
        {
            "Physical" => new PhysicalProductService(),
            "Digital" => new DigitalProductService(),
            _ => throw new ArgumentException("Invalid product type")
        };
    }
}

Usage in Controller
public class OrdersController : Controller
{
    private readonly ProductServiceFactory _factory;

    public OrdersController(ProductServiceFactory factory)
    {
        _factory = factory;
    }

    public void CreateOrder(string productType)
    {
        var service = _factory.GetProductService(productType);
        service.ProcessOrder();
    }
}

5. Singleton Pattern
The singleton pattern ensures only one instance of a class is created and shared.

Benefits

  • Ideal for shared resources like logging or caching.
  • Ensures a single point of control.

Implementation
Singleton Class
public sealed class LogManager
{
    private static readonly Lazy<LogManager> instance = new(() => new LogManager());

    private LogManager() { }

    public static LogManager Instance => instance.Value;

    public void Log(string message) => Console.WriteLine($"Log: {message}");
}


6. Command Pattern
The command pattern encapsulates a request as an object, allowing for more complex request handling.

Benefits

  • Supports undoable operations.
  • Decouples request handling from request execution.

Implementation
Command Interface and Implementation
public interface ICommand
{
    void Execute();
}

public class SaveOrderCommand : ICommand
{
    public void Execute() => Console.WriteLine("Order saved.");
}

public class CancelOrderCommand : ICommand
{
    public void Execute() => Console.WriteLine("Order canceled.");
}

Invoker Class
public class CommandInvoker
{
    private readonly List<ICommand> _commands = new();

    public void AddCommand(ICommand command) => _commands.Add(command);

    public void ExecuteCommands()
    {
        foreach (var command in _commands)
        {
            command.Execute();
        }
        _commands.Clear();
    }
}

Output


About HostForLIFE.eu

HostForLIFE.eu is European Windows Hosting Provider which focuses on Windows Platform only. We deliver on-demand hosting solutions including Shared hosting, Reseller Hosting, Cloud Hosting, Dedicated Servers, and IT as a Service for companies of all sizes.

We have offered the latest Windows 2016 Hosting, ASP.NET Core 2.2.1 Hosting, ASP.NET MVC 6 Hosting and SQL 2017 Hosting.


Tag cloud

Sign in