European ASP.NET MVC 4 and MVC 5 Hosting

BLOG about ASP.NET MVC 3, ASP.NET MVC 4, and ASP.NET MVC 5 Hosting and Its Technology - Dedicated to European Windows Hosting Customer

ASP.NET MVC 6 Hosting - HostForLIFE.eu :: Easiest Way to Make CheckBox

clock March 29, 2019 11:53 by author Peter

In this article I show you, how easy it is to make a CheckBox on ASP.NET. The use of radio buttons and checkboxes using ASP.Net programming where the function of the radio button is choosing just one selection with a circle that is a point in the middle if we choose it. While the checkbox is square shaped that there is a tick if selected. To create a function of the radio button. We will explain below:

  • First you must create a project by choosing ASP.Net which is in the File> New Project> Other Languages> Visual C #> Web> Select Empty ASP.Net Web Application.
  • Fill in the name and click OK aspproject05
  • Right Click On aspproject05 in the top right corner select ADD> New Item> Web Form. And give CheckBox.aspx as a name.
  • Next create a CheckBox, button, label by entering this code is in the <div>

<asp:CheckBox ID="chkNews" Text="Do you want to get more update ?" runat="server" />
<br />
<asp:Button ID="btnSubmit" Text="Submit" runat="server" OnClick="btnSubmit_Click" /> <hr/>
<asp:Label ID="lblResult" runat="server" />


Code Description:

<Asp: CheckBox ID = "chkNews" Text = "Do you want to get more update ?" runat = "server" />
This script serves as the manufacture CheckBox with ID named chkNews, which says Do you want to get more update? sent or received by the server.

<br />
This script is used to create a new line

<Asp: Button ID = "btnSubmit" Text = "Submit" runat = "server" OnClick = "btnSubmit_Click" />
This script is used to manufacture the ID button button named btnSubmit, that says Submit sent to the server to have an action Click if the button is clicked.

<Asp: Label ID = "lblResult" runat = "server" />

This script serves to create a label with name ID lblResult the printed blanks to be sent to the server.


When you're done simply double-Click button and type in the code below:

lblResult.Text = chkNews.Checked.ToString ();


Code Description:

LblResult.Text = chkNews.Checked.ToString ();

The above code serves as outputan of chkBerita when checked or not displayed by a label that berID lblResult that are boolean. This means that when we press the button without us tick checkbox section will appear on labels False lblResult whereas if we check the CheckBox and pressing the button it will show True.

HostForLIFE.eu ASP.NET MVC Hosting
European best, cheap and reliable ASP.NET hosting with instant activation. HostForLIFE.eu is #1 Recommended Windows and ASP.NET hosting in European Continent. With 99.99% Uptime Guaranteed of Relibility, Stability and Performace. HostForLIFE.eu security team is constantly monitoring the entire network for unusual behaviour. We deliver hosting solution including Shared hosting, Cloud hosting, Reseller hosting, Dedicated Servers, and IT as Service for companies of all size.


ASP.NET MVC 6 Hosting - HostForLIFE.eu :: ASP.NET MVC Request Life Cycle

clock March 12, 2019 09:39 by author Peter

If you have worked on ASP.NET MVC, you must be familiar with how when you type in an URL, the appropriate controller is chosen, and the action fired. Today we will dig a little deeper within the MVC request life cycle. Before we start discussing its life cycle, let's briefly understand the concept of HttpHandlers and HttpModules.

Handlers are responsible for generating the actual response in MVC. They implement the IHttpHandler class and only one handler will execute per request. On the other hand, HttpModules are created in response to life cycle events. Modules can, for example, be used for populating HttpContext objects. A request can use many modules. These classes derive from IHttpModule. We are now ready to learn about the MVC Request Life Cycle. The MVC life cycle can be briefly demonstrated as below,


When a request is fired for the first time, the Application_Start method in the Global.asax file is called. This method calls the RegisterRoutes method as below,
    public class MvcApplication : System.Web.HttpApplication 
        { 
            protected void Application_Start() 
            { 
                AreaRegistration.RegisterAllAreas(); 
                FilterConfig.RegisterGlobalFilters(GlobalFilters.Filters); 
                RouteConfig.RegisterRoutes(RouteTable.Routes); 
                BundleConfig.RegisterBundles(BundleTable.Bundles); 
            } 
        } 


RegisterRoutes method stores the routes defined in that method, in a static collection in the Routetable class.
Each route has an HttpHandler defined for it. In our case above, the MapRoute method defines the HttpHandler.
Next, the URLRoutingModule is called. It matches the request route with the routes defined in the route table. It calls the GetHttpHandler method which returns an instance of an MVCHandler.

The MVCHandler calls the ProcessRequest method. The controller execution and initialization happens inside this method. ProcessRequest calls ProcessRequestInit, which uses ControllerFactory to select an appropriate controller based on the supplied route. The ControllerFactory calls the Controller Activator which uses the dependency resolver to create an instance of the controller class.

Once the controller is created its Execute method is called.

Now comes the point where the action must be executed. The execute method in the controller calls the ExecuteCore method which calls the InvokeAction method of ActionInvoker. Action Invoker determines which action must be selected based on certain conditions, depending upon the methods available, their names and the action selectors used for them.

Once the action is selected, Authentication & Authorization filters are fired next.
Once the action passes through the authentication and authorization filter checks, the model binding takes place. The information needed for the action to execute is gathered in this step.

OnActionExecuting action filters are fired next. Once the OnActionExecuting filters are executed a response for the action is generated. The thing to note here is that the response is generated at this stage, but not executed.

Next, the OnActionExecuted filters are executed.  Once all the filters have finished executing, the response is finally executed in the ExecuteResult method which is called from the InvokeActionResult by the ActionInvoker. If the response is a view or a partial view, the ViewEngine will render it, else it will be handled appropriately. The ExecuteResult will find the appropriate view using FindView or FindPartialView method. This method will search for the view in specific locations and then render it. This is the final step in generating the response.

If you would like to further dig into the MVC request life cycle, I would highly recommend Alex Wolf’s pluralsight course by the same name.

HostForLIFE.eu ASP.NET MVC 6 Hosting
HostForLIFE.eu is European Windows Hosting Provider which focuses on Windows Platform only. We deliver on-demand hosting solutions including Shared hosting, Reseller Hosting, Cloud Hosting, Dedicated Servers, and IT as a Service for companies of all sizes. We have customers from around the globe, spread across every continent. We serve the hosting needs of the business and professional, government and nonprofit, entertainment and personal use market segments.


European ASP.NET MVC Hosting :: How to Integrate Your ASP.NET MVC with Paypal

clock March 5, 2019 08:27 by author Scott

PayPal is an online payment service that allows you to pay for purchases, receive payments, or to send and receive money. To receive these services, a person must submit various financial details to PayPal, such as credit card number, transmission can be done by mail. Thereafter, transactions are conducted without having to disclose financial details, an email address and a password is sufficient.

for more information about business please visit official Paypal Website for business or https://developer.paypal.com/webapps/developer/docs/integration/direct/log-in-with-paypal/detailed/

In this tutorial we propose to integrate the PAYPAL  e-commerce payment solution.

So, we are using Visual studio C# and ASP.NET MVC4 (for more information about ASP.NET MVC please take a look at  http://www.asp.net/mvc/tutorials/mvc-4/getting-started-with-aspnet-mvc4/intro-to-aspnet-mvc-4

Ready ? Lets start our tutorial :

1. Open Visual studio 2012 or later and Create your Project

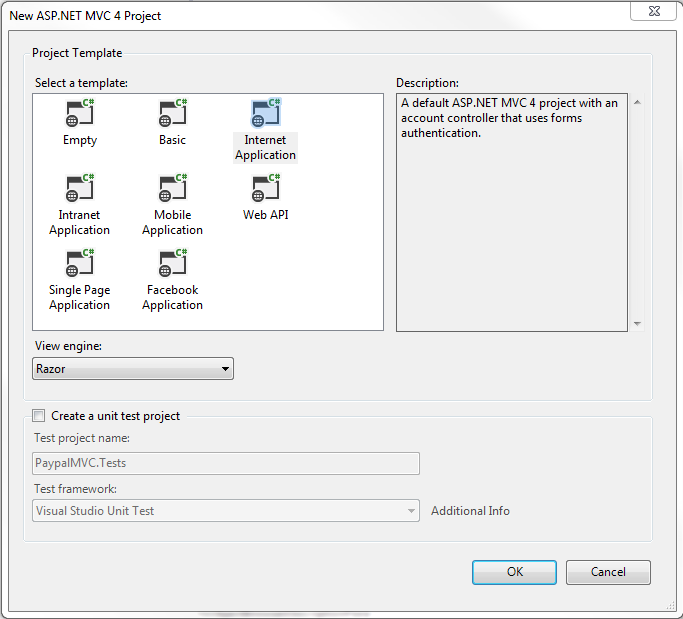
2.  Choose ASP.NET MVC4 Template Projet, Internet Application and Razor ViewEngine
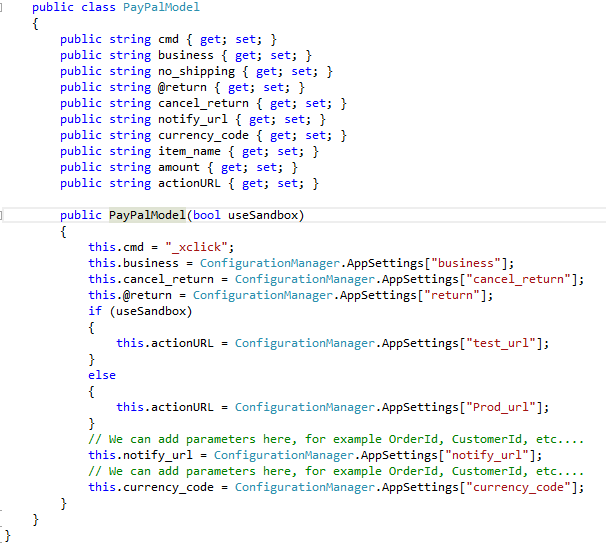
 

3. Expand Model folder and Create a new Model named PayPalModel to hold PayPal payment parameters

Try it 

public class PayPalModel
{
public string cmd { get; set; }
public string business { get; set; }
public string no_shipping { get; set; }
public string @return { get; set; }
public string cancel_return { get; set; }
public string notify_url { get; set; }
public string currency_code { get; set; }
public string item_name { get; set; }
public string amount { get; set; }
public string actionURL { get; set; }

public PayPalModel(bool useSandbox)
{
this.cmd = “_xclick”;
this.business = ConfigurationManager.AppSettings[“business”];
this.cancel_return = ConfigurationManager.AppSettings[“cancel_return”];
this.@return = ConfigurationManager.AppSettings[“return”];
if (useSandbox)
{
this.actionURL = ConfigurationManager.AppSettings[“test_url”];
}
else
{
this.actionURL = ConfigurationManager.AppSettings[“Prod_url”];
}
// We can add parameters here, for example OrderId, CustomerId, etc….
this.notify_url = ConfigurationManager.AppSettings[“notify_url”];
// We can add parameters here, for example OrderId, CustomerId, etc….
this.currency_code = ConfigurationManager.AppSettings[“currency_code”];
}
}

4. Create a Paypal Controller
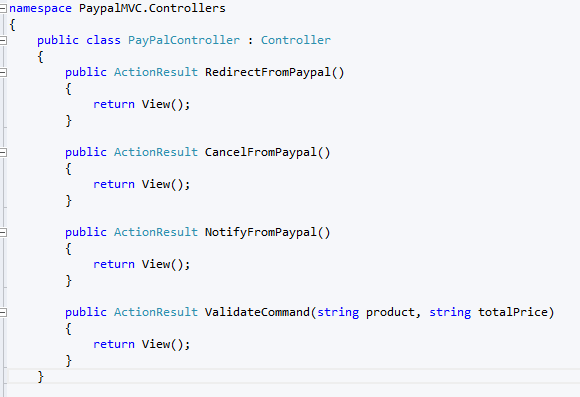
Try it :

public class PayPalController : Controller
{
public ActionResult RedirectFromPaypal()
{
return View();
}

public ActionResult CancelFromPaypal()
{
return View();
}

public ActionResult NotifyFromPaypal()
{
return View();
}

public ActionResult ValidateCommand(string product, string totalPrice)
{
return View();
}
}

5. Now Create a Partial View (ValidateCommand.csHtml)  to use our Model.  Do not forget that all fields must be of type hidden
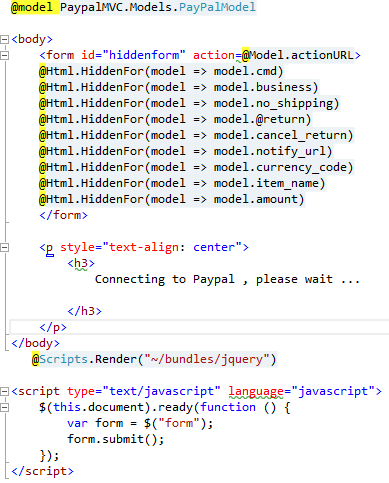
try it :

@model PaypalMVC.Models.PayPalModel

<body>
<form id=”hiddenform” [email protected]>
@Html.HiddenFor(model => model.cmd)
@Html.HiddenFor(model => model.business)
@Html.HiddenFor(model => model.no_shipping)
@Html.HiddenFor(model => model.@return)
@Html.HiddenFor(model => model.cancel_return)
@Html.HiddenFor(model => model.notify_url)
@Html.HiddenFor(model => model.currency_code)
@Html.HiddenFor(model => model.item_name)
@Html.HiddenFor(model => model.amount)
</form>

<p style=”text-align: center”>
<h3>
Connecting to Paypal , please wait …

</h3>
</p>
</body>
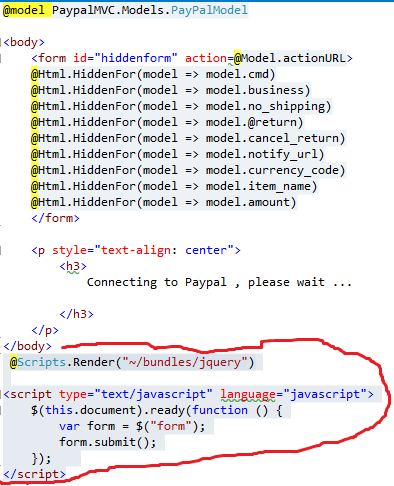
@Scripts.Render(“~/bundles/jquery”)

<script type=”text/javascript” language=”javascript”>
$(this.document).ready(function () {
var form = $(“form”);
form.submit();
});
</script>

6. Now finish our ValidateCommand action of PayPalController
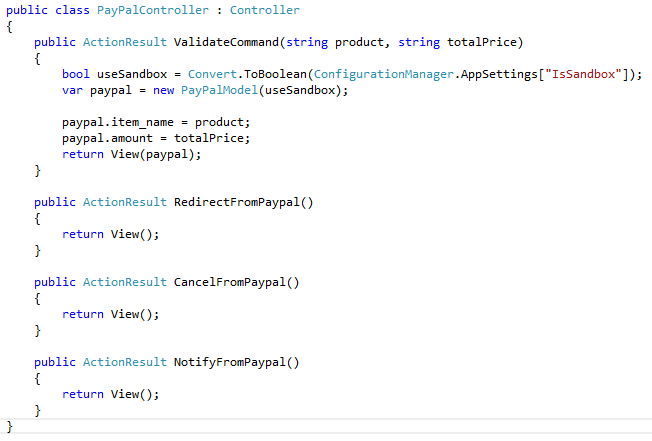
try it :

public ActionResult ValidateCommand(string product, string totalPrice)
{
bool useSandbox = Convert.ToBoolean(ConfigurationManager.AppSettings[“IsSandbox”]);
var paypal = new PayPalModel(useSandbox);

paypal.item_name = product;
paypal.amount = totalPrice;
return View(paypal);
}

7. Next finish our partialView by adding a jquery code to auto submit our form. The necessary scripts are  Jquery-{version}.js and    Jquery-{version}.min.js. Here we are used  @Scripts.Render(“~/bundles/jquery”)  to include all Jquery scripts.  A more better practice will be to export all javascript functions to external file but the submit function must be called just after displaying hidden field of our form
8. The next step is to create our checkOut form that dispays product name , Quantity, price and Total :

So expand View folder , expand Home folder and open index.csHtml file. Replace its contents by the following
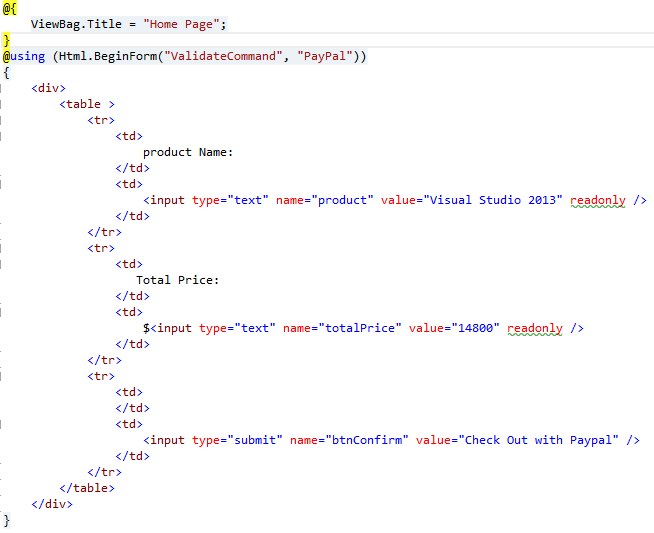
try it : 

@{
ViewBag.Title = “Home Page”;
}
@using (Html.BeginForm(“ValidateCommand”, “PayPal”))
{
<div>
<table >
<tr>
<td>
product Name:
</td>
<td>
<input type=”text” name=”product” value=”Visual Studio 2013″ readonly />
</td>
</tr>
<tr>
<td>
Total Price:
</td>
<td>
$<input type=”text” name=”totalPrice” value=”14800″ readonly />
</td>
</tr>
<tr>
<td>
</td>
<td>
<input type=”submit” name=”btnConfirm” value=”Check Out with Paypal” />
</td>
</tr>
</table>
</div>
}

9. we are at the end. Our final step is to update the web.config file with the appropriate settings
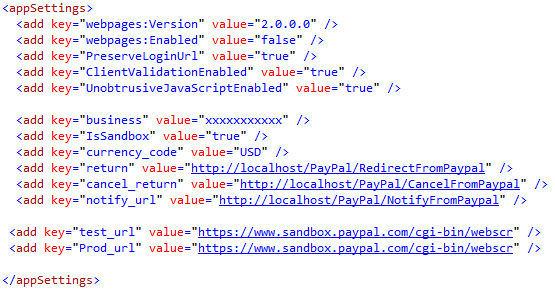
10. Let’s test and run the application
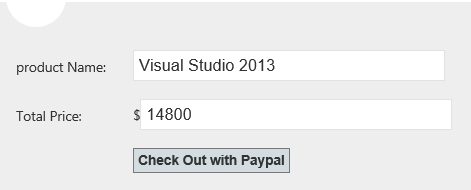
 

11. Confirm payment by clicking on button Check Out With PayPal, then you will be redirected to the payment page 
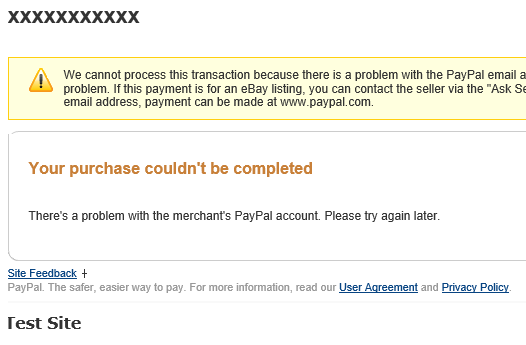
We have this page error because, we have not yet an valid account.

Now it time to create a test account by following this link https://developer.paypal.com/webapps/developer/docs/classic/lifecycle/ug_sandbox/#accounts

12. Open Web.config file and update business value with your test account 
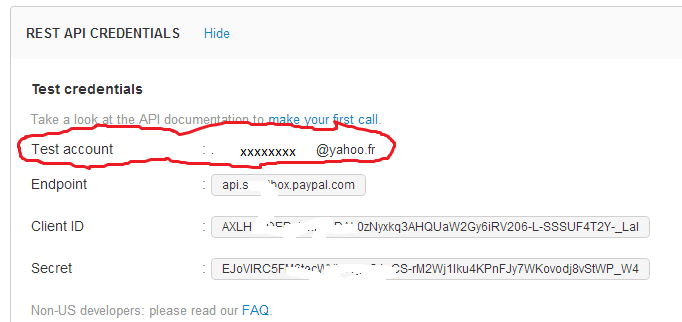
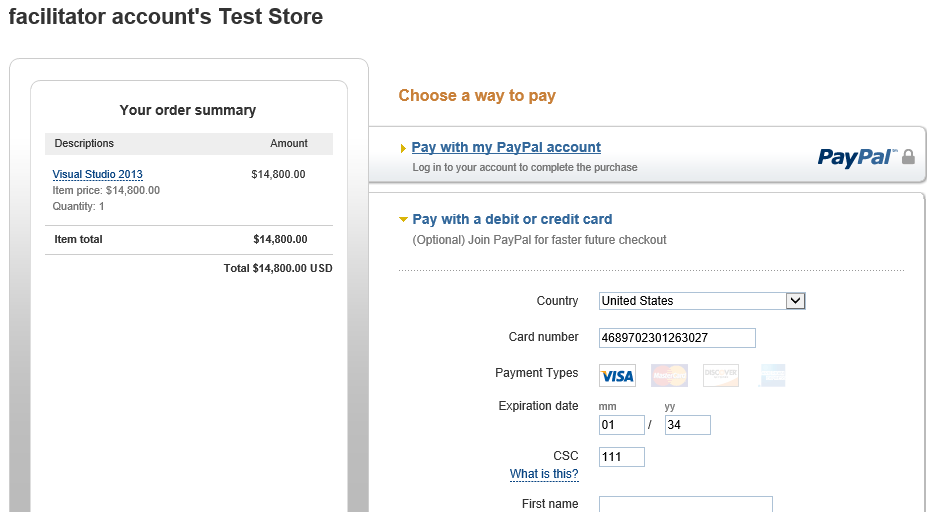
 

13. So run again your application. Confirm or Cancel , etc…

Hope this tutorial helps you. 


About HostForLIFE.eu

HostForLIFE.eu is European Windows Hosting Provider which focuses on Windows Platform only. We deliver on-demand hosting solutions including Shared hosting, Reseller Hosting, Cloud Hosting, Dedicated Servers, and IT as a Service for companies of all sizes.

We have offered the latest Windows 2016 Hosting, ASP.NET Core 2.2.1 Hosting, ASP.NET MVC 6 Hosting and SQL 2017 Hosting.


Tag cloud

Sign in