In numerous forum postings, developers and students have addressed the same question: how to utilize Web API REST Service in an ASP.NET MVC application and how to initiate a call between them to exchange data. So, in response to this need, I decided to write this post to show how to use HttpClient to consume the ASP.NET Web API REST Service in an ASP.NET MVC application.

Prerequisites
If you're not sure what a Web API REST service is or how to construct, publish, and host an ASP.NET Web API REST Service, please watch my video and read the papers linked below. Follow the same steps if you want to learn how to create, host, and consume web API REST services in client applications.
In this article, we will use the same hosted Web API REST service to consume in our created ASP.NET MVC web application. Now, let's start consuming Web API REST service in the ASP.NET MVC application step by step.
Step 1. Create an MVC Application
Start, followed by All Programs, and select Microsoft Visual Studio 2015.
Click File, followed by New, and click Project. Select ASP.NET Web Application Template, provide the Project a name as you wish, and click OK.
After clicking, the following Window will appear. Choose an empty project template and check on the MVC option.
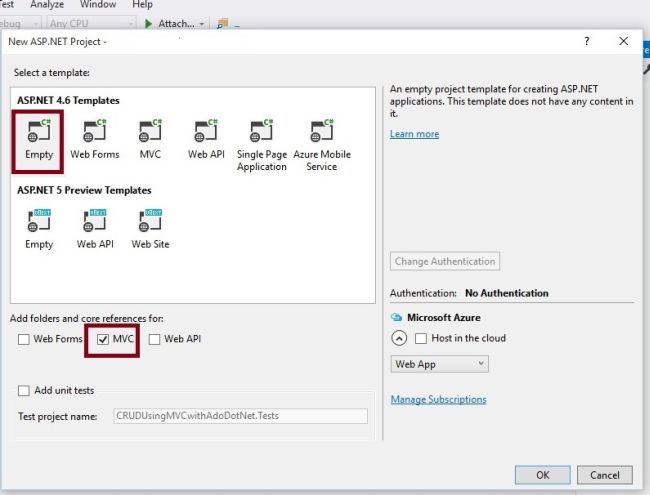
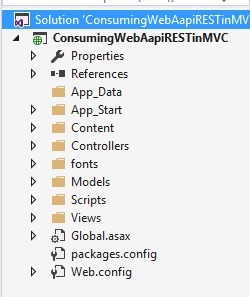
The preceding step creates the simple empty ASP.NET MVC application without a Model, View, and Controller, The Solution Explorer of created web application will look like the following.
Step 2. Install HttpClient library from NuGet
We are going to use HttpClient to consume the Web API REST Service, so we need to install this library from NuGet Package Manager .
What is HttpClient?
HttpClient is base class which is responsible to send HTTP request and receive HTTP response resources i.e from REST services.
To install HttpClient, right click on Solution Explorer of created application and search for HttpClient, as shown in the following image.
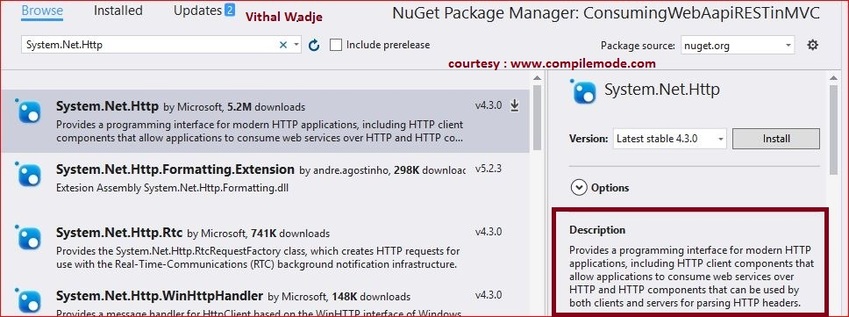
Now, click on Install button after choosing the appropriate version. It will get installed after taking few seconds, depending on your internet speed.
Step 3. Install WebAPI.Client library from NuGet
This package is used for formatting and content negotiation which provides support for System.Net.Http. To install, right click on Solution Explorer of created application and search for WebAPI.Client, as shown in following image.
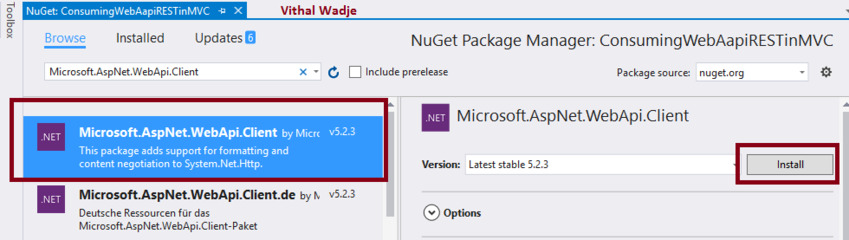
Now, click on Install button after choosing the appropriate version. It will get installed after taking few seconds depending on your internet speed. We have installed necessary NuGet packages to consume Web API REST services in web application. I hope you have followed the same steps.
Step 4. Create Model Class
Now, let us create the Model class named Employee.cs or as you wish, by right clicking on Models folder with same number of entities which are exposing by our hosted Web API REST service to exchange the data. The code snippet of created Employee.cs class will look like this.
Employee.cs
public class Employee
{
public int Id { get; set; }
public string Name { get; set; }
public string City { get; set; }
}
Step 5. Add Controller Class
Now, let us add ASP.NET MVC controller
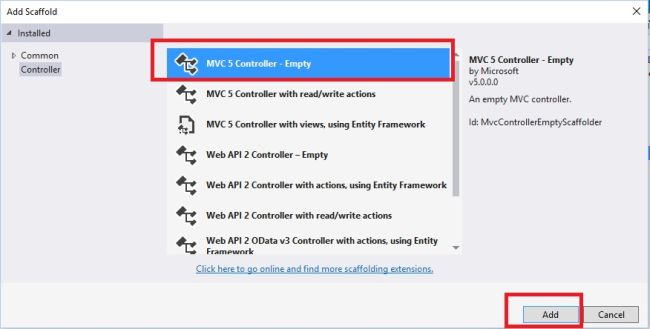
After clicking Add button, it will show in the Window. Specify the Controller name as Home with suffix Controller. Now, let's modify the default code of Home controller .
Our hosted Web API REST Service includes these two methods, as given below.
- GetAllEmployees (GET )
- GetEmployeeById (POST ) which takes id as input parameter
We are going to call GetAllEmployees method which returns the all employee details ,The hosted web api REST service base URL is http://192.168.95.1:5555/ and to call GetAllEmployees from hosted web API REST service, The URL should be Base url+api+apicontroller name +web api method name as following http://192.168.95.1:5555/api/Employee/GetAllEmployees.
In the preceding url
- http://localhost:56290 Is the base address of web API service, It can be different as per your server.
- api It is the used to differentiate between Web API controller and MVC controller request .
- Employee This is the Web API controller name.
- GetAllEmployees This is the Web API method which returns the all employee list.
After modifying the code of Homecontroller class, the code will look like the following.
Homecontroller.cs
using ConsumingWebAapiRESTinMVC.Models;
using Newtonsoft.Json;
using System;
using System.Collections.Generic;
using System.Net.Http;
using System.Net.Http.Headers;
using System.Threading.Tasks;
using System.Web.Mvc;
namespace ConsumingWebAapiRESTinMVC.Controllers
{
public class HomeController : Controller
{
//Hosted web API REST Service base url
string Baseurl = "http://192.168.95.1:5555/";
public async Task<ActionResult> Index()
{
List<Employee> EmpInfo = new List<Employee>();
using (var client = new HttpClient())
{
//Passing service base url
client.BaseAddress = new Uri(Baseurl);
client.DefaultRequestHeaders.Clear();
//Define request data format
client.DefaultRequestHeaders.Accept.Add(new MediaTypeWithQualityHeaderValue("application/json"));
//Sending request to find web api REST service resource GetAllEmployees using HttpClient
HttpResponseMessage Res = await client.GetAsync("api/Employee/GetAllEmployees");
//Checking the response is successful or not which is sent using HttpClient
if (Res.IsSuccessStatusCode)
{
//Storing the response details recieved from web api
var EmpResponse = Res.Content.ReadAsStringAsync().Result;
//Deserializing the response recieved from web api and storing into the Employee list
EmpInfo = JsonConvert.DeserializeObject<List<Employee>>(EmpResponse);
}
//returning the employee list to view
return View(EmpInfo);
}
}
}
}
I hope, you have gone through the same steps and understood about the how to use and call Web API REST service resource using HttpClient .
Step 6. Create strongly typed View
Now, right click on Views folder of the created application and create strongly typed View named by Index by choosing Employee class to display the employee list from hosted web API REST Service, as shown in the following image.
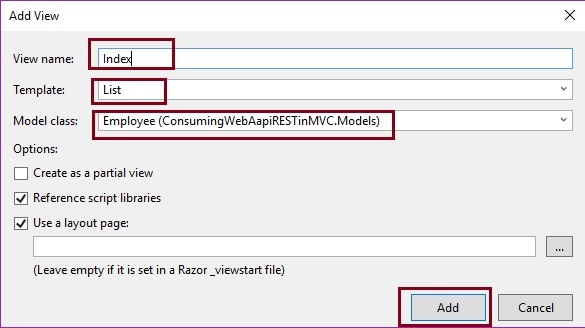
Now, click on Add button. It will create View named index after modifying the default code. The code snippet of the Index View looks like the following.
Index.cshtml
@model IEnumerable<ConsumingWebAapiRESTinMVC.Models.Employee>
@{
ViewBag.Title = "www.compilemode.com";
}
<div class="form-horizontal">
<hr />
<div class="form-group">
<table class="table table-responsive" style="width:400px">
<tr>
<th>
@Html.DisplayNameFor(model => model.Name)
</th>
<th>
@Html.DisplayNameFor(model => model.City)
</th>
</tr>
@foreach (var item in Model) {
<tr>
<td>
@Html.DisplayFor(modelItem => item.Name)
</td>
<td>
@Html.DisplayFor(modelItem => item.City)
</td>
</tr>
}
</table>
</div>
</div>
The preceding View will display all employees list . Now, we have done all the coding.
Step 7. Run the Application
After running the Application, the employee list from hosted web API REST service.
I hope, from the above examples, you have learned how to consume Web API REST Service in ASP.NET MVC using HttpClient.
Note
- Download the Zip file of the Published code to learn and start quickly.
- This article is just a guideline on how to consume Web API REST Service in ASP.NET MVC application using HttpClient.
- In this article, the optimization is not covered in depth; do it as per your skills.