European ASP.NET MVC 4 and MVC 5 Hosting

BLOG about ASP.NET MVC 3, ASP.NET MVC 4, and ASP.NET MVC 5 Hosting and Its Technology - Dedicated to European Windows Hosting Customer

ASP.NET MVC Hosting - HostForLIFE.eu :: Building a User Subscription Module in ASP.NET MVC with C# 14

clock April 29, 2025 10:00 by author Peter

In modern web applications, subscription-based features are essential for managing user access, monetizing content, or offering tiered services. In this guide, we will build a comprehensive User Subscription Module using ASP.NET MVC (Model-View-Controller) and C# 14. The module will support:

  • User registration and login
  • Subscription plan selection
  • Payment integration (mocked)
  • Role-based access based on subscription level
  • Subscription management (upgrade/downgrade/cancel)

We’ll also take advantage of new C# 14 features such as primary constructors, collection expressions, field-backed properties, and extension members to make our code more concise and modern. These features help streamline the codebase and make it easier to read and maintain, especially in large applications with many interrelated components.

By the end of this tutorial, you'll have a functioning module that you can integrate into an existing ASP.NET MVC project. Whether you're building a SaaS platform or a content subscription service, the patterns and practices here will provide a strong foundation for building reliable, scalable subscription systems.

1. Project Setup
The first step in developing our subscription module is to use Visual Studio to create a new ASP.NET MVC application. Our data models, business logic, and user interface elements will be constructed upon this basis. Select the MVC template and set up your authentication preferences according to your user base's requirements when prompted during project creation. In order to enable Entity Framework and ASP.NET Identity, which are essential to our user and subscription management features, we must install a few NuGet packages after building the project. Microsoft, for instance. We may construct our database access layer and Microsoft.AspNet.Identity using EntityFramework. EntityFramework offers the ability to authenticate users.

Install-Package Microsoft.EntityFramework -Version 6.4.4
Install-Package Microsoft.AspNet.Identity.EntityFramework
Install-Package Stripe.net // Optional for real payment integration

These packages lay the groundwork for our entire system. With Entity Framework, we can interact with the database using strongly typed models, and Identity gives us a comprehensive system for managing users and roles. The Stripe package is optional but included for future scalability and integration.

Using NuGet simplifies the setup process and ensures that you get the latest, most secure versions of each dependency. This modular approach also makes the project easier to maintain, since each package can be updated independently of the others.

2. Define Models

To store and manage subscription data, we need to define our data models. These include SubscriptionPlan for defining available plans, UserSubscription to represent a user’s active or past subscriptions, and ApplicationUser which extends ASP.NET Identity’s user model. Each of these models plays a key role in organizing how data is stored and retrieved.

public class SubscriptionPlan
{
    public int Id { get; set; }

    public string Name
    {
        get => field;
        set => field = value ?? throw new ArgumentNullException(nameof(value));
    }

    public decimal Price { get; set; }
    public string Description { get; set; }
    public int DurationInDays { get; set; }
}

public class UserSubscription
{
    public int Id { get; set; }
    public string UserId { get; set; }
    public int PlanId { get; set; }
    public DateTime StartDate { get; set; }
    public DateTime EndDate { get; set; }
    public bool IsActive => DateTime.UtcNow <= EndDate;

    public virtual ApplicationUser User { get; set; }
    public virtual SubscriptionPlan Plan { get; set; }
}

public class ApplicationUser : IdentityUser
{
    public virtual ICollection<UserSubscription> Subscriptions { get; set; }
}

These classes map to tables in our SQL database and help organize our business logic. The use of navigation properties (virtual) allows us to navigate related entities easily when using Entity Framework. The UserSubscription model is especially critical for tracking start and end dates, which will be used to determine access.

In C# 14, field-backed properties like Name in SubscriptionPlan help ensure data integrity with built-in validation. This allows us to enforce rules such as requiring names to be non-null directly in the model, rather than repeating this logic throughout the codebase.

3. Add Subscription Logic to DbContext

Next, we extend our DbContext to include our new models. This allows us to use EF to manage our tables and data.

public class ApplicationDbContext : IdentityDbContext<ApplicationUser>
{
    public DbSet<SubscriptionPlan> SubscriptionPlans { get; set; }
    public DbSet<UserSubscription> UserSubscriptions { get; set; }

    public ApplicationDbContext() : base("DefaultConnection", throwIfV1Schema: false) { }

    public static ApplicationDbContext Create() => new();
}

This DbContext class bridges your application to the database. Entity Framework uses it to perform CRUD operations and generate SQL queries under the hood. The DbSet<T> properties tell EF which entities should be tracked and mapped to database tables.

The constructor and factory method (Create) show how to simplify context initialization, and using the latest syntax from C# 14 makes it even more concise. Keeping the context clean and modular helps when unit testing or transitioning to more advanced patterns like repository or unit-of-work.

4. Seed Subscription Plans
Add seed data to initialize plans in development or production environments.

context.SubscriptionPlans.AddOrUpdate(p => p.Name,
    new SubscriptionPlan { Name = "Free", Price = 0, Description = "Basic access", DurationInDays = 30 },
    new SubscriptionPlan { Name = "Pro", Price = 9.99M, Description = "Pro features", DurationInDays = 30 },
    new SubscriptionPlan { Name = "Enterprise", Price = 29.99M, Description = "All features", DurationInDays = 90 }
);

Seeding is essential to provide default options without requiring manual input every time the database is recreated. This is useful not only in development but also in CI/CD pipelines for automated deployments. These plans can be adjusted or extended later to suit business needs.

This code ensures that users always have valid plans to choose from. It's especially useful when the app is first launched, ensuring a smooth experience from the very first interaction.
5. Controllers and Views
Here’s a controller that uses a primary constructor:
[Authorize]
public class SubscriptionController(ApplicationDbContext db) : Controller
{
    public ActionResult Index() => View(db.SubscriptionPlans.ToList());

    public ActionResult Subscribe(int id) => View(db.SubscriptionPlans.Find(id));

    [HttpPost]
    public ActionResult SubscribeConfirmed(int id)
    {
        var userId = User.Identity.GetUserId();
        var plan = db.SubscriptionPlans.Find(id);

        var subscription = new UserSubscription
        {
            UserId = userId,
            PlanId = plan.Id,
            StartDate = DateTime.UtcNow,
            EndDate = DateTime.UtcNow.AddDays(plan.DurationInDays)
        };

        db.UserSubscriptions.Add(subscription);
        db.SaveChanges();

        return RedirectToAction("MySubscription");
    }

    public ActionResult MySubscription()
    {
        var userId = User.Identity.GetUserId();
        var activeSub = db.UserSubscriptions
            .Include("Plan")
            .Where(s => s.UserId == userId && s.IsActive)
            .OrderByDescending(s => s.EndDate)
            .FirstOrDefault();

        return View(activeSub);
    }
}


This controller manages the user's interaction with subscription plans. It retrieves available plans, handles subscription actions, and displays the user's current subscription. Using C# 14 primary constructors simplifies dependency injection, especially when there are few dependencies.

The controller is tied to Identity for user management, ensuring that actions like subscribing are tied to the correct user context. This integration of business logic and authentication is central to secure and personalized application flows.

6. Access Control Based on Subscription

Create a custom authorization attribute:
public class SubscriptionAuthorizeAttribute : AuthorizeAttribute
{
    protected override bool AuthorizeCore(HttpContextBase httpContext)
    {
        var userId = httpContext.User.Identity.GetUserId();
        var db = new ApplicationDbContext();
        var sub = db.UserSubscriptions.FirstOrDefault(x => x.UserId == userId && x.EndDate >= DateTime.UtcNow);
        return sub != null;
    }
}


Use it like this:
[SubscriptionAuthorize]
public ActionResult PremiumContent()
{
    return View();
}


This custom attribute checks if the logged-in user has an active subscription. It’s a lightweight and reusable solution to protect controller actions or entire controllers. It works well for scenarios where only subscribers should access certain parts of the application.

By encapsulating this logic into an attribute, we keep our controller actions clean and focused on what they need to do, rather than how authorization should be enforced. This improves both readability and maintainability.

7. Optional: Mock Payment Service

Handling payments is a critical part of any subscription system, but during development or for MVP testing, it's useful to mock this functionality. A mock payment service allows us to simulate successful transactions without integrating a third-party provider like Stripe or PayPal.

Below is a simple mock PaymentService class. It returns true to simulate a successful payment transaction, regardless of input. This allows you to develop and test your system logic without incurring real charges or managing payment API credentials.
public class PaymentService
{
    public bool ChargeUser(string userId, decimal amount)
    {
        // Simulate a successful payment
        Console.WriteLine($"Charging user {userId} for ${amount}");
        return true;
    }
}


You can integrate this into your subscription flow by calling it before saving the subscription. For example:
var paymentService = new PaymentService();
if (paymentService.ChargeUser(userId, plan.Price))
{
    var subscription = new UserSubscription
    {
        UserId = userId,
        PlanId = plan.Id,
        StartDate = DateTime.UtcNow,
        EndDate = DateTime.UtcNow.AddDays(plan.DurationInDays)
    };

    db.UserSubscriptions.Add(subscription);
    db.SaveChanges();
}

Using a mock now allows you to fully test your end-to-end subscription logic while making it simple to switch to a real provider later. When you're ready for live payments, just replace it PaymentService with a real implementation that connects to your gateway of choice.

8. Extension Members in C# 14

Use extension members to clean check the premium status:
public static class SubscriptionExtensions
{
    extension(UserSubscription subscription)
    {
        public bool IsPremium => ["Pro", "Enterprise"].Contains(subscription.Plan?.Name);
    }
}


Then in your code:

if (userSubscription.IsPremium)
{
    // Show premium features
}

Extension members let you encapsulate logic related to a class without modifying the class itself. This is ideal for computed properties like determining plan tier. It keeps your domain model lean while making your code more expressive. This feature is especially useful in scenarios where your business logic spans multiple types or you need utility-style operations across many parts of the app. You avoid cluttering your core model with too much logic.

9. Views

Here's a simple Index.cshtml:
@model IEnumerable<SubscriptionPlan>
<h2>Choose a Plan</h2>
@foreach (var plan in Model)
{
    <div>
        <h3>@plan.Name</h3>
        <p>@plan.Description</p>
        <p>Price: [email protected]</p>
        @Html.ActionLink("Subscribe", "Subscribe", new { id = plan.Id })
    </div>
}

This view lists all available subscription plans. Each plan includes a button that links to the subscribe confirmation page. The use of Razor syntax makes it easy to iterate through models and generate dynamic HTML. Views like this help users quickly understand the value proposition of each plan. With Bootstrap or Tailwind CSS, you could further enhance the design for a polished, responsive experience.

Conclusion

We built a user subscription module using ASP.NET MVC and C# 14, leveraging modern language features for better performance and readability. We explored models, controllers, access control, extension methods, and mocked payment processing. This provides a solid foundation for a SaaS or subscription-based application. Next steps might include adding webhook support, real payment integration (e.g., Square, Stripe), user dashboards, or analytics.


ASP.NET MVC Hosting - HostForLIFE.eu :: How to Use View Files to Publish ASP.NET Core MVC Project.NET 8?

clock April 15, 2025 07:29 by author Peter

This walkthrough will address the following questions and teach you how to publish CSHTML files along with the project.

  • How to create an Asp.Net Core MVC Project?
  • What are the settings for the Project file to publish the CSHTML file while publishing?
  • What are the settings to be done on the publish screen or wizards before publishing?

We are using Visual Studio 2022 for this walk-through.


How to create an ASP.NET Core MVC Project?

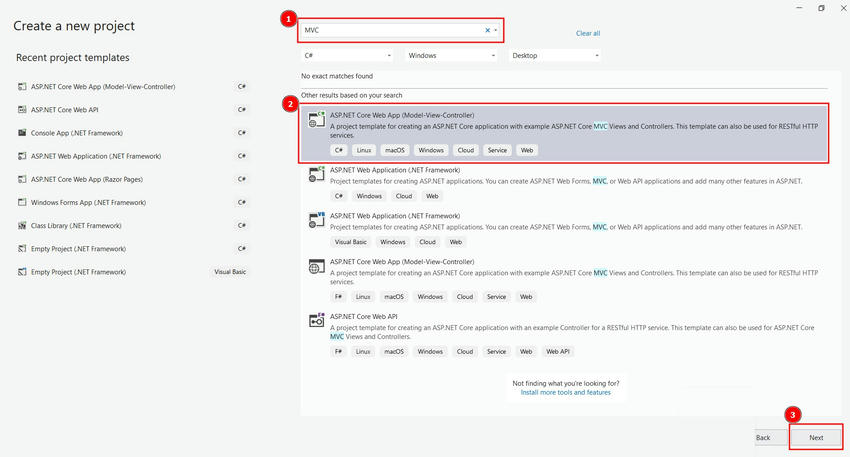
Select ASP.NET Core web App (Model-View-Controller as per IMAGE1.

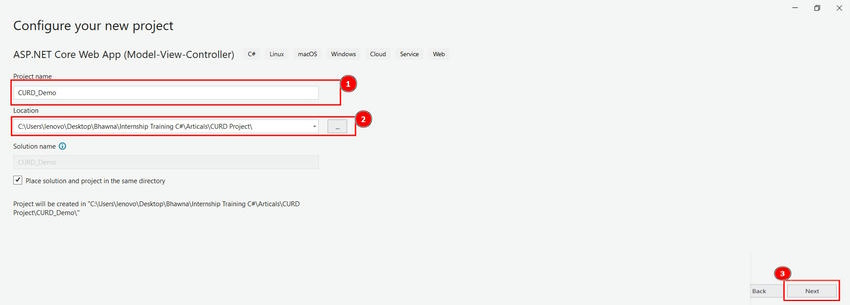
Set the following things in the above image 2:

  • Project name: Set your project name: AspNetMvcNet8Proj.
  • Location: Set your location by clicking… or select previous by clicking on the dropdown list.

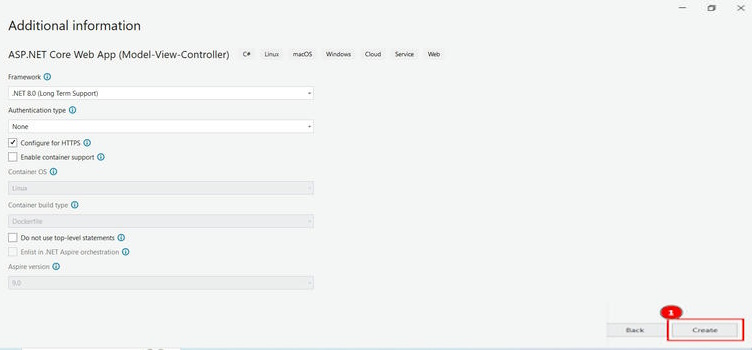
  • Framework: Select your .NET version (6.0, 8.0. . .)

We selected .NET 8

  • Authentication Type: None
  • (You can select as per your requirement – None, Individual Accounts, Microsoft Identity Platform, or Windows)
  • Configure for HTTPS: Set Configure for HTTPS for secure request and response.
  • Enable Container Support: Select Docker for Windows or Linux operating system.

After the above selection, choose as per your project requirement. Click on the CREATE button to proceed toward creating a new project.

Press F5 to run the project.


You can see the above project executed successfully.

The next step is to publish the project with a CSHTML file by default while publishing all views files compiled and output into one DLL (assembly). No external CSHTML published.

What are the settings for the Project file to publish the CSHTML file while publishing?

Right-click on the project
Select “Unload Project”

Default Content:
<Project Sdk="Microsoft.NET.Sdk.Web">

  <PropertyGroup>
    <TargetFramework>net8.0</TargetFramework>
    <Nullable>enable</Nullable>
    <ImplicitUsings>enable</ImplicitUsings>
  </PropertyGroup>

</Project>

Change the file to the following settings:
<Project Sdk="Microsoft.NET.Sdk.Web">

  <PropertyGroup>
    <TargetFramework>net8.0</TargetFramework>
    <Nullable>enable</Nullable>
    <ImplicitUsings>enable</ImplicitUsings>
    <PreserveCompilationContext>true</PreserveCompilationContext>
    <MvcRazorCompileOnPublish>false</MvcRazorCompileOnPublish>

    <!-- To publish views instead of views.dll -->
    <EnableDefaultRazorGenerateItems>false</EnableDefaultRazorGenerateItems>
    <EnableDefaultRazorComponentItems>false</EnableDefaultRazorComponentItems>
    <CopyRazorGenerateFilesToPublishDirectory>true</CopyRazorGenerateFilesToPublishDirectory>
  </PropertyGroup>

  <ItemGroup>
    <PackageReference Include="Microsoft.AspNetCore.Mvc.Razor.RuntimeCompilation" Version="8.0.0" />

    <!-- Explicitly include each .cshtml file in the subfolders under Views -->
    <Content Update="Views\**\*.cshtml" CopyToPublishDirectory="PreserveNewest" />
  </ItemGroup>

</Project>

After updating the above settings in the file, close the file again, right-click on the project, and click on “Reload Project”. In the Next step, we set and configure Publish settings.

What are the settings to be done on the publish screen or wizards before publishing?

After Right click on the project, select the “Publish” option.

Select the FOLDER option to publish on the Local Folder and click on the NEXT button.

Select or create a folder where you want to publish the project. Click on the FINISH button after you select the folder location.

Click on Show All settings to set your publish setting more precisely, or directly click on the PUBLISH button. Output of Publish Button:

Error Message: Views\Shared\_Layout.cshtml.css(0,0): Error BLAZOR102: The scoped css file 'Views\Shared\_Layout.cshtml.css' was defined, but no associated razor component or view was found for it.

You can see the error thrown by the publishing process in (Image-10 and Image-11).

Error Solution

Solution 1
You can delete the CSS file “View/Shared/Layout.cshtml” and publish it again.

Solution 2
If you want CSS style or content of the CSS file “View/Shared/Layout.cshtml,” you can create a new CSS file and move this file into the “wwwroot/css” folder and assign the link in the “view/shared/Layout.cshtml” file.


VIEW published successfully

Folder View

You can see in Image-13 and Image-14 Views files were published successfully.


ASP.NET MVC Hosting - HostForLIFE.eu :: Understanding Controller In ASP.NET MVC

clock March 26, 2025 08:41 by author Peter

Here, in this article, we will see more about the controllers and understanding about RouteConfig File. I will be using the same solution which we had used in our previous article. Thus, let's start an introduction.

Open our solution MVCTestApplication, given below:

You can see in our Home Controller class; we have two Action methods; one is Index() and other is HelloAll() . The Index methods are invoked, when you run the Application. Now, just run the Application and you will see:

By default, Hello CsharpCorner has been displayed, because in RouteConfig file, the default action method is Index and we had written “Hello HostForLIFE ” in Index Action Method.

Now, let's type the URL i.e. ControllerName/ActionName and see what we are getting:

As you can see, we had got the same result: “Hello CsharpCorner.” Here, Home is our ControllerName and Index is our Action Method . Similarly, we will see our second Action Method i.e. HelloAll()

As you can see, HelloAll() Action Method has been invoked. Now, let's understand RouteConfig and how these controllers are displayed. Just Open global.asax file in our solution and you will see:


Open this file and you will see Application_start () method, in which you will see this line as:

Go to its Definition section, it will redirect to RouteConfig File and you will see:


In RouteConfig class, we have default document as:
name:”Default”-Specifies the name

URL: “{Controller}/{action}/{id}” – This line actually says that when you run the solution by default, it will first fire the controllername/index and then Id.

Defaults: As you can see, the default controller' s Home is called and is followed by the action Index and then Id. Note: Here the specified Id is normal and if you want to retrieve the results, you have to pass the Id.

Now, we will see how to pass the Id in our URL and see what output we are getting. Hence, let's start:

In our Homecontroller class, in our Index Action method, just pass a parameter as a string name and return as a name . Now, we will run the Application and see what values we are getting.

When you run the solution, it will ask for the name. Now, let's pass the name in our URL:

As you can see in the output, given above, it had passed Id=1 and got Id=1. Just type Home/index/1 an you will get the output, given above. Now, we will modify the code, write the name and see the output that we will get:

I had passed the name. Now, run the Application. You will see the following output:

Now, just pass the Id and name. We saw the last Id, how to specify the Id or name and how to display it. Now, let's get back to the RouteConfig file and understand the line, given below:

Here, what this line says is: Whatever you are doing in the Controller or in the Index Action method, a trace is getting generated in the form of axd format. We will see how these are generated and how to generate a resource.axd trace. Just open web.config file, shown below:

Just write this line in your web.config file.

Now, run the Application and type trace.axd. You will see the following output:

Click the View details and you will get all the details, shown below:

Scroll down at the bottom of the page and you will see that its path, query string and its respective URLs are:

The trace.axd is useful, when you have built a huge application and you require tracing to find out the details. Conclusion: This was controllers in MVC. I hope you found this article helpful.


ASP.NET MVC Hosting - HostForLIFE.eu :: Using External Projects And Assemblies To Extend MVC Controllers

clock March 18, 2025 07:30 by author Peter

I thought I would take a moment to discuss how one might handle the situation after seeing a recent question on Stack Overflow about how to extend an existing ASP.NET MVC Controller that was present within another assembly or project (i.e., external to the "main" MVC application).

The Fundamental Concept
Assuming you are working on two projects,

  • ProjectA is your primary MVC program.
  • ProjectB is merely a basic class library.

Your goal is to add more controller actions or functionality to an already-existing controller in Project A. These extra steps will originate from a separate project or assembly and won't be included in your primary application. When developing client-specific functionality—that is, when a client requests a certain behavior that might not be pertinent in the main application—this could be helpful.

Thus, for example, your ProjectA controller definition could resemble this:

    namespace ProjectA.Controllers    
    {  
        // This is the primary controller that we want to extend  
        public class FooController : ApplicationController  
        {  
              public ActionResult Index()  
              {  
                  return Content("Foo");  
              }  
        }  
    }   


And you might have a similar class in ProjectB that resembles this,
    namespace ProjectB.Controllers    
    {  
        // You want to essentially add the Bar action to the existing controller  
        public class CustomFooController : FooController  
        {  
            public ActionResult Bar()  
            {  
                return Content("Bar");  
            }  
        }  
    }   


You want to allow all of the different clients to access Foo, but perhaps only a certain client to be exposed to Foo/Bar.

Breaking Down The Steps
This process requires a few different steps that will need to be done to get everything working as expected, which I'll review below,

  • Inheritance
    • The custom controller will inherit from the controller in our main application to streamline extension.
  • Routing
    • Routing can be a tricky business, so using attribute routing might ease some of the burden of fighting with route tables or conflicting controller names.
  • Build Events
    • Build events are just one simple approach to actually getting the necessary .dll files from your custom project into your main application so they can be used.

Taking Advantage of Inheritance
If you actually want to extend the functionality of an existing controller, then inheritance might be the way to go. Inheriting from the controller within your main application will allow you to take advantage of any existing attributes, overridden methods, or underlying base controllers that might already place.

You'll just want to add a reference to your ProjectA project in ProjectB and then target the appropriate controller you wish to inherit from,
    // Other references omitted for brevity  
    using ProjectA.Controllers;  
      
    namespace ProjectB.Controllers    
    {  
        public class CustomFooController : FooController  
        {  
            public ActionResult Bar()  
            {  
                return Content("Bar");  
            }  
        }  
    }   


Leverage Attribute Routing
Doing this kind of thing can get a bit dicey with regards to routing. When you attempt to create this new controller within your current application, it'll attempt to use the existing routes defined in that application, which can lead to naming conflicts and ambiguity if you aren't careful.

Based on the code provided, this means you could easily access /CustomFoo/Bar, but not /Foo/Bar like you might prefer. Thankfully, attribute routing can help with this.

Simply decorate your custom controller action with a [Route] attribute that indicates how you wish to access it,
    [Route("Foo/Bar")]  
    public ActionResult Bar()    
    {  
         return new Content("Bar");  
    }   

This will let MVC know to use map this action to the Foo/Bar URL before taking a look at some of the other routes. In order for attribute routing to work as expected, you'll need to ensure to call the MapMvcAttributeRoutes() method within the RouteConfig.cs file of your main application,
    public static void RegisterRoutes(RouteCollection routes)    
    {  
        // This is important to write up your Route Attributes  
        routes.MapMvcAttributeRoutes();  
      
        // Route declarations omitted for brevity  
    }   


Note
If you were extending a controller that was present within an MVC Area, you would do the same thing within the RegisterArea() method in your AreaRegistration.cs file,
    public override void RegisterArea(AreaRegistrationContext context)    
    {  
        // Wire up any attribute based routing  
        context.Routes.MapMvcAttributeRoutes();  
      
        // Area routing omitted for brevity  
    }   

Properly Scoping Routes
One additional change that will need to be made within your main application will be to prioritize routes within its own namespace. The MapRoute() method supports an overload to handle this via the namespaces parameter.

Set the namespaces parameter to point to the namespaces that you wish to prioritize, namely those in your main application (i.e. "ProjectA.Controllers").
    routes.MapRoute(    
       name: "Default",  
       url: "{controller}/{action}/{id}",  
       defaults: new { controller = "Foo", action = "Index", id = UrlParameter.Optional },  
       // This will prioritize routes within your main application  
       namespaces: new[] { "ProjectA.Controllers"}  
    );   

Putting It All Together
At this point, code-wise, everything should be in place. The only thing left to do is actually get the code from your ProjectB into ProjectA so that you can run it. There are a variety of ways to handle this and configure this entire process, but a very simple one might be through a Build Event. Build Events allow you to execute a bit of code during various stages of the build process.

We are interested in defining a Post-Build event that will move our ProjectB.dll file into the bin directory of ProjectA, which might look like this,
xcopy /E /Y /S "$(ProjectName).dll" "$(SolutionDir)\ProjectA\Bin\"

This would be defined under ProjectB > Properties > Build Events > Post-Build Event Command Line as seen below,

Now if you perform a Rebuild Solution, you should see that all of the proper files have been added to your bin directory as expected,

Now if you were to navigate to /Foo within your application, you would see the content that you might expect,

And likewise, /Foo/Bar should now hit your custom code and do exactly what you'd imagine,


ASP.NET MVC Hosting - HostForLIFE.eu :: ASP.NET MVC Membership Provider

clock March 13, 2025 09:16 by author Peter

Here, we will learn how to use ASP.NET MVC membership provider, create users and their roles using ASP.NET MVC membership, assign roles to users in ASP.NET MVC membership provider, and remove users from roles once we have all user roles from ASP.NET MVC membership. Finally, we will demonstrate how to implement security in ASP.NET MVC applications.

To make security in ASP.NET MVC application use the following method to create the security in ASP.NET MVC application.

Authentication And Authorization in ASP.NET MVC
Authentication: It is the process of checking that the user is valid or not.
Authorization: It is the process of checking that the user is applicable for the process or not.

Membership providers in ASP.NET MVC
Roles based authentication for user in ASP.NET MVC.

We will learn how to create a database for the membership provider in ASP.NET MVC and how to assign role to user, we will create a registration page to understand this.

Let’s create a application for membership provider ASP.NET MVC.
Step 1: Go to visual studio and click on new project -> a window will open from here select a 'ASP.NET MVC4 web application' and give the name for this project in my case I give it as “MVCMembershipProvider "

Now click ok and select a template as Internet Application and engine as Razor engine , after sleeting all these click ok. it will click a solution project this will contain .css file ,script file and MVC application structure.

Step 2: After creation of application let's create a database for this and give the name for this database i gave it as 'MVCApp' and then add a connection string to the database.
    <connectionStrings>  
        <add name="DBConnection" connectionString="Data Source=MUNESH-PC;Database=MVCApp;UID=sa;Password=*****" providerName="System.Data.SqlClient" />  
    </connectionStrings>  


After adding the connection string to the project now we need to create membership tables to the database but before this go to the models folder and have a look on AccountModels.cs class. this class automatically create when we select mvc application as Internet application.

AccountModel.cs class contain following methods.

Now for creating membership tables in database initialize the connection in globel.asax . here we will use code first approach for that we need to add following code in this class.
For adding data table in database membership we need to add a line of code in Global.asax.
WebSecurity.InitializeDatabaseConnection("DBConnection", "UserProfile", "UserId","UserName", autoCreateTables: true);  
Here namespace for WebSecurity is “using WebMatrix.WebData;”

WebSecurity.InitializeDatabaseConnection

Definition for the InitializeDatabaseConnection is:
Public static void InitializeDatabaseConnection (string connectionStringName, stringuserTableName, string userIdColumn, string userNameColumn, bool autoCreateTables);  

connectionStringName: It the name of database table where user information stored.
userTableName: It contain user profile information.
userIdColumn: This column name of table contain user ID this should be integer.
userNameColumn: Column name of table contain user name. This column is basically used to match profile data of user with membership account data.

autoCreateTables: True to indicate that user profile and membership tables should be created if they do not exist; false to indicate that tables should not be created automatically. Although the membership tables can be created automatically, the database itself must already exist.

Now globel.asax page will look like:

Now after all this configuration let's run your application and see the ur hoe page and click on register link which is your page's right side. After running your application you go to the database and see the table, it will generate the following tables for us.

When you will click on registration link the following screen will open with 3 fields.

We can add more fields to this view, for making changes in registration view 1st weneed to add field in database and the  table name is “UserProfile”;


Here we added 3 columns as shown above; now we need to add these column parameters in registration model, it is in Account.cs class which is available in Model.
Code for registration model is:
    public class RegisterModel  
    {  
        [Required]  
        [Display(Name = "User name")]  
        public string UserName  
        {  
            get;  
            set;  
        }  
        [Required]  
        [StringLength(100, ErrorMessage = "The {0} must be at least {2} characters long.", MinimumLength = 6)]  
        [DataType(DataType.Password)]  
        [Display(Name = "Password")]  
        public string Password  
        {  
            get;  
            set;  
        }  
        [DataType(DataType.Password)]  
        [Display(Name = "Confirm password")]  
        [Compare("Password", ErrorMessage = "The password and confirmation password do not match.")]  
        public string ConfirmPassword  
        {  
            get;  
            set;  
        }  
        [Required]  
        [Display(Name = "EmailID")]  
        public string EmailId  
        {  
            get;  
            set;  
        }  
        [Required]  
        [Display(Name = "address")]  
        public string Address  
        {  
            get;  
            set;  
        }  
        [Required]  
        [Display(Name = "Mobile No")]  
        public string MobileNo  
        {  
            get;  
            set;  
        }  
    }  


Add these field in registration view:
    <fieldset>  
        <legend>Registration Form</legend>  
        <ol>  
            <li>  
                @Html.LabelFor(m => m.UserName) @Html.TextBoxFor(m => m.UserName)  
            </li>  
            <li>  
                @Html.LabelFor(m => m.Password) @Html. PasswordFor (m => m.Password)  
            </li>  
            <li>  
                @Html.LabelFor(m => m.ConfirmPassword) @Html.PasswordFor(m => m.ConfirmPassword)  
            </li>  
            <li>  
                @Html.LabelFor(m => m.EmailId) @Html.TextBoxFor(m => m.EmailId)  
            </li>  
            <li>  
                @Html.LabelFor(m => m.Address) @Html.TextBoxFor(m => m.Address)  
            </li>  
            <li>  
                @Html.LabelFor(m => m.MobileNo) @Html.TextBoxFor(m => m.MobileNo)  
            </li>  
        </ol>  
        <input type="submit" value="Register" />  
    </fieldset>  


Now if you will run your application and you will see registration page it will look with new fields.

Now according to this we need to add or handle these field in controller also so for that go to Account Controller and we have to make changes in HTTPPost method of registration Action.

Now the code for this action according to old registration model is:
WebSecurity.CreateUserAndAccount(model.UserName, model.Password);  

Now will make changes in this according to new model:
    WebSecurity.CreateUserAndAccount(model.UserName, model.Password,  
    new  
    {  
       EmailID = model.EmailId,  
       Address = model.Address,  
       MobileNo = model.MobileNo  
    }  
    );  

So the code for the Registration action method is:

    [HttpPost]  
    [AllowAnonymous]  
    [ValidateAntiForgeryToken]  
    public ActionResult Register(RegisterModel model)  
    {  
        if (ModelState.IsValid)  
        {  
            // Attempt to register the user  
            try  
            {  
                WebSecurity.CreateUserAndAccount(model.UserName, model.Password,  
                    new  
                    {  
                        EmailID = model.EmailId,  
                            Address = model.Address,  
                            MobileNo = model.MobileNo  
                    }  
                );  
                WebSecurity.Login(model.UserName, model.Password);  
                return RedirectToAction("Index", "Home");  
            }  
            catch (MembershipCreateUserException e)  
            {  
                ModelState.AddModelError("", ErrorCodeToString(e.StatusCode));  
            }  
        }  
        // If we got this far, something failed, redisplay form  
        return View(model);  
    }  


Now run your application and go to registration page and enter some data to fields then save it ,data will save in database.


ASP.NET MVC 6 Hosting - HostForLIFE.eu :: How Do You Make An ASP.NET Core MVC Application?

clock November 9, 2023 06:17 by author Peter

We will learn how to develop an ASP.NET Core MVC web application step by step in this tutorial. Web applications built with ASP.NET Core MVC are noted for their adaptability, scalability, and ability to meet a wide range of business requirements. By the end of this tutorial, you will have a firm grasp on the core principles and practical actions required to get started with your own ASP.NET Core MVC project.

What exactly is ASP.NET Core?
Microsoft's ASP.NET Core is an open-source, cross-platform framework for developing modern, cloud-based, and scalable online applications.

What are the benefits of using ASP.NET Core?

  • ASP.NET Core is cross-platform, which means you can write and run applications on Windows, Linux, and macOS. Because of its adaptability, it is suited for a wide range of situations.
  • High Performance: ASP.NET Core is built for speed and scalability. It employs asynchronous programming and supports real-time technologies such as WebSockets and SignalR.
  • Open Source: Because ASP.NET Core is open source, you can view the source code and contribute to the community. It's being developed openly on GitHub, which encourages cooperation and improvement.
  • ASP.NET Core emphasizes current development approaches such as dependency injection, integrated support for popular front-end frameworks such as Angular and React, and built-in support for RESTful APIs.
  • Cross-platform Tools: ASP.NET Core comes with a set of cross-platform tools, including the .NET CLI, which simplifies development, testing, and deployment processes.
  • Support for Microservices: ASP.NET Core is well-suited for microservices architecture, allowing you to build modular, independently deployable services that can scale individually.
  • Integrated Security: ASP.NET Core provides built-in security features, such as identity and authentication, that help developers protect their applications against common threats.
  • Extensible Middleware: Middleware in ASP.NET Core is highly customizable, allowing developers to add or remove components easily to tailor their application's behavior.
  • Docker Support: ASP.NET Core has excellent support for Docker containers, making it straightforward to containerize your applications for easier deployment and scaling.
Let's get started with an ASP.NET Core MVC web application.

Step 1: Launch Visual Studio.

Launch Visual Studio (I'm using 2022).
When Visual Studio opens, in the image below, click on Create a New Project.

Step 2: Select a Project Template
All languages, All platforms, and All project kinds will be displayed. As seen in the figure below, I used the ASP.NET Core Web App (Model-View-Controller) Template.


After selecting a project template, click Next.
Step 3: Establish the Project Name and Location

The following options are available in the project configuration window:,

  • Project Name: You can name your project whatever you want.
  • Location: Select where you want to save the project files on your machine's hard drive. I chose the Project/VS folder on the machine's E drive, which is presumably different on your PC.
  • Solution Name: The solution name is auto-generated based on the project name, but you can alter it to something else.

In addition, there is a checkbox. If you checked it, the solution file (.sln) and project files will be saved in the same directory. Now, select the bare minimum of details for clarity, as illustrated in the image below.

After defining the necessary details, click Next.

Step 4: Select a Target Framework
Choose the target framework.NET 6, which is the most recent, or choose according on your needs. Skip the rest of the details for clarity, as illustrated in the image below.


After providing the required details, click the Create button. It will create the ASP.NET Core MVC web application, as shown in step 5.

Step 5. Understanding ASP.NET Core MVC Folder Structure

The following is the default folder structure of the ASP.NET Core ASP.NET MVC application.


Let's understand the preceding project folder structure in brief.

In ASP.NET Core MVC, the project structure is organized to promote a clean and maintainable architecture. Here's a typical project structure for an ASP.NET Core MVC application.

  • Controllers: This is where you define your controller classes. Controllers handle incoming HTTP requests and contain action methods.
  • Models: In the Models folder, you define your data models. These models represent the structure of your application's data. You might have separate subfolders for different types of models (e.g., ViewModels, DataModels).
  • Views: The Views folder is where you store your view files. These views are responsible for rendering the HTML that's sent to the client. You often have subfolders here corresponding to the controller names, which helps organize the views.
  • wwwroot: This folder contains static files like CSS, JavaScript, and images that are directly accessible to the client.
  • Startup.cs: This file contains the startup configuration for your application, including configuring services and middleware.
  • appsettings.json: This JSON file is used to store configuration settings for your application, such as database connection strings.
  • Program.cs: This is the entry point of your application. It contains the Main method that sets up the web host.
  • wwwroot: This is where you place static files, such as CSS, JavaScript, and images, that are served directly to clients.
  • Areas (optional): If you are using areas in your application to organize controllers and views, you will have a folder for each area.
  • Data (optional): You can have a separate folder for data-related code, such as database context and migrations.
  • Services (optional): You can create a folder for service classes that provide business logic and are used by your controllers.
  • ViewComponents (optional): If you are using view components, you can organize them in this folder.
  • Filters (optional): You may create custom action filters and store them in this folder.
  • Extensions (optional): For extension methods and helper classes that can be reused throughout the application.
  • Resources (optional): For storing localization resources if you are supporting multiple languages.
  • Tests (optional): If you are writing unit tests, you can create a separate folder for your test projects.
  • Properties (auto-generated): This folder may include the AssemblyInfo.cs file and other assembly-related information.

It's important to note that while this is a common structure, it's not set in stone, and you can adapt it to fit the specific requirements of your project. ASP.NET Core is flexible in this regard, allowing you to organize your code as you see fit while following best practices for maintainability and scalability.

Step 6. Run the ASP.NET Core MVC Application

You can run the application with default contents or let open the Index.cshtml file and put some contents there. Now press F5 on the keyboard or use the run option from Visual Studio to run the application in the browser. After running the application, it will show in the browser, as shown in the following image.

I hope you learnt how to develop the ASP.NET Core MVC Web Application from the accompanying step-by-step tutorial.


ASP.NET MVC 6 Hosting - HostForLIFE.eu :: Dapper ASP.NET Core MVC CRUD Application

clock October 25, 2023 07:48 by author Peter

ASP.NET Core MVC (Model-View-Controller) is a sophisticated web application framework. It offers an organized approach to developing web applications by splitting application logic into separate components. When it comes to data access, developers have several options. Dapper, a lightweight and efficient Object-Relational Mapping (ORM) library, is one of the more popular choices.


In this post, we'll look at how to build a comprehensive CRUD (Create, Read, Update, Delete) application with ASP.NET Core MVC and Dapper, combining the characteristics of both technologies to create a strong web application.

What exactly is Dapper?
Dapper is a.NET micro ORM library created by the Stack Overflow team. Dapper, in contrast to full-featured ORMs such as Entity Framework, keeps things simple and lightweight. It allows you to map database records to.NET objects without adding unnecessary complexity. Dapper is well-known for its speed and efficiency, making it an ideal candidate for high-performance applications.

Using ASP.NET Core MVC with Dapper to Create a CRUD Application

You'll need the following components to construct a comprehensive CRUD application with ASP.NET Core MVC and Dapper:

  • Visual Studio or any other code editor will suffice.
  • SQL Server or another database server may be used.
  • ASP.NET Core MVC application.

Let us now begin the process.

Make an ASP.NET Core MVC Project.
Begin by launching Visual Studio and creating a new ASP.NET Core MVC project. You can select the "Web Application" template and the "MVC" project type.

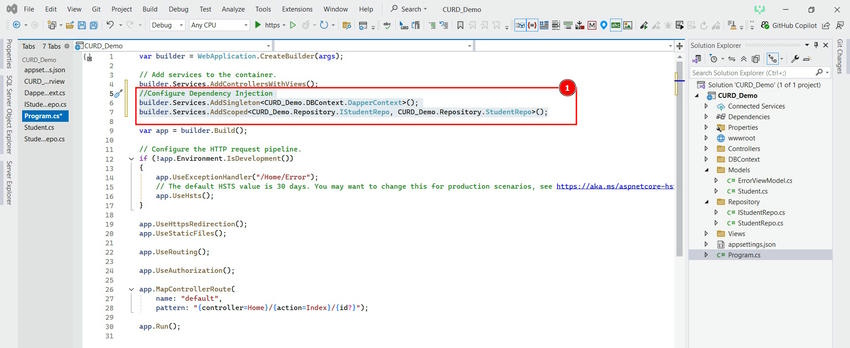
Step 1

Step 2


Step 3

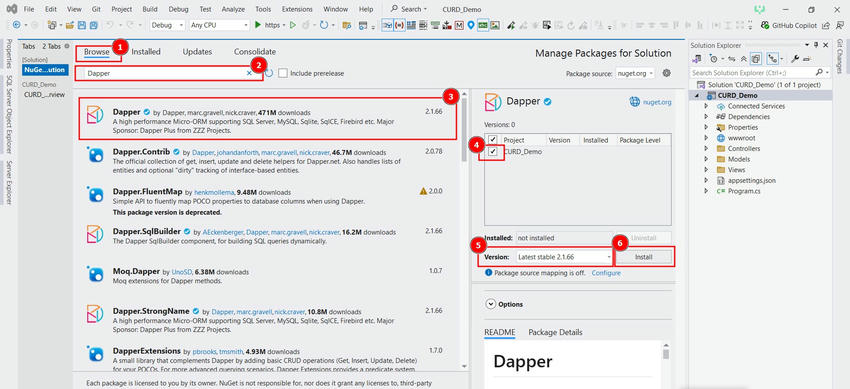
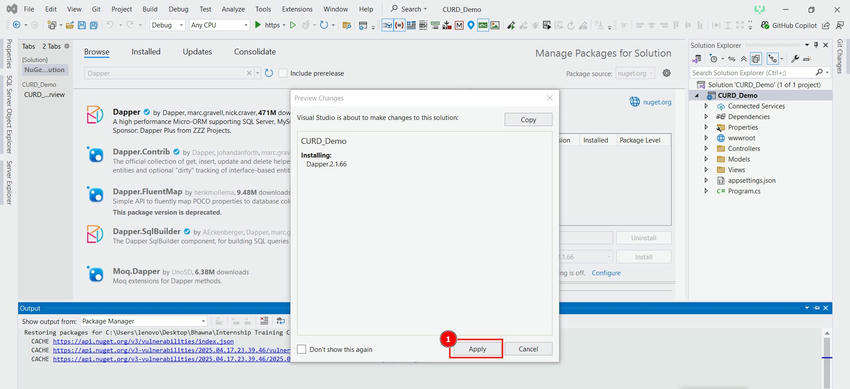
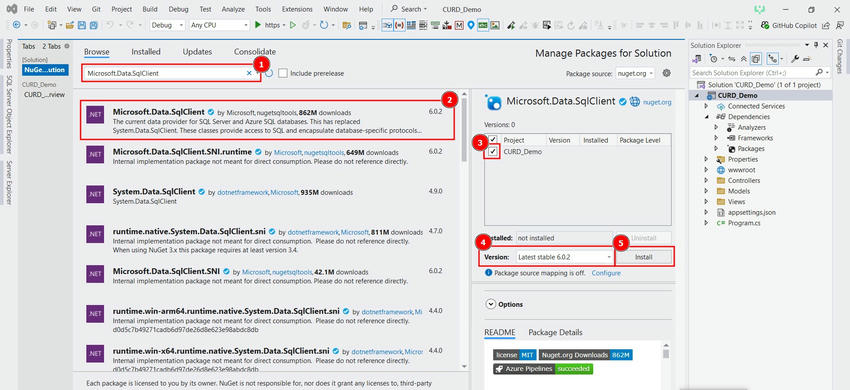
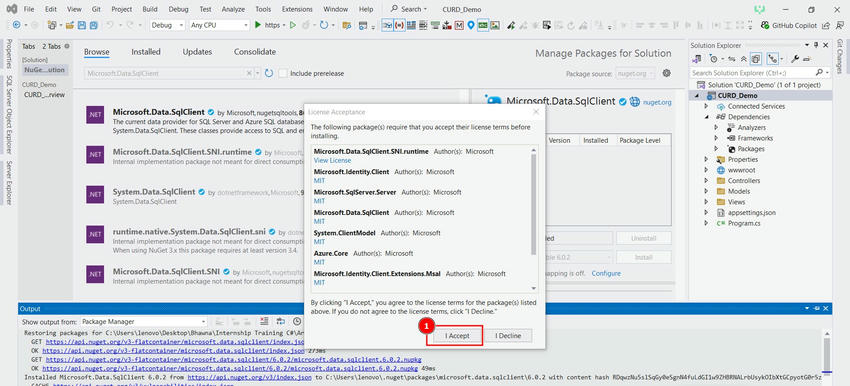
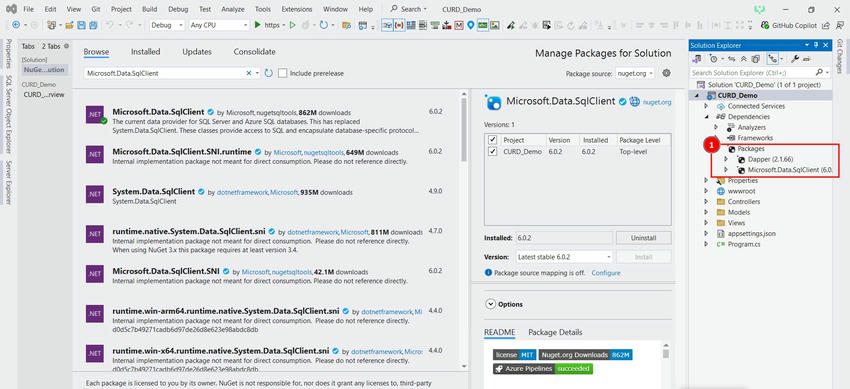
Install Dapper
Install the Dapper library via NuGet Package Manager.

Database Interconnection
Connect to your SQL Server via a database connection. To connect to the database, use the connection string in your application.
Step 1. Launch SQL Server Management Studio (SSMS).
Step 2: Establish a connection to a SQL Server instance by entering the server name and authentication credentials.
Step 3: In the Object Explorer, right-click on the destination server's "Databases" folder and select "New Database."

Step 4: In a SQL Server database, follow these steps to build a table and CRUD (build, Read, Update, Delete) stored procedures for that table.
Make a Table
CREATE TABLE dbo.Person(
Id INT PRIMARY KEY IDENTITY,
FullName NVARCHAR (100) NOT NULL,
Email NVARCHAR (100) NOT NULL,
[Address] NVARCHAR (200) NOT NULL
);

Create CRUD Stored Procedures

/* CREATE OPERATION */
CREATE PROCEDURE sp_add_person(
    @name NVARCHAR(100),
    @emil NVARCHAR(100),
    @address NVARCHAR(200)
)
AS
BEGIN
    INSERT INTO dbo.Person (FullName, Email, [Address])
    VALUES (@name, @emil, @address)
END

/* READ OPERATION */
CREATE PROCEDURE sp_get_Allperson
AS
BEGIN
    SELECT * FROM dbo.Person
END

/* UPDATE OPERATION */
CREATE PROCEDURE sp_update_person(
    @id INT,
    @name NVARCHAR(100),
    @email NVARCHAR(100),
    @address NVARCHAR(200)
)
AS
BEGIN
    UPDATE dbo.Person
    SET FullName = @name, Email = @email, [Address] = @address
    WHERE Id = @id
END

/* DELETE OPERATION */
CREATE PROCEDURE sp_delete_person(@id INT)
AS
BEGIN
    DELETE FROM dbo.Person WHERE Id = @id
END

Create a Data Access Layer
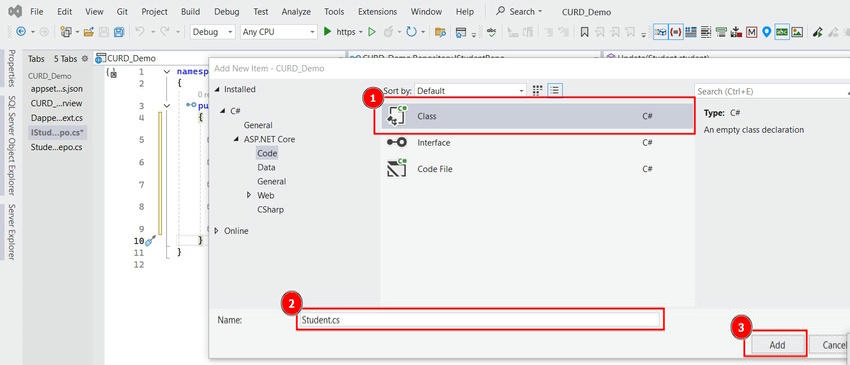
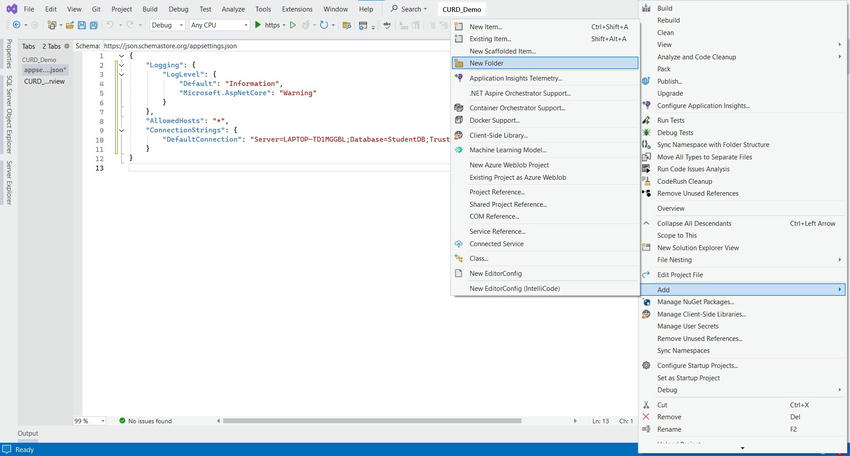
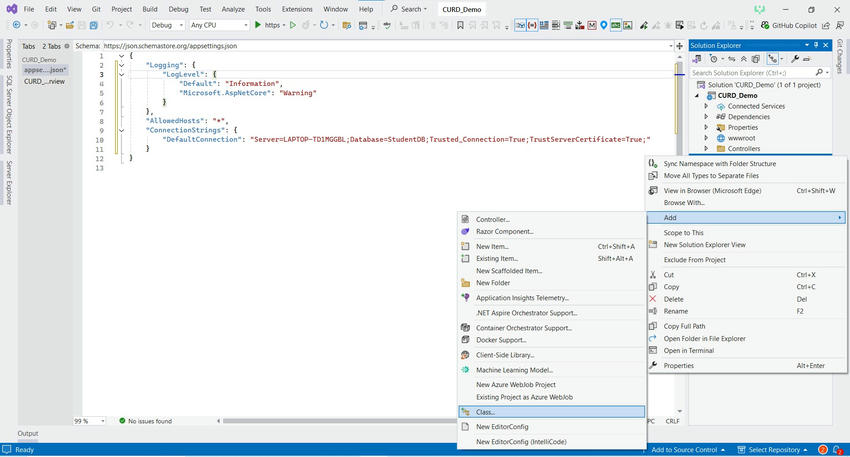
Start by Adding a new Class Library project to your project.

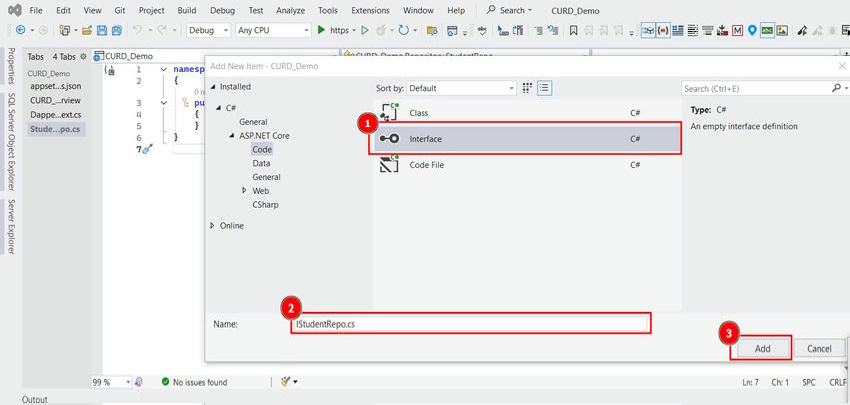
Step 1

Step 2

Step 3. Define a model class to represent the data you want to manipulate.

public class Person
    {
        public int Id { get; set; }
        [Required]
        public string? FullName { get; set; }
        [Required]
        public string? Email { get; set; }
        public string? Address { get; set; }
    }

Step 4: Using Dapper, create a data access layer. This layer will include methods for carrying out CRUD tasks on your model objects.

using Microsoft.Extensions.Configuration;
using Dapper;
using Microsoft.Data.SqlClient;
using System.Data;

namespace DapperMVC.Data.DataAccess
{
    public class SqlDataAccess: ISqlDataAccess
    {
        private readonly IConfiguration _configuration;
        public SqlDataAccess(IConfiguration configuration)
        {
            _configuration = configuration;
        }
        public async Task<IEnumerable<T>> GetData<T, P>(string spName, P parameters, string connectionId = "conn")
        {
            try {
                string connectionString = _configuration.GetConnectionString(connectionId);
                using (IDbConnection dbConnection = new SqlConnection(connectionString))
                {
                    return await dbConnection.QueryAsync<T>(spName, parameters, commandType: CommandType.StoredProcedure);
                }
            }
            catch (Exception ex)
            {
                throw;
            }

        }
        public async Task<bool> SaveData<T>(string spName, T parameters, string connectionId = "conn")
        {
            try
            {
                using IDbConnection connection = new SqlConnection(_configuration.GetConnectionString(connectionId));
                await connection.ExecuteAsync(spName, parameters, commandType: CommandType.StoredProcedure);
                return true;
            }
            catch (Exception ex)
            {

                return false;
            }
        }
    }
}

using DapperMVC.Data.DataAccess;
using DapperMVC.Data.Models.DbModel;
using Microsoft.Extensions.Configuration;

namespace DapperMVC.Data.Repository
{
    public class PersonRepository : IPersonRepository
    {
        private readonly ISqlDataAccess _dataAccess;
        private readonly IConfiguration _configuration;
        public PersonRepository(ISqlDataAccess db, IConfiguration configuration)
        {
            _dataAccess = db;
            _configuration = configuration;
        }
        public async Task<bool> AddAsync(Person person)
        {
            try
            {
                await _dataAccess.SaveData("sp_add_person", new
                {
                    Name = person.FullName,
                    email = person.Email,
                    address = person.Address
                });
                return true;
            }
            catch (Exception ex)
            {
                return false;
            }
        }
        public async Task<bool> UpdateAsync(Person person)
        {
            try
            {
                await _dataAccess.SaveData("sp_update_person", new
                {
                    id = person.Id,
                    Name = person.FullName,
                    email = person.Email,
                    address = person.Address
                });
                return true;
            }
            catch (Exception ex)
            {
                return false;
            }
        }
        public async Task<bool> DeleteAsync(int id)
        {
            try
            {
                await _dataAccess.SaveData("sp_delete_person", new { Id = id });
                return true;
            }
            catch (Exception ex)
            {
                return false;
            }
        }
        public async Task<Person?> GetByIdAsync(int id)
        {
            IEnumerable<Person> result = await _dataAccess.GetData<Person, dynamic>
                ("sp_get_person", new { Id = id });
            return result.FirstOrDefault();
        }
        public async Task<IEnumerable<Person>> GetAllPersonAsync()
        {
            string query = "sp_get_Allperson";
            return await _dataAccess.GetData<Person, dynamic>(query, new { });
        }
    }
}

Actions of the Controller
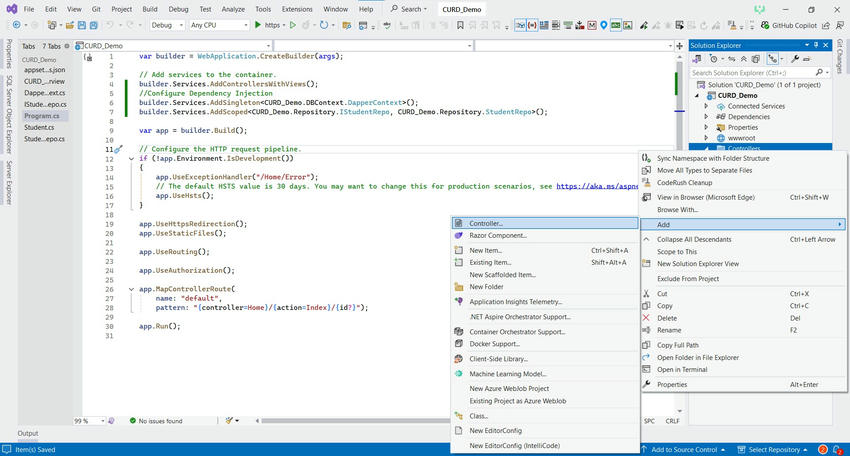
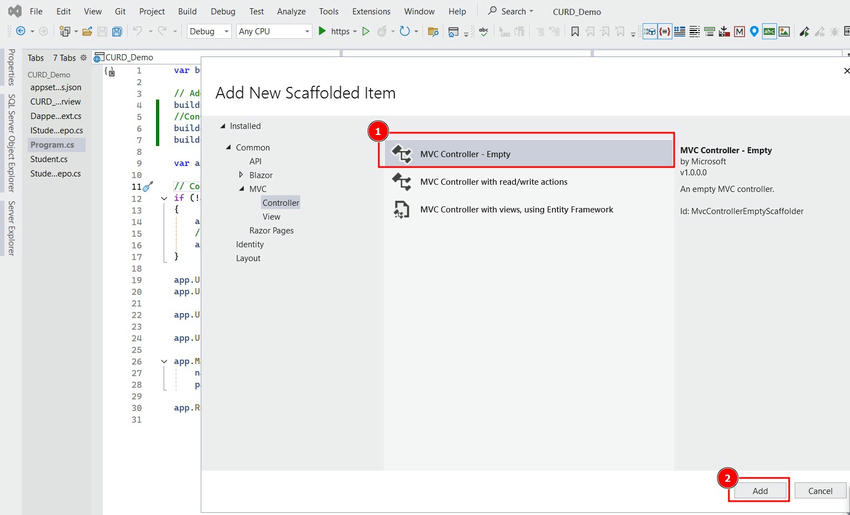
Make controller actions that communicate with your data access layer. These actions will process requests, call the appropriate data access methods, and return views.

public IActionResult Person()
{
    return View();
}

[HttpGet]
public async Task<IActionResult> Add()
{
    return View();
}

[HttpPost]
public async Task<IActionResult> Add(Person person)
{
    try
    {
        if (!ModelState.IsValid)
        {
            return View(person);
        }
        bool addPerson = await _personRepo.AddAsync(person);
        if (addPerson)
        {
            TempData["msg"] = "Successfully Added";
        }
        else
        {
            TempData["msg"] = "Could Not Added";
        }
    }
    catch (Exception ex)
    {
        TempData["msg"] = "Could Not Added";
    }
    return RedirectToAction(nameof(Add));
}

[HttpGet]
public async Task<IActionResult> Edit(int id)
{
    var person = await _personRepo.GetByIdAsync(id);
    if (person == null)
    {
        throw new Exception();
    }
    return View("Edit", person);
}

[HttpPost]
public async Task<IActionResult> Edit(Person person)
{
    try
    {
        if (!ModelState.IsValid)
        {
            return View(person);
        }
        var updateResult = await _personRepo.UpdateAsync(person);
        if (updateResult)
        {
            TempData["msg"] = "Edit Successfully.";
            return RedirectToAction(nameof(DisplayAllPerson));
        }
        else
        {
            TempData["msg"] = "Could Not Edit.";
            return View(person);
        }
    }
    catch (Exception ex)
    {
        TempData["msg"] = "Could Not Edit.";
        return View(person);
    }
}

[HttpGet]
public async Task<IActionResult> DisplayAllPerson()
{
    try
    {
        var personAll = await _personRepo.GetAllPersonAsync();
        return View(personAll);
    }
    catch (Exception ex)
    {
        return View("Error", ex);
    }
}

[HttpGet]
public async Task<IActionResult> Delete(int id)
{
    var deleteResult = await _personRepo.DeleteAsync(id);
    return RedirectToAction(nameof(DisplayAllPerson));
}

Views
Create views for your controller actions. You can use Razor views to generate HTML content and display data to users.

Implement the CRUD Operations
Create controller actions and views to handle Create, Update, and Delete operations. You'll need forms in your views for creating and editing data and buttons or links to delete records.

Test and Debug

Test your application thoroughly, making sure all CRUD operations work as expected. Debug any issues that arise.

Output


When paired with Dapper, ASP.NET Core MVC provides a robust and efficient framework for developing CRUD apps. Because of Dapper's lightweight and high-performance data access capabilities, it is an excellent solution for applications that require speed and simplicity. You can construct a powerful CRUD application that properly manages data and delivers a seamless user experience by following the steps indicated in this article. As you gain experience with Dapper and ASP.NET Core MVC, you can add more features and functionalities to your application.


ASP.NET MVC 6 Hosting - HostForLIFE.eu :: Using Elastic Search With ASP.NET MVC

clock September 8, 2023 09:06 by author Peter

In this article, we are going to learn how to use elastic search with ASP.NET MVC in step by step way.We are already in the fifth part of this article. Till now, we have covered a lot in elastic search starting from how to configure elastic search to how to insert data into elastic search, further using Kibana for visualizing data, and at last, we have learned about Logstash and how to insert a bulk of data from MSSQL and MYSQL into elastic search. Now, it’s time to learn how we can query elastic search documents from ASP.NET MVC because at last, we need to show data to end-users in a fast way as possible.


If you are a beginner and you do not have an idea what is elastic search but you want to know it, then the below links will help you to kick start with elastic search.

Create ASP.NET MVC Application
Let’s create a simple ASP.NET MVC application with the name “WebElasticSearch”.

After entering the name, it will show another window for project selection. There, just choose “MVC” Template and change Authentication to “No Authentication” and click OK to create the project.

Project Structure

Next, we are going to install NuGet packages.            

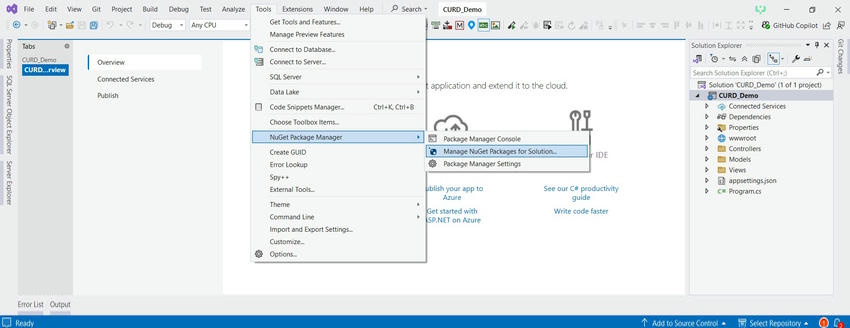
Installing NuGet Packages

We are going to install 2 NuGet packages.

    Net
    Nest

After installing the NuGet package, next, we are going to add a new connection folder.
Creating Connector folder and adding ConnectionToEs class

After creating the folder, next, we are going to add ConnectionToEs class.
In this class, we are going to create a connection to elastic search instance. As you can see in the below code, we have provided elastic search URI http://localhost:9200/".

Code Snippet

    using Elasticsearch.Net;  
    using Nest;  
    using System;  
    using System.Collections.Generic;  
    using System.Linq;  
    using System.Web;  
      
    namespace WebElasticSearch.Connector  
    {  
        public class ConnectionToEs  
        {  
            #region Connection string to connect with Elasticsearch  
      
            public ElasticClient EsClient()  
            {  
                var nodes = new Uri[]  
                {  
                    new Uri("http://localhost:9200/"),  
                };  
      
                var connectionPool = new StaticConnectionPool(nodes);  
                var connectionSettings = new ConnectionSettings(connectionPool).DisableDirectStreaming();  
                var elasticClient = new ElasticClient(connectionSettings);  
      
                return elasticClient;  
            }  
     
            #endregion Connection string to connect with Elasticsearch  
        }  
    }  

After creating the connection class, next, we are going to add a Controller and create View for search.

Add Controller “AllSearch”

Adding a controller with name “AllSearch”.

After adding the Controller, next, we are going to add an action method and in the constructor, we are going to instantiate the connection object.

Adding Action Method
In this part, we are going to add Action method “Search” and create an instance of the ConnectionToEs class.

Code Snippet
    using System.Web.Mvc;  
    using WebElasticSearch.Connector;  
      
    namespace WebElasticSearch.Controllers  
    {  
        public class AllSearchController : Controller  
        {  
            private readonly ConnectionToEs _connectionToEs;  
            public AllSearchController()  
            {  
                _connectionToEs = new ConnectionToEs();  
            }  
      
            [HttpGet]  
            public ActionResult Search()  
            {  
                return View("Search");  
            }  
        }  
    }  

After adding “Search” Action Method, we are going to add a View for that action method.

Now, we are going to design the View.

Designing View

In this part, we are going to design the View with 2 textboxes.

    jobtitle
    nationalidnumber

Below is document of “humanresource” index in which, first we are going to create a search on both these parameters.


After designing the search View, next, we are going to add a class “humanresource” and properties similar to “humanresource” index and type “doc”.

Adding Class similar to “Humanresource” Index and type “Doc”
    public class Humanresources  
    {  
     public string nationalidnumber { get; set; }  
     public string LoginID { get; set; }  
     public string OrganizationNode { get; set; }  
     public int? OrganizationLevel { get; set; }  
     public string jobtitle { get; set; }  
     public string BirthDate { get; set; }  
     public string MaritalStatus { get; set; }  
     public string Gender { get; set; }  
     public DateTime? HireDate { get; set; }  
     public bool? SalariedFlag { get; set; }  
     public int? VacationHours { get; set; }  
     public int? SickLeaveHours { get; set; }  
     public bool? CurrentFlag { get; set; }  
     public string rowguid { get; set; }  
     public DateTime? ModifiedDate { get; set; }  }

After adding humanresource class next we are going to add “DataSearch” Action Method which will take both this parameter as input and provide response in json.

Adding DataSearch Action Method
The request to elastic search we are going to send using “Nest” Client.

In this action Method the first thing we have done is to connect to elastic search using connectionEs class, then we have provided index “humanresources” and type “doc”, next we can provide size of document as output I have provided as 50, at last comes query in this we are using “match” query for that we are passing field jobtitle and in query we are going to pass value which we have searched.

Code Snippet
    public JsonResult DataSearch(string jobtitle, string nationalIDNumber)  
        {  
            var responsedata = _connectionToEs.EsClient().Search<Humanresources>(s => s  
                                    .Index("humanresources")  
                                    .Type("doc")  
                                    .Size(50)  
                                    .Query(q => q  
                                        .Match(m => m  
                                            .Field(f => f.jobtitle)  
                                            .Query(jobtitle)  
                                        )  
                                    )  
                                );  
      
            var datasend = (from hits in responsedata.Hits  
                            select hits.Source).ToList();  
      
            return Json(new { datasend, responsedata.Took }, behavior: JsonRequestBehavior.AllowGet);  
        }  

After creating Action Method and setting up search with Nest, next we are going to call this Action Method using AJAX and then display this result on View. Since we get the response as JSON, I am going to use a client-side grid from DevExpress.

Calling Datasearch Action Method using Ajax and Displaying Response in Grid

Code Snippet
    <script>  
        $(document).ready(function () {  
      
            $("#btnsubmit").on("click", function () {  
      
                if ($("#txtjobTitle").val() === "" && $("#txtnationalIDNumber").val() === "") {  
                    alert("Provide Details to Search !");  
                }  
                else {  
      
                    var obj = {};  
                    obj.jobTitle = $.trim($("#txtjobTitle").val());  
                    obj.nationalIDNumber = $.trim($("#txtnationalIDNumber").val());  
      
                    var apiUrl = "@Url.Action("DataSearch", "AllSearch")";  
      
                    $.ajax({  
                        type: "POST",  
                        contentType: 'application/json',  
                        url: apiUrl,  
                        dataType: "json",  
                        data: JSON.stringify(obj),  
                        crossDomain: true,  
                        success: function (data) {  
                            var response = data;  
      
                            if (data.datasend.length <= 0) {  
                                alert("No Data Found!!");  
                            } else {  
      
                                var timetook = data.Took;  
                                $('div.total-title').text(timetook + " millisecond");  
      
                                $("#gridContainer").dxDataGrid({  
                                    dataSource: data.datasend,  
                                    showColumnLines: false,  
                                    showRowLines: true,  
                                    rowAlternationEnabled: true,  
                                    showBorders: true,  
                                    paging: {  
                                        pageSize: 50  
                                    },  
                                    scrolling: {  
                                        mode: "infinite" // or "virtual" | "infinite"  
                                    },  
                                    pager: {  
                                        showPageSizeSelector: false,  
                                        allowedPageSizes: [5, 10, 20],  
                                        showInfo: true  
                                    },  
                                    columns: [  
                                        {  
                                            caption: "JobTitle",  
                                            width: 350,  
                                            fixed: true,  
                                            dataField: "jobtitle"  
                                        },  
                                        {  
                                            caption: "NationalIDNumber",  
                                            width: 300,  
                                            fixed: true,  
                                            dataField: "nationalidnumber"  
                                        },  
                                         "MaritalStatus",  
                                         "Gender",  
                                         "SalariedFlag",  
                                         "VacationHours",  
                                         "SickLeaveHours",  
                                         "CurrentFlag"  
                                    ]  
                                });  
      
                            }  
                        },  
                        error: function (xhr, err) {  
                            alert("readyState: " + xhr.readyState + "\nstatus: " + xhr.status);  
                            alert("responseText: " + xhr.responseText);  
                        }  
      
                    });  
      
                }  
      
            });  
      
        });  
      
    </script>  

Markup of Grid
    <div class="panel panel-default">  
        <div class="panel-heading">Output</div>  
        <div class="panel-body">  
            <div class="row">  
                <div class="col-lg-12">  
                    <div id="gridContainer"></div>  
                </div>  
            </div>  
        </div>  
    </div>   

We have set up everything. Let’s run the code and see the output.

Output

Let’s see in Debug Mode how it works.

Searching Values


Getting Response

Single Document View

Let us now make the search conditional, i.e., the user can use any combination to search.

If the user searches data by Jobtitle only, then he will get response according to jobtitle. If a user does search with nationalidnumber, then he will get response according to it. Finally, the combination of both (Jobtitle+ nationalidnumber) can also be used to search, then the user will get response according to it.

Code Snippet
    public JsonResult DataSearch(string jobtitle, string nationalIDNumber)  
          {  
      
              if (!string.IsNullOrEmpty(jobtitle) && !string.IsNullOrEmpty(nationalIDNumber))  
              {  
                  var responsedata = _connectionToEs.EsClient().Search<Humanresources>(s => s  
                                   .Index("humanresources")  
                                   .Type("doc")  
                                   .Size(50)  
                                   .Query(q => q  
                                       .Match(m => m  
                                           .Field(f => f.jobtitle)  
                                           .Query(jobtitle)  
                                       )  
                                       && q  
                                       .Match(m => m  
                                           .Field(f => f.nationalidnumber)  
                                           .Query(nationalIDNumber)  
                                   ))  
                               );  
      
                  var datasend = (from hits in responsedata.Hits  
                                  select hits.Source).ToList();  
      
                  return Json(new { datasend, responsedata.Took }, behavior: JsonRequestBehavior.AllowGet);  
      
              }  
              else if (!string.IsNullOrEmpty(jobtitle))  
              {  
                  var responsedata = _connectionToEs.EsClient().Search<Humanresources>(s => s  
                                  .Index("humanresources")  
                                  .Type("doc")  
                                  .Size(50)  
                                  .Query(q => q  
                                      .Match(m => m  
                                          .Field(f => f.jobtitle)  
                                          .Query(jobtitle)  
                                      )));  
      
                  var datasend = (from hits in responsedata.Hits  
                                  select hits.Source).ToList();  
      
                  return Json(new { datasend, responsedata.Took }, behavior: JsonRequestBehavior.AllowGet);  
              }  
              else if (!string.IsNullOrEmpty(nationalIDNumber))  
              {  
                  var responsedata = _connectionToEs.EsClient().Search<Humanresources>(s => s  
                                  .Index("humanresources")  
                                  .Type("doc")  
                                  .Size(50)  
                                  .Query(q => q  
                                      .Match(m => m  
                                          .Field(f => f.nationalidnumber)  
                                          .Query(nationalIDNumber)  
                                      )));  
                  var datasend = (from hits in responsedata.Hits  
                                  select hits.Source).ToList();  
      
                  return Json(new { datasend, responsedata.Took }, behavior: JsonRequestBehavior.AllowGet);  
              }  
              return Json(data: null, behavior: JsonRequestBehavior.AllowGet);  
      
          }  


Output


These are simple examples which will help you to start using elastic search with ASP.NET Application. There are lots of filters and ways to write query in Elastic using “Nest” in ASP.NET.

Finally, we have learned how to simply query elastic search using “Nest” Client and display data in grid.


About HostForLIFE.eu

HostForLIFE.eu is European Windows Hosting Provider which focuses on Windows Platform only. We deliver on-demand hosting solutions including Shared hosting, Reseller Hosting, Cloud Hosting, Dedicated Servers, and IT as a Service for companies of all sizes.

We have offered the latest Windows 2016 Hosting, ASP.NET Core 2.2.1 Hosting, ASP.NET MVC 6 Hosting and SQL 2017 Hosting.


Tag cloud

Sign in