For those of you using ASP.NET MVC and hoping to receive a little guidance on how to implement a jQuery UI DatePicker widget on a date input field, as well as the appropriate way to pass dates from the view back to the controller, the following article is just for you.
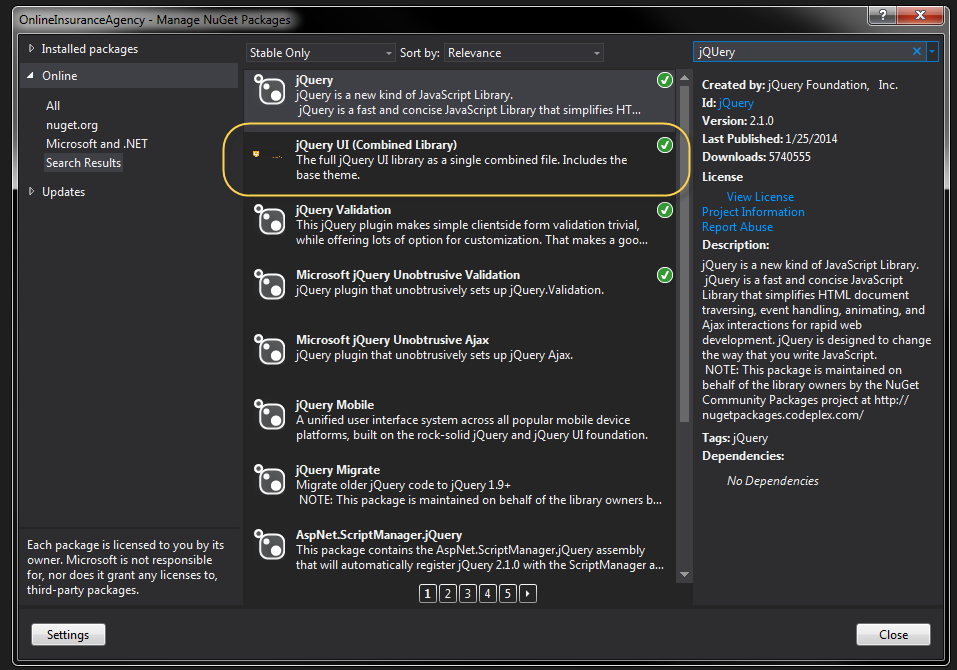
The first gotcha was to download the entire jQuery UI (Combined Library) package from Nuget. Downloading the older jQuery UI DatePicker package has some incompatibilities with the jQuery core framework that the bootstrap template needs to function correctly.

The next step is to extend the model you are using to support a datetime field you’d like to manage with the jQuery UI DatePicker. Take a look at the DateOfBirth field in the code below.
public class RegisterViewModel
{
[Required]
[Display(Name = "User name")]
public string UserName { get; set; }
[Required]
[Display(Name = "Email Address")]
public string EmailAddress { get; set; }
[Required]
[Display(Name = "Date of Birth")]
public DateTime DateOfBirth { get; set; }
Extending the view to support this datetime field is pretty straight forward razor coding. The one thing to notice in this piece of code is the “datefield” css class used in the TextBoxFor method. We’ll be using the class later on to allow for easier jQuery UI DatePicker widget initialization. It also allows for more reusability across your applications.
<div class="form-group">
@Html.LabelFor(m => m.DateOfBirth, new { @class = "col-md-2 control-label" })
<div class="col-md-10">
@Html.TextBoxFor(m => m.DateOfBirth, new { @class = "form-control datefield" })
</div>
</div>
The code to initialize any jQuery UI DatePicker widgets is only 3 lines of code. We utilize the “datefield” css class here as a generic selector so all input fields with this class will transform into jQuery UI DatePicker widgets.
$(function () {
$(".datefield").datepicker();
});
The final touch is to include all required .js and .css files necessary to a common layout which provides this codes use throughout your web application. If you are concerned about page load times you can cherry pick where you’d like these includes to go.
<div class="container body-content">
@RenderBody()
<hr />
<footer>
<p>© @DateTime.Now.Year - My ASP.NET Application</p>
</footer>
</div>
@Scripts.Render("~/bundles/jquery")
@Scripts.Render("~/bundles/bootstrap")
<link href="~/Content/themes/base/jquery.ui.core.css" rel="stylesheet" />
<link href="~/Content/themes/base/jquery.ui.datepicker.css" rel="stylesheet" />
<link href="~/Content/themes/base/jquery.ui.theme.css" rel="stylesheet" />
<script src="~/Scripts/jquery-ui-1.10.4.js"></script>
<script src="~/Scripts/Common/DatePickerReady.js"></script>
@RenderSection("scripts", required: false)
</body>
</html>
The nice thing about this approach is that ASP.NET MVC5 takes care of all the model binding for you since the jQuery UI DateTime picker sets the input field as a valid date value that native model binding understands. By the time you get to your controller you’ll have your datetime value set.
// POST: /Account/Register
[HttpPost]
[AllowAnonymous]
[ValidateAntiForgeryToken]
public async Task<ActionResult> Register(RegisterViewModel model)
{
if (ModelState.IsValid)
{
var user = new ApplicationUser() { UserName = model.UserName };
var result = await UserManager.CreateAsync(user, model.Password);
if (result.Succeeded)
{
await SignInAsync(user, isPersistent: false);
var message = new EmailMessage();
message.ToEmail = model.EmailAddress;
message.Subject = "Insurance Website Registration";
message.IsHtml = false;
message.Body =
String.Format("You have succesfully registered for Vanderbuilt Insurance with the following" +
"username: {0}", model.UserName);
var status = EmailService.SendEmailMessage(message);
return RedirectToAction("Index", "Home");
}
else
{
AddErrors(result);
}
}
// If we got this far, something failed, redisplay form
return View(model);
}