Here, we'll discover how to use our ASP.NET MVC application's Facebook login. These days, every commercial website has an external login feature that allows users to log in using social media sites like Facebook, Google, Twitter, and others. similar to Amazon and Flipkart.

We will now learn how to provide a Facebook login.
Click "New Project" in Visual Studio. A window will then appear. Choose "Asp.net MVC4 web application" and give it a name (in my example, "FacebookLoginMVCApplication").
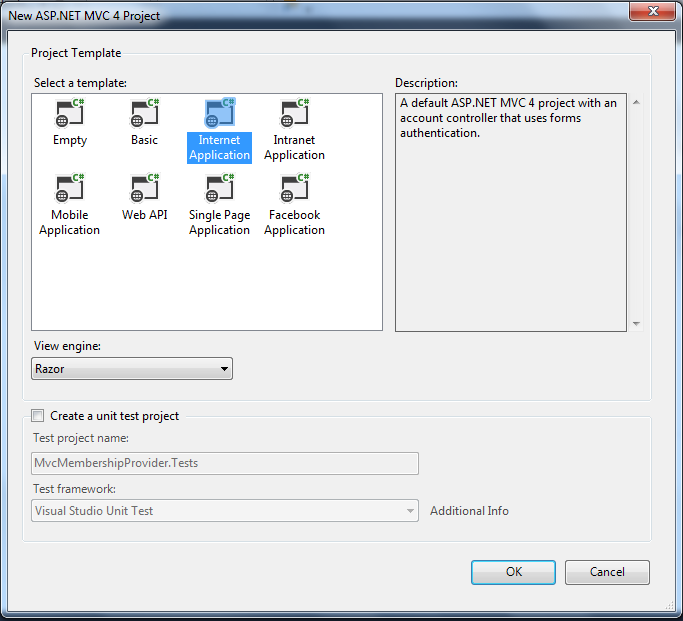
Now click ok and select a template as Internet Application and engine as Razor engine, after sleeting all these click ok. It will click a solution project this will contain .Css file ,script file and MVC application structure.
After creation of application let's create a database for this and give the name for this database i gave it as 'MVCApp' and then add a connection string to the database.
<connectionStrings>
<add name="DefaultConnection" connectionString="Data Source=MUNESH-PC;Database=MVCApp;UID=sa;Password=*****" providerName="System.Data.SqlClient" />
</connectionStrings>
If you are creating a new connection string then existing connection string in ewb config file we have removed the following line of code from the "InitializeSimpleMembershipAttribute.cs" which is available in filter folder because it gives a double connection existing run time error.
// WebSecurity.InitializeDatabaseConnection("DefaultConnection", "UserProfile", "UserId", "UserName", autoCreateTables: true);
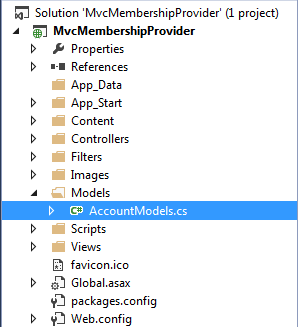
After adding the connection string to the project now we need to create membership tables to the database but before this go to the models folder and have a look on AccountModels.cs class. This class is automatically created when we select mvc application as Internet application.
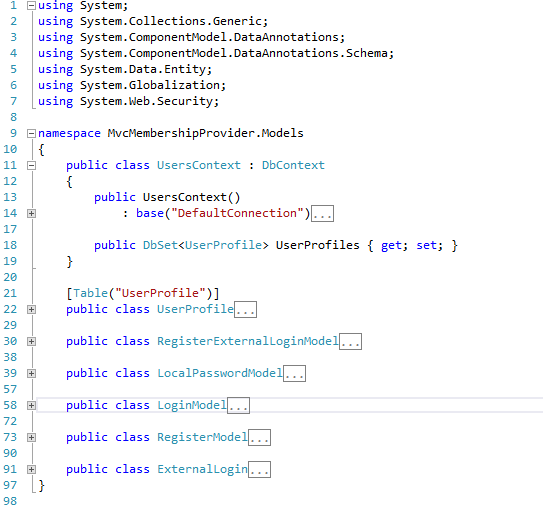
AccountModel.cs class contain following methods.
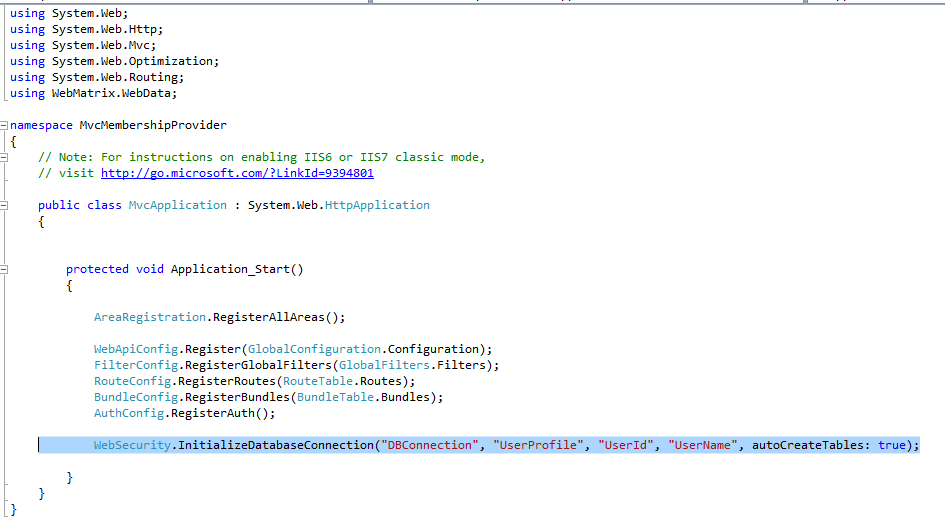
Now for creating membership tables in database initialize the connection in globel.asax. Here we will use code first approach for that we need to add following code in this class.
For adding data table in database membership we need to add a line of code in Global.asax.
WebSecurity.InitializeDatabaseConnection("DBConnection", "UserProfile", "UserId", "UserName", autoCreateTables: true);
Here namespace for WebSecurity is “using WebMatrix.WebData;”
WebSecurity.InitializeDatabaseConnection
Definition for the InitializeDatabaseConnection is,
public static void InitializeDatabaseConnection (string connectionStringName, string userTableName, string userIdColumn, string userNameColumn, bool autoCreateTables);
connectionStringName - It the name of database table where user information stored.
UserTableName - It contains user profile information.
UserIdColumn - This column name of table contains user ID this should be integer.
UserNameColumn
Column name of table contains user name. This column is basically used to match profile data of user with membership account data.
AutoCreateTables
True to indicate that user profile and membership tables should be created if they do not exist; false to indicate that tables should not be created automatically. Although the membership tables can be created automatically, the database itself must already exist.
Now globel.asax page will look like.
Now after all this configuration let's run your application and see the url home page and click on register link which is your page right side. After running your application you go to database and see the table, it will generate following tables for us,

AuthConfig file in Asp.net MVC application
This AuthConfig file is exist under “App_start”s folder. It is automatically created by the asp.net mvc application when we create a project.
This AuthConfig.cs file contains the entire external client as comment by default. So we need to uncomment for auth config for faceBook then the code we like following.
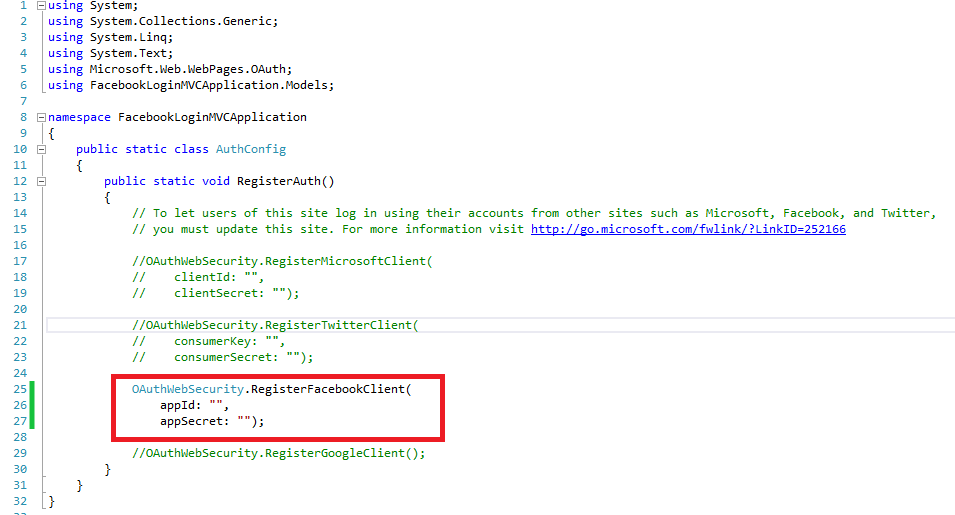
At this time if you will run your application it will give error that you can’t be put empty value for “appID,secreted”. For that we need to register in facebook.
Register MVC application with facebook
Before running mvc application we have to pass appID and secret id so for that we need to register in facebook or login if you have account in facebook, after loggin in go to the URL and register there. There will be register button at right click side at top.
After registering you need to create Appid for your website, it will redirect to that page after registering or you can go to this URL and fill the information which it is asking like the following snapshot. From here click on create new App id it will open a window.
There I gave display name as "dotnet" and Email and category I selected as “Education and after that click on create App ID. After click on this, your account will be created and it will redirect to the following page where it will ask security answer for selecting image,

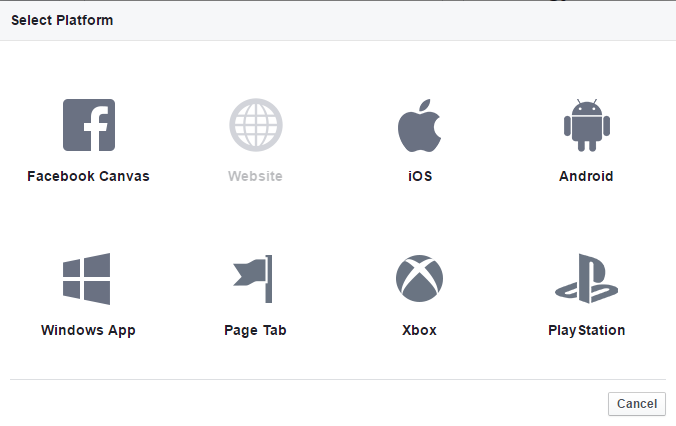
From here you have to select Website. After selecting add platform a small panel will popup asking Site URL here you will be adding your project URL like http://localhost:63695/.To see where project URL is just right click on Project then select Properties like as shown below.
After selecting Properties a new window will open inside that select Web Menu just below Build at bottom of page you will see Project URL which we highlighted in yellow here project URL like http://localhost:63695/.Just copy that URL.
After selecting click ok then a window will open. Here you can see your app id and Appsecret on Dashboard section. Now go to setting and on basic section enter field and app domain as empty after that click on add platform and select website. When you will click on add flat form following window will open.

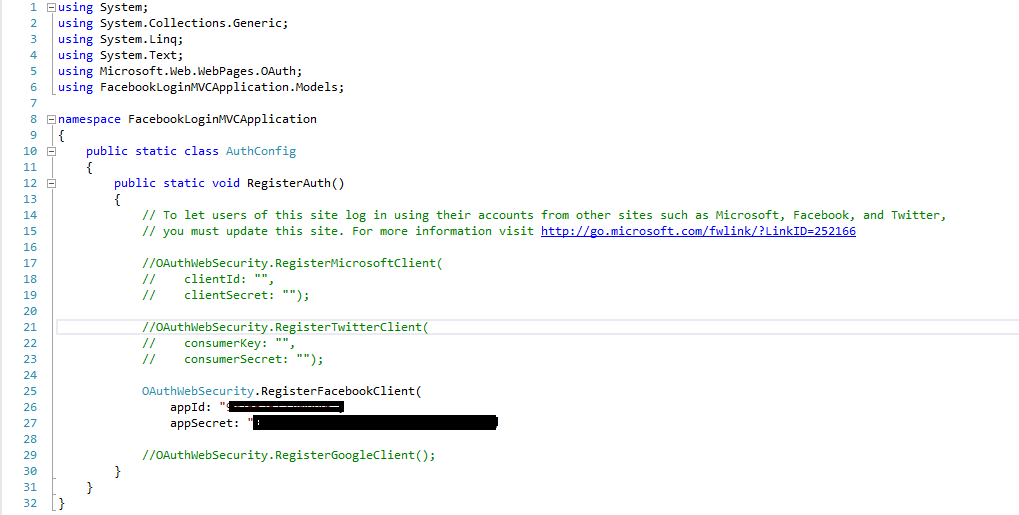
After copying just paste that URL inside Site URL (http://localhost:63695/) and then click on save changes button. After that just copy App ID and App Secret and just add in AuthConfig.cs files.
After adding just save your application then Run application. Following is our login page after adding oAuth facebook login in ASP.NET MVC application.
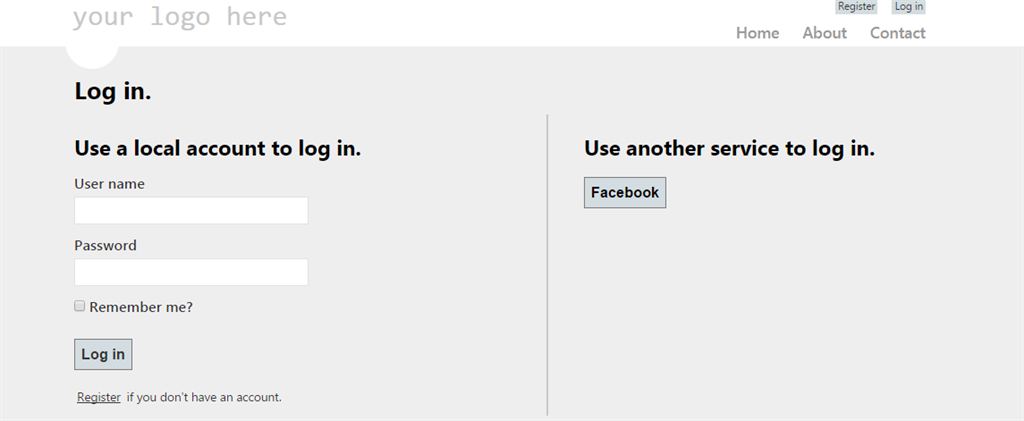
Here you will see a Facebook button on right part of login page. Now just click on this Facebook button then it will redirect you to Facebook login page ,here you enter Facebook credentials and then login in to Facebook. After logging in in to Facebook now a new dialog will pop up for allowing App to take your all profile information which you provided in facebook (like name, profile picture, age range, gender etc). Now just click on Okay button to proceed further. After clicking on okay button it will redirect to "ExternalLoginCallback" view and on that page we will see Username textbox which contains Username which we have got from Facebook Oauth service. now just click on Register button and you are logged in to your web application. The user name with facebook is successfully saved in UserProfile table and second table which iswebpages_OAuthMembership table.