In this tutorial I will show you how to make ASP.NET MVC 4 Web Application for beginners. But before we start, we need an application which enables user to create/update/read/delete (CRUD) the data connected with cars. Let’s create a new project.

- Open Visual Studio 2012
- File/New/Project -> select Web/ASP.NET MVC 4 Web Application.
- When new window appears, please select a template as Internet Application and the vie engine as Razor. For this example, please do not select Create a unit test project.
- Confirm
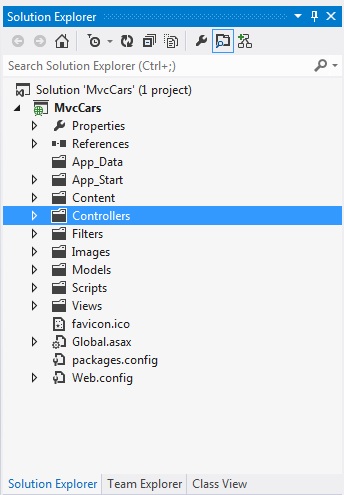
Your project structure should look like this:
We will start from creating a new model class. To do this, please right click on folder Models, select Add->New Item and choose Class. Name it as Car.cs – it is our first POCO in a project. The next thing is to add primitive properties inside of a class as below:
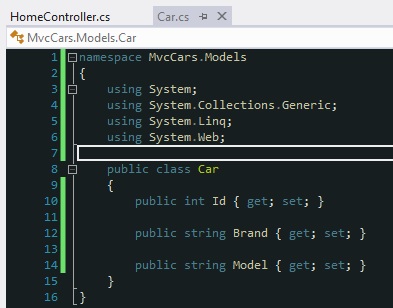
This class represents a Car. Car is an object which will be stored in a Cars table in a database. It means, that one car = one row in a db.
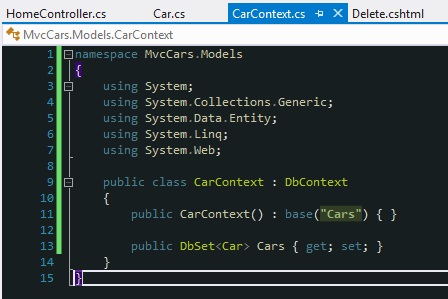
If you have already created this class, please create another one for model, named CarContext.cs -> here we will include DbSet for our Car objects and information about the name of the future database. To add it, please follow steps from Car.cs. The structure of CarContext is shown below:
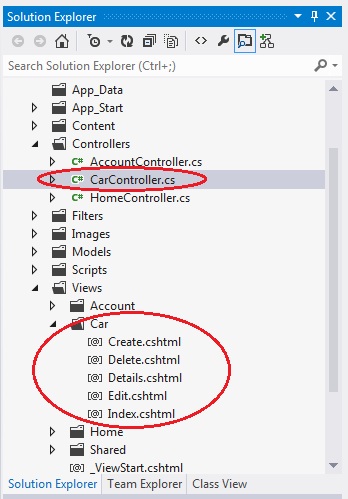
The next thing is to add a Controller for our Model. It will store Create, Read, Update, Delete methods. To add this please right click at Controller, then select Add->Controller:

Click Add. As you can see, VS 2012 has automatically added CarController with implemented CRUD methods and also new views:
The last thing to do is to add a connection string into web.config file. To do this, please open web.config and add this connection string:

Name of connection string should be the same in CarContext class ( : base(“Cars”) ).
Please hit F5 to Debug. When new tab appears please insert http://localhost:yourport/car/ and enter. This will open the view folder named Car, where all razor files for CRUD methods are stored. After that you should see your web application.
The next step is to click Create New. The new View will appear (Create.cshtml). Just add a new car with its brand and model name. After that you will see the list of all cars that have been already added. You can edit this, delete or show the details.
HostForLIFE.eu ASP.NET MVC 4 Hosting
HostForLIFE.eu revolutionized hosting with Plesk Control Panel, a Web-based interface that provides customers with 24x7 access to their server and site configuration tools. Plesk completes requests in seconds. It is included free with each hosting account. Renowned for its comprehensive functionality - beyond other hosting control panels - and ease of use, Plesk Control Panel is available only to HostForLIFE's customers. They offer a highly redundant, carrier-class architecture, designed around the needs of shared hosting customers.