PayPal is an online payment service that allows you to pay for purchases, receive payments, or to send and receive money. To receive these services, a person must submit various financial details to PayPal, such as credit card number, transmission can be done by mail. Thereafter, transactions are conducted without having to disclose financial details, an email address and a password is sufficient.
for more information about business please visit official Paypal Website for business or https://developer.paypal.com/webapps/developer/docs/integration/direct/log-in-with-paypal/detailed/
In this tutorial we propose to integrate the PAYPAL e-commerce payment solution.
So, we are using Visual studio C# and ASP.NET MVC4 (for more information about ASP.NET MVC please take a look at http://www.asp.net/mvc/tutorials/mvc-4/getting-started-with-aspnet-mvc4/intro-to-aspnet-mvc-4
Ready ? Lets start our tutorial :
1. Open Visual studio 2012 or later and Create your Project
2. Choose ASP.NET MVC4 Template Projet, Internet Application and Razor ViewEngine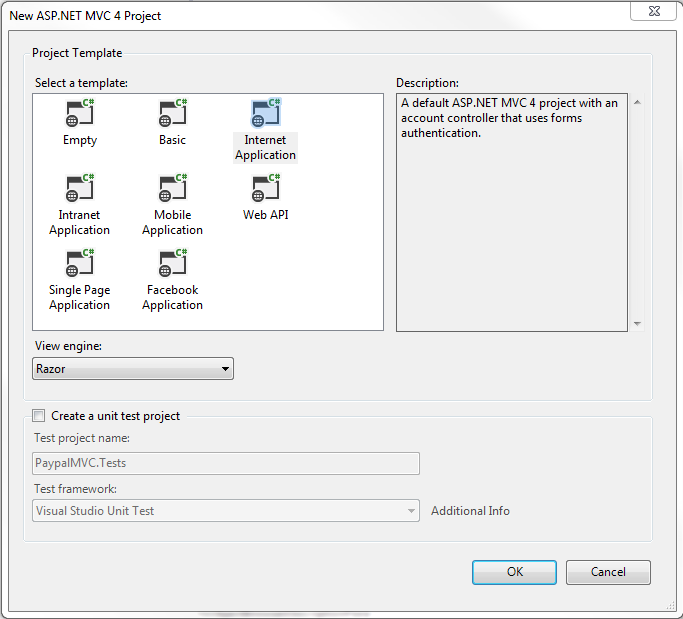
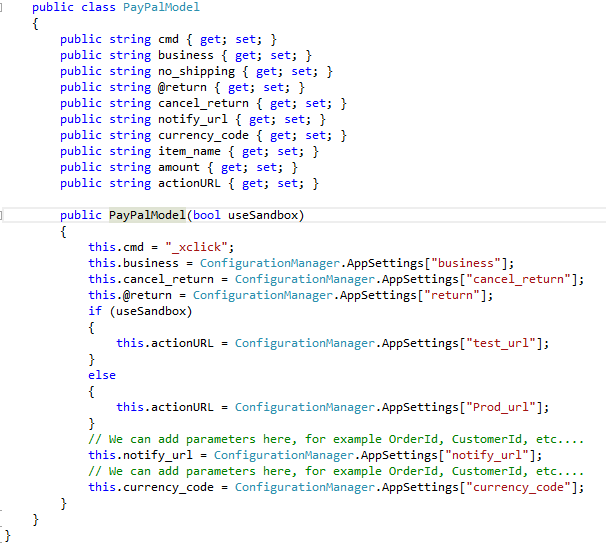
3. Expand Model folder and Create a new Model named PayPalModel to hold PayPal payment parameters
Try it
public class PayPalModel
{
public string cmd { get; set; }
public string business { get; set; }
public string no_shipping { get; set; }
public string @return { get; set; }
public string cancel_return { get; set; }
public string notify_url { get; set; }
public string currency_code { get; set; }
public string item_name { get; set; }
public string amount { get; set; }
public string actionURL { get; set; }
public PayPalModel(bool useSandbox)
{
this.cmd = “_xclick”;
this.business = ConfigurationManager.AppSettings[“business”];
this.cancel_return = ConfigurationManager.AppSettings[“cancel_return”];
this.@return = ConfigurationManager.AppSettings[“return”];
if (useSandbox)
{
this.actionURL = ConfigurationManager.AppSettings[“test_url”];
}
else
{
this.actionURL = ConfigurationManager.AppSettings[“Prod_url”];
}
// We can add parameters here, for example OrderId, CustomerId, etc….
this.notify_url = ConfigurationManager.AppSettings[“notify_url”];
// We can add parameters here, for example OrderId, CustomerId, etc….
this.currency_code = ConfigurationManager.AppSettings[“currency_code”];
}
}
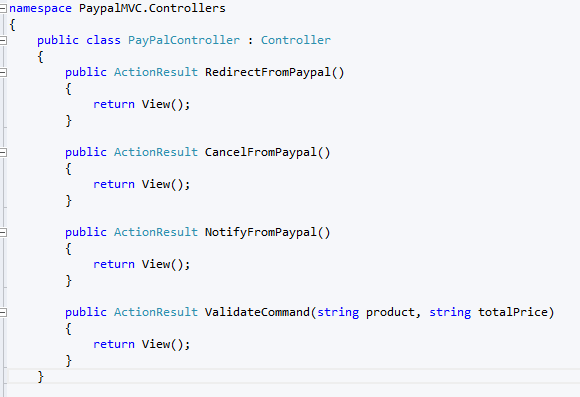
4. Create a Paypal Controller
Try it :
public class PayPalController : Controller
{
public ActionResult RedirectFromPaypal()
{
return View();
}
public ActionResult CancelFromPaypal()
{
return View();
}
public ActionResult NotifyFromPaypal()
{
return View();
}
public ActionResult ValidateCommand(string product, string totalPrice)
{
return View();
}
}
5. Now Create a Partial View (ValidateCommand.csHtml) to use our Model. Do not forget that all fields must be of type hidden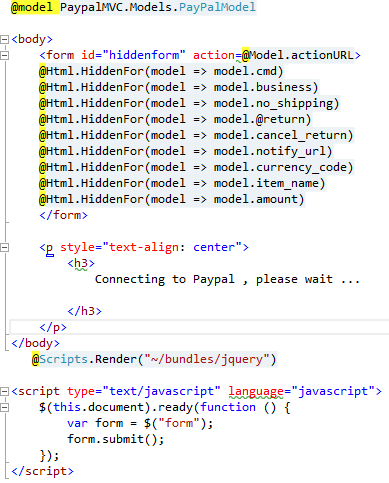
try it :
@model PaypalMVC.Models.PayPalModel
<body>
<form id=”hiddenform” [email protected]>
@Html.HiddenFor(model => model.cmd)
@Html.HiddenFor(model => model.business)
@Html.HiddenFor(model => model.no_shipping)
@Html.HiddenFor(model => model.@return)
@Html.HiddenFor(model => model.cancel_return)
@Html.HiddenFor(model => model.notify_url)
@Html.HiddenFor(model => model.currency_code)
@Html.HiddenFor(model => model.item_name)
@Html.HiddenFor(model => model.amount)
</form>
<p style=”text-align: center”>
<h3>
Connecting to Paypal , please wait …
</h3>
</p>
</body>
@Scripts.Render(“~/bundles/jquery”)
<script type=”text/javascript” language=”javascript”>
$(this.document).ready(function () {
var form = $(“form”);
form.submit();
});
</script>
6. Now finish our ValidateCommand action of PayPalController
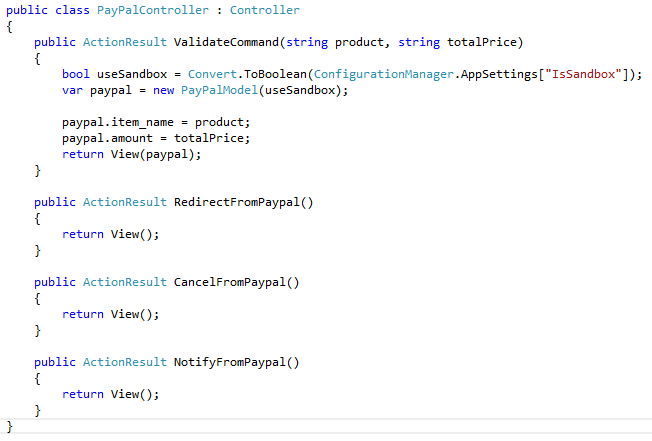
try it :
public ActionResult ValidateCommand(string product, string totalPrice)
{
bool useSandbox = Convert.ToBoolean(ConfigurationManager.AppSettings[“IsSandbox”]);
var paypal = new PayPalModel(useSandbox);
paypal.item_name = product;
paypal.amount = totalPrice;
return View(paypal);
}
7. Next finish our partialView by adding a jquery code to auto submit our form. The necessary scripts are Jquery-{version}.js and Jquery-{version}.min.js. Here we are used @Scripts.Render(“~/bundles/jquery”) to include all Jquery scripts. A more better practice will be to export all javascript functions to external file but the submit function must be called just after displaying hidden field of our form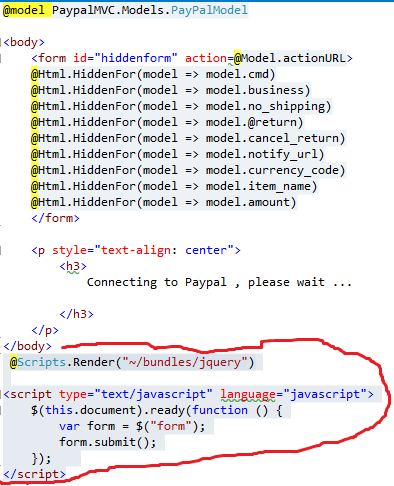
8. The next step is to create our checkOut form that dispays product name , Quantity, price and Total :
So expand View folder , expand Home folder and open index.csHtml file. Replace its contents by the following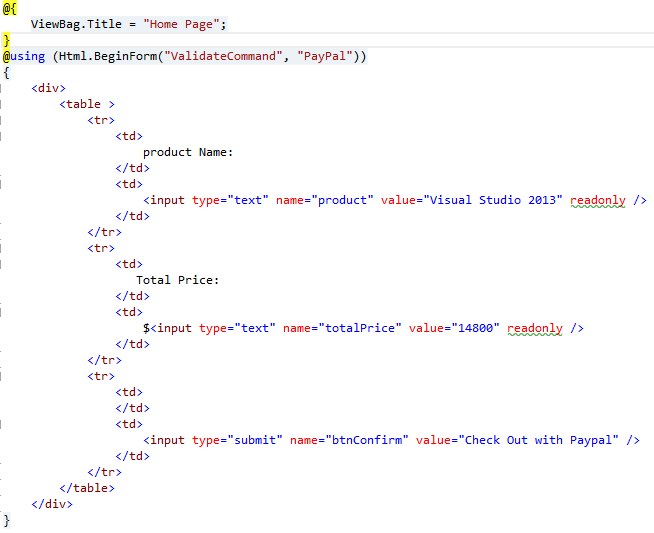
try it :
@{
ViewBag.Title = “Home Page”;
}
@using (Html.BeginForm(“ValidateCommand”, “PayPal”))
{
<div>
<table >
<tr>
<td>
product Name:
</td>
<td>
<input type=”text” name=”product” value=”Visual Studio 2013″ readonly />
</td>
</tr>
<tr>
<td>
Total Price:
</td>
<td>
$<input type=”text” name=”totalPrice” value=”14800″ readonly />
</td>
</tr>
<tr>
<td>
</td>
<td>
<input type=”submit” name=”btnConfirm” value=”Check Out with Paypal” />
</td>
</tr>
</table>
</div>
}
9. we are at the end. Our final step is to update the web.config file with the appropriate settings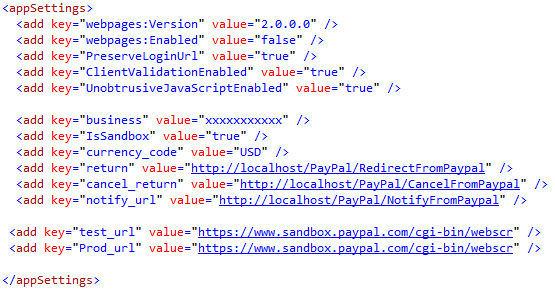
10. Let’s test and run the application
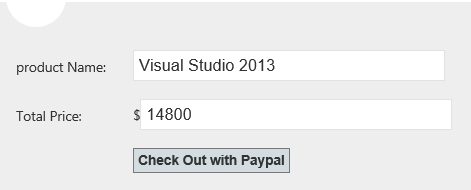
11. Confirm payment by clicking on button Check Out With PayPal, then you will be redirected to the payment page 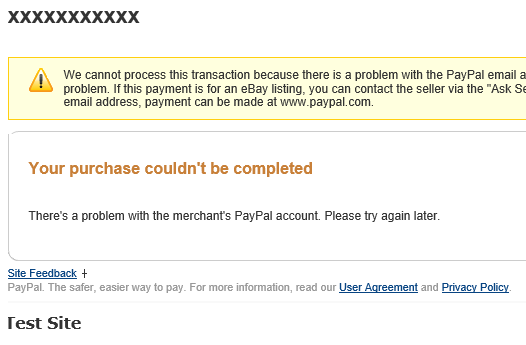
We have this page error because, we have not yet an valid account.
Now it time to create a test account by following this link https://developer.paypal.com/webapps/developer/docs/classic/lifecycle/ug_sandbox/#accounts
12. Open Web.config file and update business value with your test account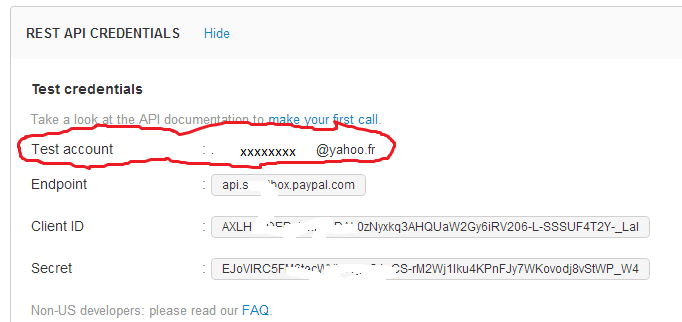
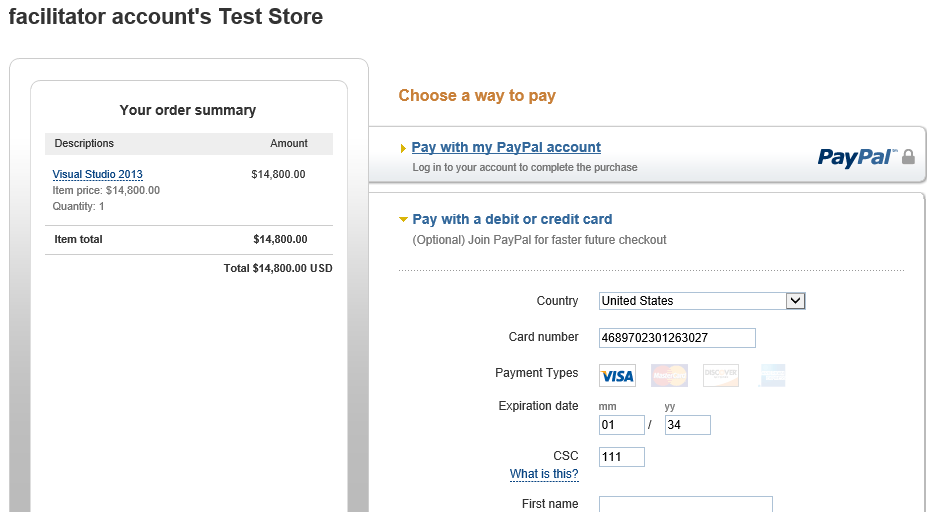
13. So run again your application. Confirm or Cancel , etc…
Hope this tutorial helps you.