When getting started with ASP.NET MVC and/or the ASP.NET Web API, it can be overwhelming trying to figure out how it all works. These frameworks offer powerful features, and abstract away a good deal of pain associated with handling, routing, and responding to HTTP requests within an application. This is a great thing for seasoned developers who understand what it is the framework is doing “for” you (and how to modify that behavior, if desired). It also makes it easier for new or less-experienced folk to set up a basic site or API and watch it “just work.”
On the other hand, the abstraction can make it challenging for those new to the MVC world to understand just what is going on, and where the critical functionality they want to modify “lives.”
One of the fundamental concepts to understand when using ASP.NET MVC and/or the ASP.NET Web API is routing, which essentially defines how your application will process and respond to incoming HTTP requests.
Routing Makes it All Work
Traditional web communication architecture maps a URL (Uniform Resource Locator) to a file within the file system. For example, the following:
http://mydomain.com/mybooks/favorites.html
would tend to map to a file named favorites.html, in the directory ~/mybooks/favorites, located in the root directory for the site mydomain.com. In response to an incoming HTTP request for this resource, the contents of the file are either returned (as in the example above, as HTML) or perhaps code associated with a file is executed (if, for example, the file were a .aspx file).
Within the MVC framework, as well as the Web API*, URLs are instead mapped to specific methods which execute in response to the incoming request, generally returning either a View (MVC) or some sort of structured data (Web API) corresponding to the the requested resource. In other words, instead of pointing to actual physical resources within a file system, MVC and Web API routes instead point to an abstraction which represents the resource requested, in both cases a method which will return the requested item.
This de-coupling of the URL from the physical file system allows us to construct cleaner, more friendly URLs which are more beneficial to the user, search-engine-friendly, and (in theory) more persistent, meaning URLs associated with specific content are less likely to change, and break incoming links.
How Routing Works in ASP.NET MVC
In MVC, the convention is to map URLs to a particular action (a method) on a particular controller. The action then executes, and (usually, but not always) returns an instance of ActionResult. The ActionResult class handles Framework logic such as rendering to HTML or JSON, and writing to the HTTP response that will be returned to the user’s browser.
Once again, I defer to the authors of ASP.NET MVC 4 (who happen to also be members of the ASP.NET team):
The most basic version of this convention would be a URL as follows:
http://mydomain/controllername/methodname
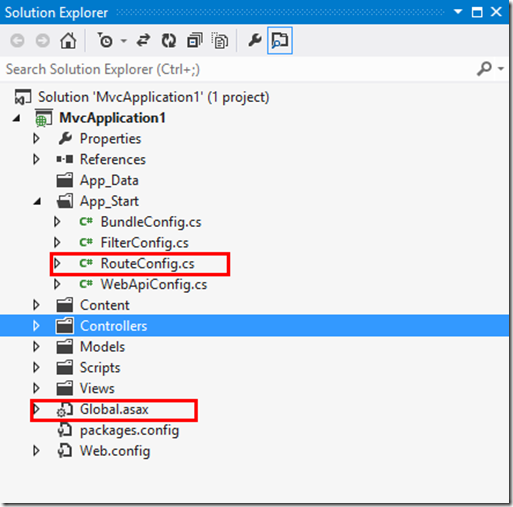
In an MVC project, this is achieved by registering route templates which establish how incoming URLs will be mapped to specific controllers and actions. A typical MVC project defines a Global.asx file, which contains a single method – Application_Start. Within this method, calls are made to various configuration methods to set up the application’s working state. One of these calls is to the RegisterRoutes method of the RouteConfig class found in the App_Start folder of the project.
Global.asx File and the RouteConfig File in a Typical MVC Project:
If we examine the Global.asx file, we find the following code:
The Default ASP.NET MVC Global.asx File:
public class MvcApplication : System.Web.HttpApplication
{
protected void Application_Start()
{
AreaRegistration.RegisterAllAreas();
WebApiConfig.Register(GlobalConfiguration.Configuration);
FilterConfig.RegisterGlobalFilters(GlobalFilters.Filters);
RouteConfig.RegisterRoutes(RouteTable.Routes);
BundleConfig.RegisterBundles(BundleTable.Bundles);
}
}
For our purposes, we are interested only in the call to RouteConfig.RegisterRoutes. As we can see, the call passes the the Routes collection of the Global RouteTable as a parameter to the RegisterRoutes method, which then populates the routes collection with pre-defined route templates for the application. The default MVC project template comes with a single pre-configured route:
The Default MVC RouteConfig Class:
public class RouteConfig
{
public static void RegisterRoutes(RouteCollection routes)
{
routes.IgnoreRoute("{resource}.axd/{*pathInfo}");
routes.MapRoute(
name: "Default",
url: "{controller}/{action}/{id}",
defaults: new
{
controller = "Home",
action = "Index",
id = UrlParameter.Optional
}
);
}
}
Note that any MVC application must have at least one route definition in order to function. In the above, a route template named “Default” is added to the routes collection. The items in curly braces enclose Route Parameters, and are represented by the parameter name as a placeholder between the curly braces. Route Segments are separated by forward slashes (much like a standard URL). Notice how the implied relative URL our route specifies matches the MVC convention:
~/{controller}/{action}
Route parameters can be named just about anything, however ASP.NET recognizes a few special route parameter names, in particular {controller} and {action}, and treats them differently than other route parameters.
Controller Matching
When the routing framework encounters a route parameter named {controller}, it appends the suffix “Controller” to the value of the parameter, and then scans the project for a class by that name which also implements the System.Web.Mvc.IController interface. Note that the search for a controller with a matching name is case-insensitive.
Action Matching
Once the framework has selected the proper controller, it attempts to locate an action on the controller with a name matching the {action} parameter value. The search for a matching action name is case-insensitive. If more than one action matches by name (as with multiple overloaded methods on the same controller), the framework will select the method for which the most URL parameters match method arguments by name.
Action Parameter Matching
Additional URL Parameters other than {controller} and {action} are available to be passed as arguments to the selected Action method. The framework will evaluate the input arguments of the available actions, and match them by name (case-insensitively) to the URL parameters other than {action} and {controller}. With certain restrictions, the framework will select that action with the greatest number of matching parameters.
Some things to consider:
-
The MVC framework will first match method arguments by name to URL parameters. Then, it will attempt to match any query string parameters included in the URL by name. If the request is a POST, then the framework will attempt to match the contents of the POST body.
-
Method arguments are evaluated for a match by name only. The framework does not consider the type required by the method argument. For example, a URL parameter named {id} with a value of “John” will be considered a match for a method which accepts an int argument named id.
-
Action methods can be decorated with attributes which restrict the type of HTTP request they will respond to. Such attributes indicate the applicable HTTP verb to which the action will respond.
As an example of limiting the HTTP actions which a method may respond, consider the following:
Overloaded Action Method with HttpPost Attribute:
public ActionResult Edit(int id)
{
return View();
}
[HttpPost]
public ActionResult Edit(int id, FormCollection collection)
{
try
{
// TODO: Add update logic here
return RedirectToAction("Index");
}
catch
{
return View();
}
}
In the above, we find two methods named Edit. The first accepts an int named id as an argument, and the second accepts an int named id and a FormCollection (a complex type). The purpose of this overloaded method is so that a browser can:
-
Request a view with which to edit a record of some sort and then,
-
Submit the modified record values back to the site for storage.
The first Edit method, which requires only an int id argument will be called using HTTP GET, and return a view with the current representation of the data to be edited. Once the user has updated values in the view and submits the form data, an HTTP POST request is issued. The overloaded Edit method, decorated with the [HttpPost] attribute, is executed, and the modified data is persisted or otherwise processed.
The MVC Default Route Template – Routing Walk-Thru
The route mapping assumes that the URL template specified is relative to the domain root for your site. In other words, since the entire application is hosted at http://yourdomain.com it is not necessary to include this domain root as part of the route template.
In the case of the default MVC mapping from our RouteConfig class above, the route contains the two special parameters, {controller} and {action}. In processing incoming requests, the framework appends “Controller” to the value provided for the {controller} parameter, and then searches the project for a controller class of that name. Once the proper controller has been identified, MVC next looks for a method name corresponding to the value of the {action} parameter, and then attempts to match any additional parameters with input arguments accepted by that method.
For example, if our application receives a request with the following URL:
http://mybookstore.com/books/details/25
the routing will match the default template. The string “Controller” will be appended to the “books” segment, and the runtime will set about searching the project for a class named BooksController. If the controller is located, MVC will then examine the controller for a public method named Details. If a Details method is found, MVC will attempt to find an overload which accepts a single argument named id, and then calls that method, passing in the final URL segment (“25” in this case) as an argument.
The following controller example would provide a suitable match for our incoming request:
A Simple Books Controller:
public class BooksController : Controller
{
public ActionResult Index()
{
return View();
}
public ActionResult Details(int id)
{
return View();
}
}
The incoming request would result in a call to the Details method, passing in the integer 25 as the proper id argument. The method would return the appropriate view (how MVC does this is another convention for another post – let’s stay focused on request routing for now).
Route Parameter Defaults
Notice in the RegisterRoutes method, the registration of the “Default” route also appears to assign some default values to the controller and action, parameters. These values will be used for any of these parameters if they are missing from the incoming request URL. Additionally, the id parameter is designated as optional. For example, consider the following URL:
http://mybookstore.com/books/
In this case, we have specified the Books controller, but have not specified a value for the action or id. However, this route still matches our route definition, since MVC will provide the default value specified for the action parameter (in this case, index). Since the id parameter has been made optional in our route template, MVC will again search for a controller named BooksController, but in this case, examine the controller for a method named Index which does not require an argument. Again, a match is found, and the Index method is called, returning an appropriate view (most likely a list of all the books in the database).
The MVC default route mapping also specifies a default controller to use when no controller parameter is specified; namely, the “Home” controller. In other words, incoming requests to our domain root:
http://mybookstore.com/
will also match the default project controller. In this case, the runtime will attempt to locate a controller named HomeController, then locate the Index method of that controller. Since no id parameter was provided, the Index method will be called, returning the appropriate view ( most likely, the Homepage of our site).
What Next?
As we have seen above, MVC examines an incoming URL and attempts to map each URL segment to a controller and action according to the route templates set up in the RouteConfig.MapRoutesmethod. Once a proper controller and action have been identified, any additional URL segments (for example, the optional {id} segment in our example above) are evaluated against the action method signature to determine the best parameter match for the action.
But what happens when we need to do more than just send an ID in as an argument for the desired action method? Or, what if we have one or more overloaded methods by which we wish to perform more complex queries against our data?
While we can always include query parameters as part of our URL (and in fact we will no doubt have to resort to this at various points in our application design), we can customize and extend the default routing, and exert a little more control over how how and what our application will accept in an HTTP request by customizing our routes.
While the default /controller/action/id route baked into the MVC project template is a useful start and will handle many common controller cases, it is safe to say the MVC team did not expect developers to limit their applications to this minimally-flexible, single standard. Indeed, the ASP.NET routing framework (and the corresponding routing framework used by Web API) are very flexible, and within certain limits, highly customizable.