
June 13, 2024 07:45 by
 Peter
PeterWhen malicious scripts are inserted into web sites that other users are seeing, it can lead to cross-site scripting (XSS) attacks, which pose a serious security risk. This article shows how to use best practices and built-in security capabilities in ASP.NET Core MVC to develop a basic blog application while guarding against XSS attacks.

Step 1. Create the ASP.NET Core MVC Project
Create a new ASP.NET Core MVC project
dotnet new mvc -n BlogApp
cd BlogApp
Add Entity Framework Core Packages
dotnet add package Microsoft.EntityFrameworkCore.SqlServer
dotnet add package Microsoft.EntityFrameworkCore.Design
dotnet add package Microsoft.Security.Application
Step 2. Set Up Entity Framework Core
Create the database context and models
Create a Data folder and add ApplicationDbContext.cs
using Microsoft.EntityFrameworkCore;
using XSSAttackInAspNetCoreMVC.Model;
namespace XSSAttackInAspNetCoreMVC.Data
{
public class ApplicationDbContext : DbContext
{
public ApplicationDbContext(DbContextOptions<ApplicationDbContext> options) : base(options) { }
public DbSet<BlogPost> BlogPosts { get; set; }
}
}
Configure the Database Context in Startup.cs
using Microsoft.EntityFrameworkCore;
using XSSAttackInAspNetCoreMVC.Data;
namespace XSSAttackInAspNetCoreMVC
{
public class Program
{
public static void Main(string[] args)
{
var builder = WebApplication.CreateBuilder(args);
// Add services to the container.
builder.Services.AddRazorPages();
builder.Services.AddControllersWithViews();
builder.Services.AddDbContext<ApplicationDbContext>(options =>
options.UseSqlServer(builder.Configuration.GetConnectionString("DefaultConnection")));
var app = builder.Build();
// Configure the HTTP request pipeline.
if (!app.Environment.IsDevelopment())
{
app.UseExceptionHandler("/Error");
// The default HSTS value is 30 days. You may want to change this for production scenarios, see https://aka.ms/aspnetcore-hsts.
app.UseHsts();
}
app.UseHttpsRedirection();
app.UseStaticFiles();
app.UseRouting();
app.UseAuthorization();
app.MapRazorPages();
app.UseEndpoints(routes =>
{
routes.MapControllerRoute(
name: "default",
pattern: "{controller=Home}/{action=Index}/{id?}");
});
app.Run();
}
}
}
Add Connection String in appsettings.json
{
"ConnectionStrings": {
"DefaultConnection": "Server=(localdb)\\mssqllocaldb;Database=BlogAppDb;Trusted_Connection=True;MultipleActiveResultSets=true"
},
"Logging": {
"LogLevel": {
"Default": "Information",
"Microsoft.AspNetCore": "Warning"
}
},
"AllowedHosts": "*"
}
Create the Initial Migration and Update the Database
dotnet ef migrations add InitialCreate
dotnet ef database update
Step 3. Create Controllers and Views
Create the BlogPost Model
Create a Models folder and add BlogPost.cs
using System.ComponentModel.DataAnnotations;
namespace XSSAttackInAspNetCoreMVC.Model
{
public class BlogPost
{
public int Id { get; set; }
[Required]
[StringLength(100)]
public string? Title { get; set; }
[Required]
public string? Content { get; set; }
public DateTime Created { get; set; }
}
}
Create the BlogController
Create a Controllers folder and add BlogController.cs
using Microsoft.AspNetCore.Mvc;
using Microsoft.Security.Application;
using XSSAttackInAspNetCoreMVC.Data;
using XSSAttackInAspNetCoreMVC.Model;
namespace XSSAttackInAspNetCoreMVC.Controllers
{
public class BlogController : Controller
{
private readonly ApplicationDbContext _context;
public BlogController(ApplicationDbContext context)
{
_context = context;
}
[HttpGet]
public IActionResult Index()
{
var posts = _context.BlogPosts.ToList();
return View(posts);
}
[HttpGet]
public IActionResult Create()
{
return View();
}
[HttpPost]
[ValidateAntiForgeryToken]
public IActionResult Create(BlogPost model)
{
if (ModelState.IsValid)
{
// Sanitize inputs before saving to the database
model.Title = Sanitizer.GetSafeHtmlFragment(model.Title);
model.Content = Sanitizer.GetSafeHtmlFragment(model.Content);
_context.BlogPosts.Add(model);
_context.SaveChanges();
return RedirectToAction(nameof(Index));
}
return View(model);
}
}
}
Create the Views
Create a Views/Blog folder and add the following views
Index.cshtml
@model IEnumerable<XSSAttackInAspNetCoreMVC.Model.BlogPost>
<!DOCTYPE html>
<html>
<head>
<title>Blog Posts</title>
</head>
<body>
<h1>Blog Posts</h1>
<a asp-controller="Blog" asp-action="Create">Create New Post</a>
<ul>
@foreach (var post in Model)
{
<li>
<h2>@post.Title</h2>
<p>@Html.Raw(@post.Content)</p>
<p><small>@post.Created</small></p>
</li>
}
</ul>
</body>
</html>
Create.cshtml
@model XSSAttackInAspNetCoreMVC.Model.BlogPost
<!DOCTYPE html>
<html>
<head>
<title>Create Blog Post</title>
</head>
<body>
<h1>Create Blog Post</h1>
<form asp-action="Create" method="post" asp-antiforgery="true">
<div class="form-group">
<label asp-for="Title"></label>
<input asp-for="Title" class="form-control" />
<span asp-validation-for="Title" class="text-danger"></span>
</div>
<div class="form-group">
<label asp-for="Content"></label>
<textarea asp-for="Content" class="form-control"></textarea>
<span asp-validation-for="Content" class="text-danger"></span>
</div>
<button type="submit" class="btn btn-primary">Submit</button>
</form>
<a asp-controller="Blog" asp-action="Index">Back to List</a>
</body>
</html>
Step 4. Add Client-Side Validation
Enable Client-Side Validation
Add the necessary scripts to _Layout.cshtml
<!DOCTYPE html>
<html lang="en">
<head>
<meta charset="utf-8" />
<meta name="viewport" content="width=device-width, initial-scale=1.0" />
<title>@ViewData["Title"] - XSSAttackInAspNetCoreMVC</title>
<link rel="stylesheet" href="~/lib/bootstrap/dist/css/bootstrap.min.css" />
<link rel="stylesheet" href="~/css/site.css" asp-append-version="true" />
<link rel="stylesheet" href="~/XSSAttackInAspNetCoreMVC.styles.css" asp-append-version="true" />
</head>
<body>
<header>
<nav class="navbar navbar-expand-sm navbar-toggleable-sm navbar-light bg-white border-bottom box-shadow mb-3">
<div class="container">
<a class="navbar-brand" asp-area="" asp-page="/Index">XSSAttackInAspNetCoreMVC</a>
<button class="navbar-toggler" type="button" data-bs-toggle="collapse" data-bs-target=".navbar-collapse" aria-controls="navbarSupportedContent"
aria-expanded="false" aria-label="Toggle navigation">
<span class="navbar-toggler-icon"></span>
</button>
<div class="navbar-collapse collapse d-sm-inline-flex justify-content-between">
<ul class="navbar-nav flex-grow-1">
<li class="nav-item">
<a class="nav-link text-dark" asp-area="" asp-page="/Index">Home</a>
</li>
<li class="nav-item">
<a class="nav-link text-dark" asp-area="" asp-page="/Privacy">Privacy</a>
</li>
<li class="nav-item">
<a class="nav-link text-dark" asp-action="Index" asp-controller="Blog">Blog</a>
</li>
</ul>
</div>
</div>
</nav>
</header>
<div class="container">
<main role="main" class="pb-3">
@RenderBody()
</main>
</div>
<footer class="border-top footer text-muted">
<div class="container">
© 2024 - XSSAttackInAspNetCoreMVC - <a asp-area="" asp-page="/Privacy">Privacy</a>
</div>
</footer>
<script src="~/lib/jquery/dist/jquery.min.js"></script>
<script src="~/lib/bootstrap/dist/js/bootstrap.bundle.min.js"></script>
<script src="~/js/site.js" asp-append-version="true"></script>
<script src="~/lib/jquery/dist/jquery.min.js"></script>
<script src="~/lib/jquery-validation/dist/jquery.validate.min.js"></script>
<script src="~/lib/jquery-validation-unobtrusive/jquery.validate.unobtrusive.min.js"></script>
@await RenderSectionAsync("Scripts", required: false)
</body>
</html>
Step 5. Run the Application
dotnet run
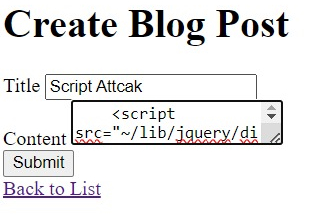
Output
If we want to submit the script in the form after doing the above steps the site will sanatize the input if the script is found the site will not accept the data.
After submitting this data, we will debug the inputs in the code, and we will not receive the script attack on my website.
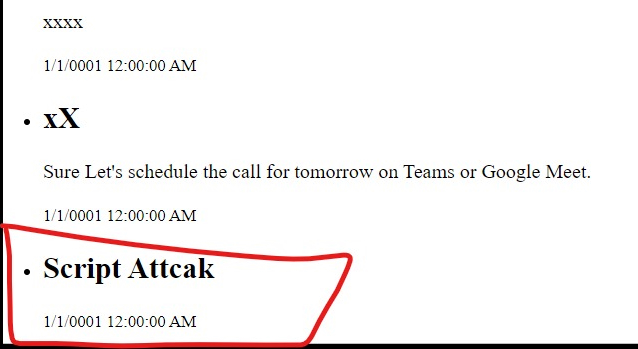
You can see from the result that we don't receive any output pertaining to the scripts in the view after sanitization.
Conclusion
By following these instructions, you have developed a basic ASP.NET Core MVC application that shields users against XSS threats while enabling them to make and read blog posts. In order to display content properly, the application employs built-in encoding features and sanitizes user inputs before saving them to the database. By using this method, you may be sure that your application is safe against frequent XSS attacks.