HTML Assistance
HTML Controls are made by creating HTML markup using HTML Helpers. A method that returns an HTML string is called HTML Helper. HTML Helpers come in three different varieties:
Inline HTML Helpers: These are created by the @helper tag of Razor Syntax. These Helpers can be reused only on the same view.
Built-In HTML Helpers: These HTML Helpers are extension methods on the HtmlHelper class. These are categorized in to three parts:

- Standard HTML Helpers: These helpers are used to create the most common types of HTML elements.
- Strongly Typed HTML Helpers: The HTML is generated through Model Class Properties. These helpers work on lambda expression.
- Templated HTML Helpers: These helpers defines what HTML elements are required to render based on properties of our Model class.
Custom HTML Helpers: You can also create your own custom helper methods by creating an extension method on the HtmlHelper class or by creating static methods within a utility class.
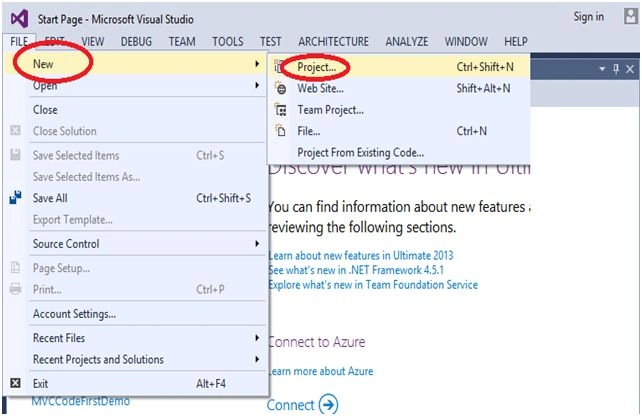
Step 1: Open the Visual Studio and select the “File” menu, New, then Project.
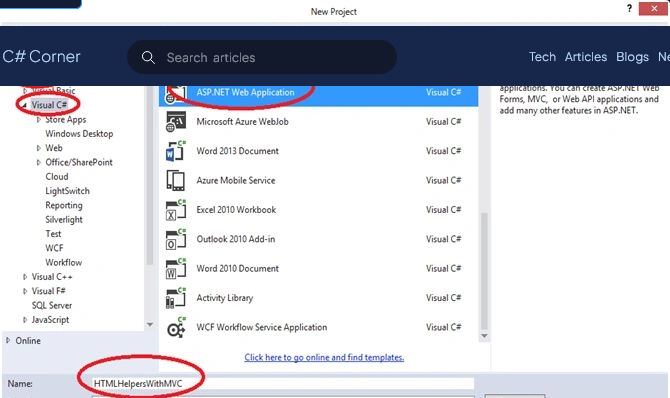
In the following figure select “Templates”, Visual C#, ASP.NET Web Application, and here I gave the name of project as “HTMLHelpersWithMVC.”
You can give the project name as you wish.
And then click on “OK” button.
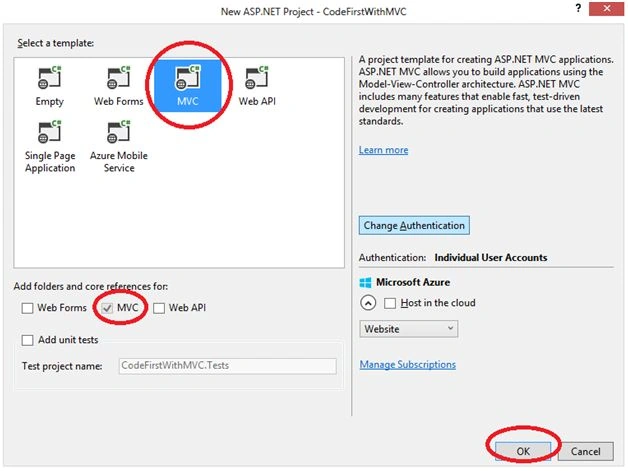
In the following figure as you can see the default MVC will be selected, select MVC and then click “OK” button.
First, I want to create a Controller, so right click on "Controllers" folder and click on “Add”, then click on to Controller, to add a Controller.
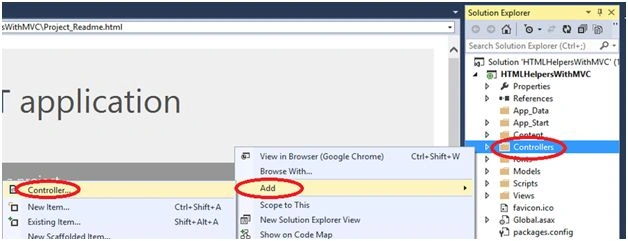
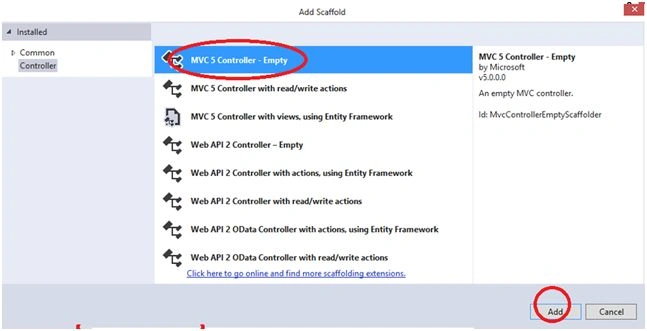
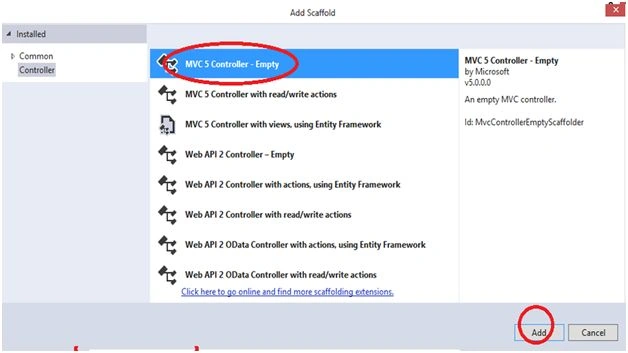
Select the MVC 5 Controller - Empty.
Click on to the “Add” button to add a Controller.
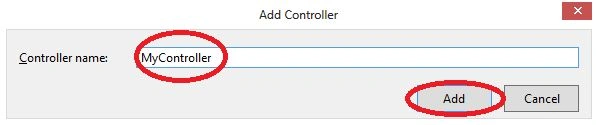
Here I gave the “MyController” name to my Controller.
Click on to the “Add” button.
You can give the Controller name as you wish.
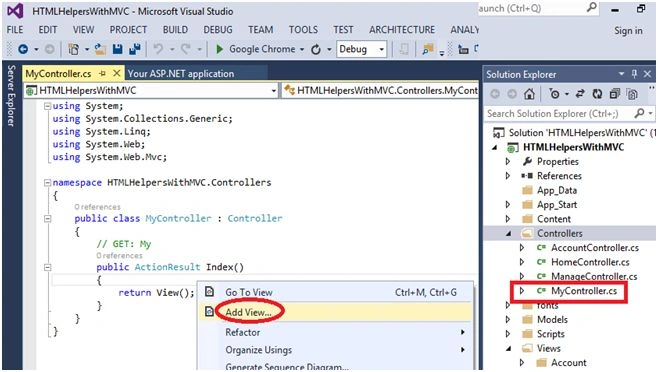
In the “MyController”, right click near return view(); to add a view.
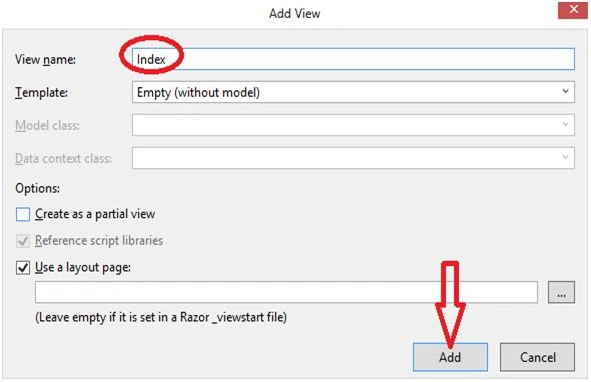
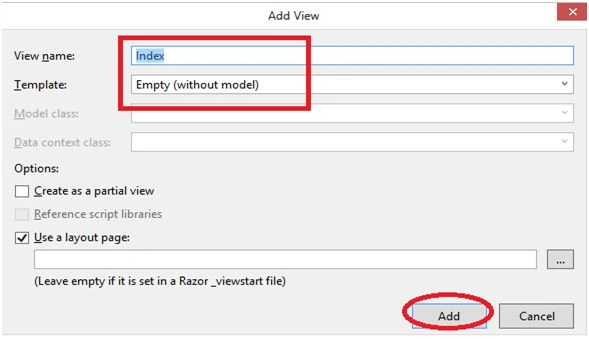
In the following figure, the view name is by default Index, and Templates name is by default Empty (without model).
Click on “Add” button to add a view.
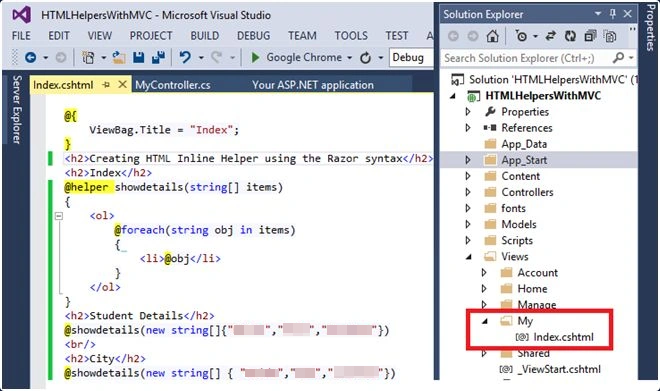
Here is the first of all we have taken in the Inline HTML Helpers example, where we can show the items in Inline format.
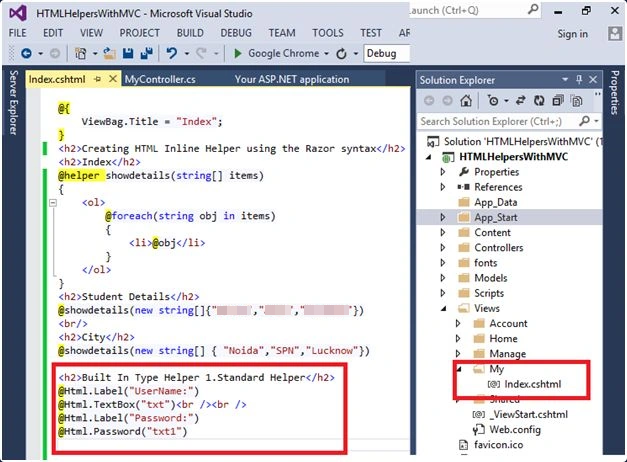
Now I’m going to create Built-In Type HTML Helpers:
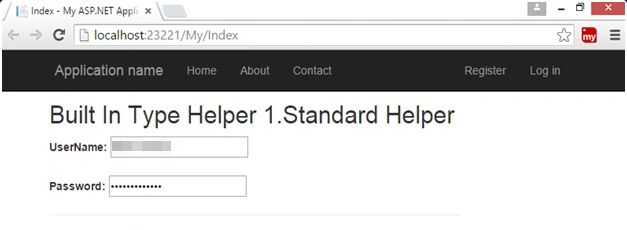
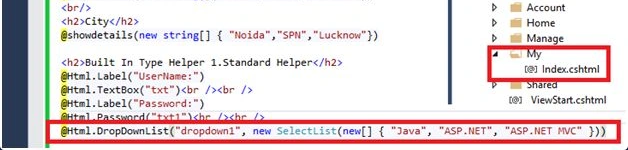
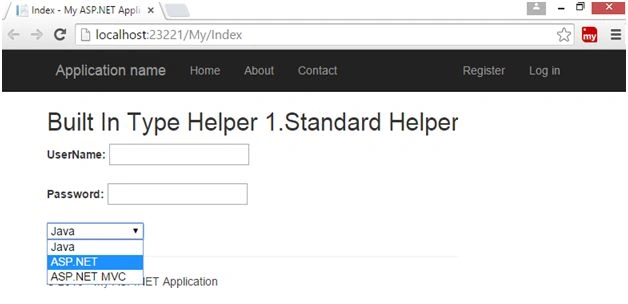
Firstly, I’m using the Standard HTML Helpers like HTML text boxes, Password, Dropdown list, etc.
Now I’m going to create Strongly Typed HTML Helpers-
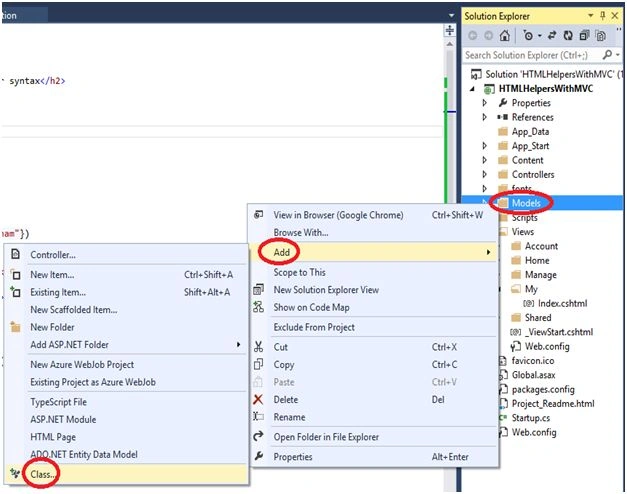
For this I need to create a Model using a Model folder, right click on to Models folder, click on “Add” button and add a class.
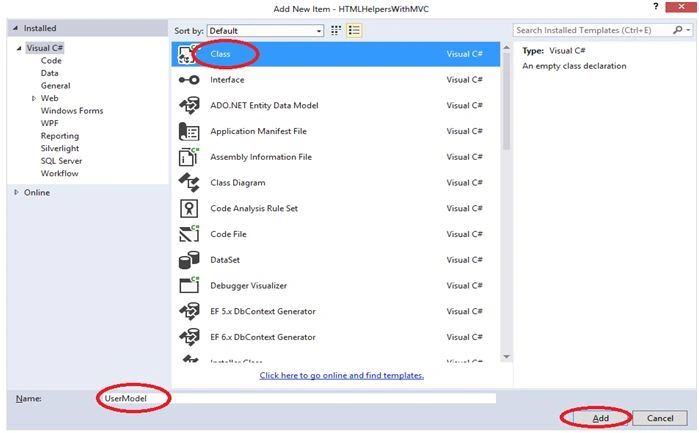
Select the class name and give the name of this class “UserModel”.
Click on to the “Add” button.
In the Model Class, we have to create two properties, EmployeeName and Password.
In the Model Class, we have to create two properties, EmployeeName and Password.
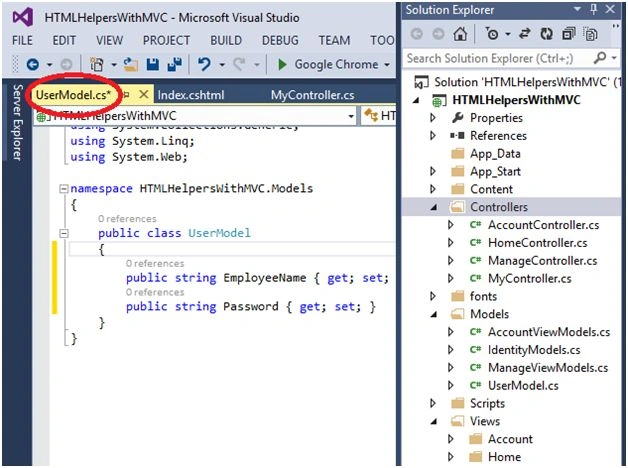
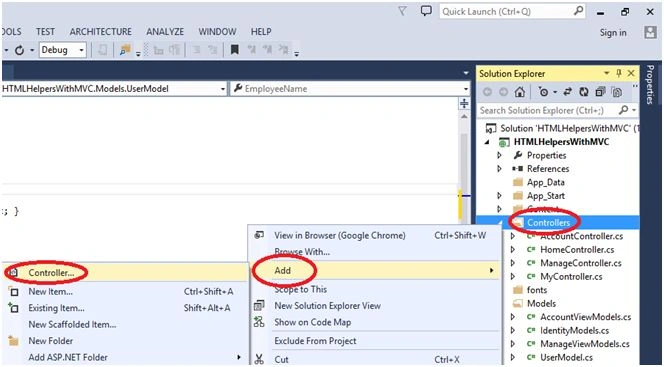
To demonstrate, I want to add a new Controller, so right click on the Controllers folder and click on Add. Click on Controller to add a new Controller.
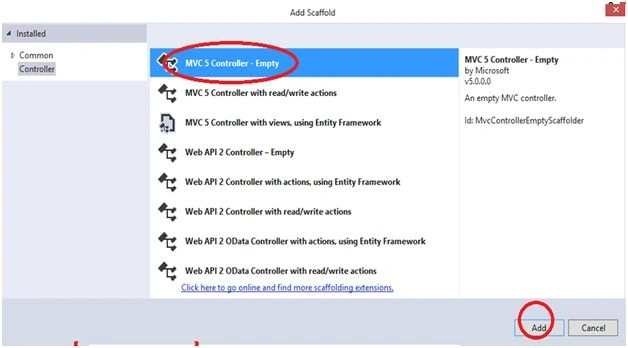
Select the MVC 5 Controller - Empty.
Click on “Add” button to add a Controller.
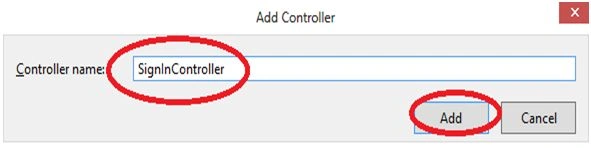
So give the Controller name “SignInController”.
Click on “Add” button.
Here we need to create a particular view, right click near return view(); and click “Add View”.
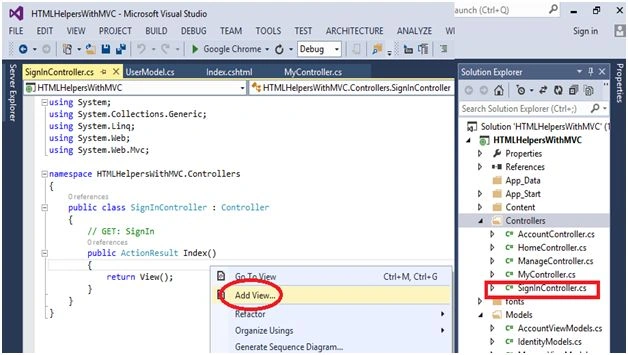
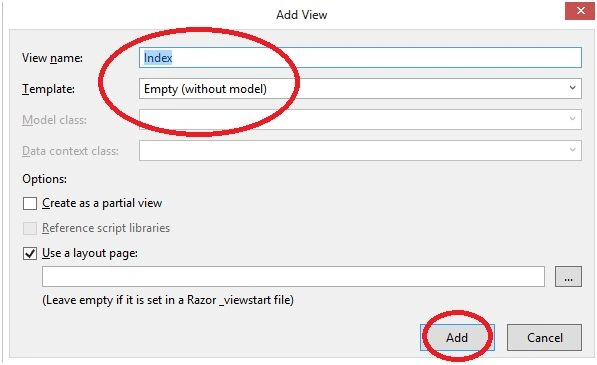
The View name by default is Index and Template name by default is Empty.
Click on Add button.
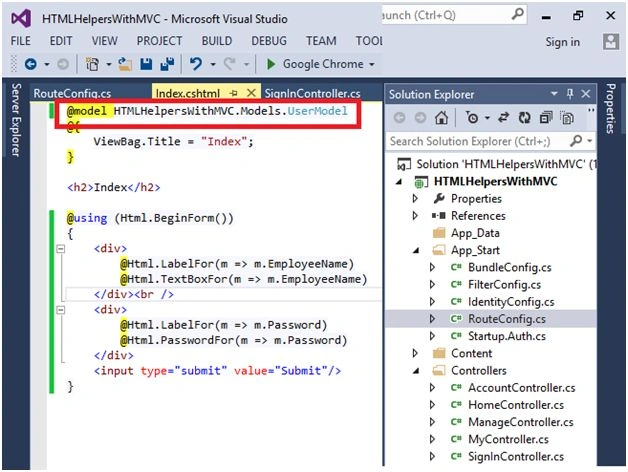
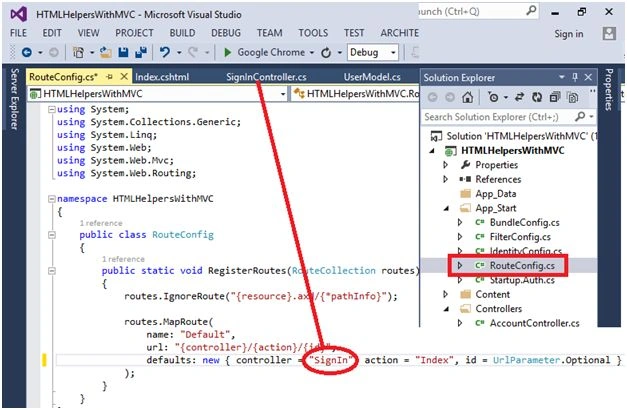
In the RouteConfig.cs, change the Controller name, write the “SignIn”.
Now run the Project, press F5 key to run the project.
Now I’m going to create Templated HTML Helpers-
In MyController.cs, right click near return view(); to add a view.
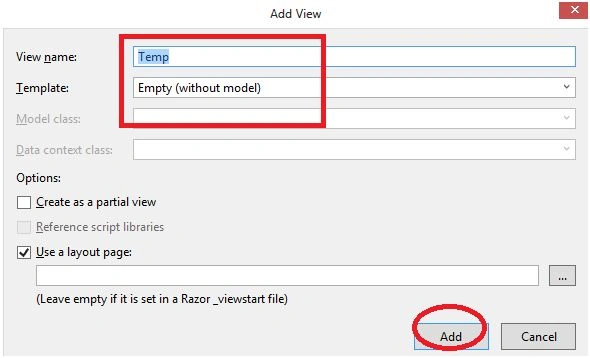
The View Name is by default “Temp” and Template Name is by default Empty.
Click on to the “Add” button.
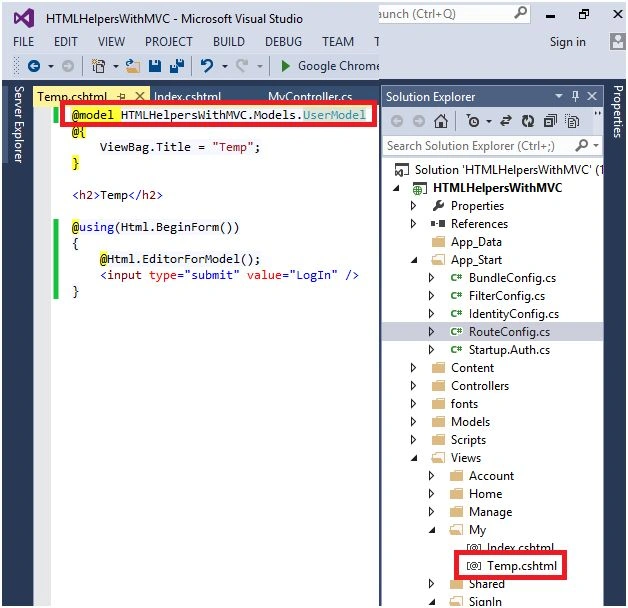
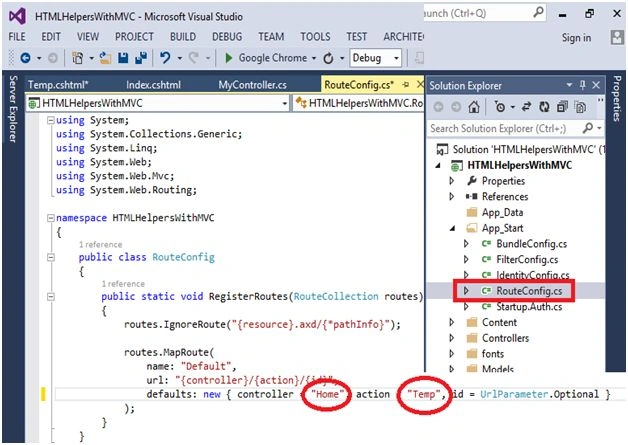
Change the Controller and action name according to the View and Controller name in the RouteConfig.cs file.
Now I’m going to create Custom HTML Helpers:
First of all we need to create a Controller, so right click on Controllers folder, select “Add” and then Controller to add a Controller.
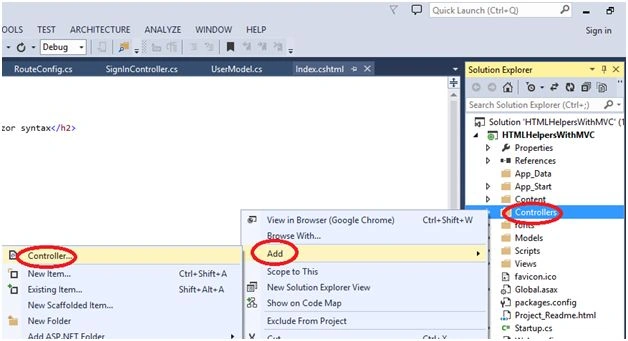
Select the MVC 5 Controller - Empty.
Click on “Add” button to add a Controller.
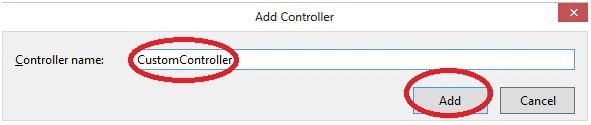
So give the Controller name “CustomController”.
Click on “Add” button.
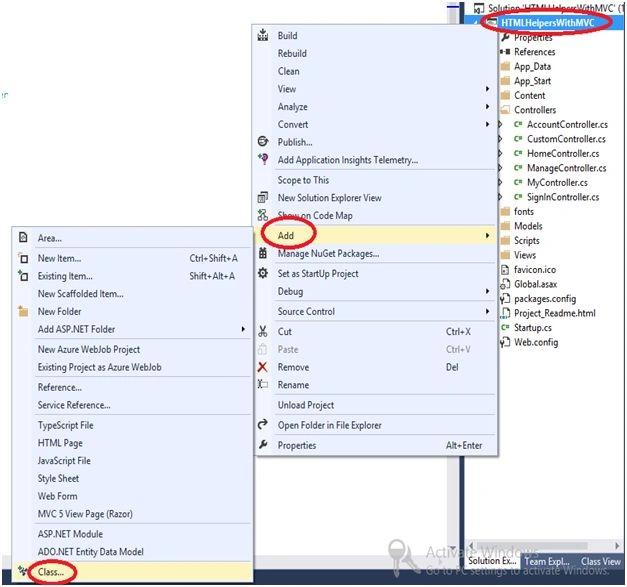
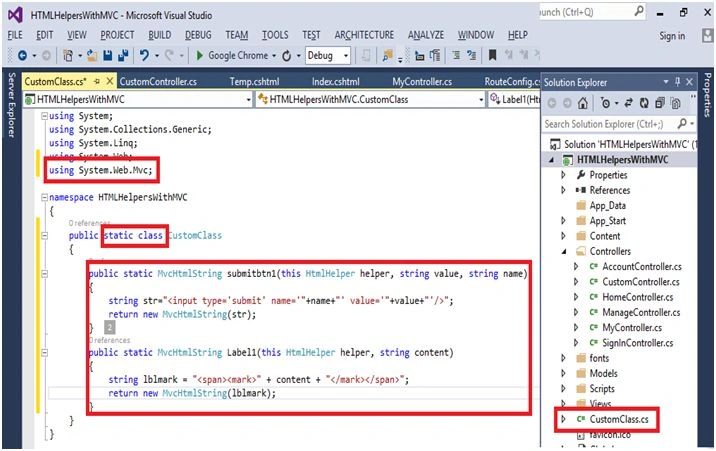
Now we need to create a class.
Right click on to the Project and choose “Add” and then click on “class” to add a Class.
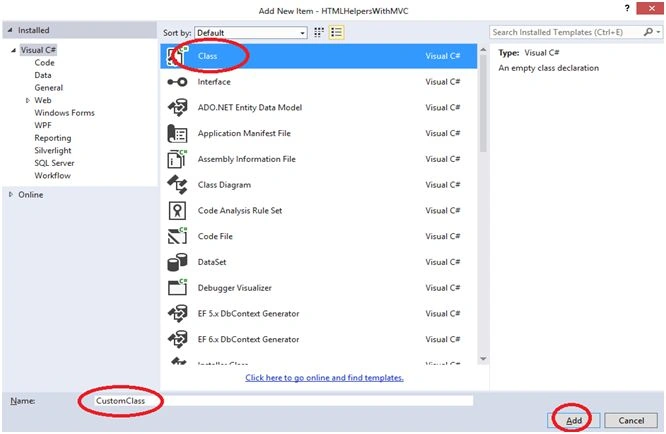
Select the Class and give the “CustomClass” name of the class.
Click on to the “Add” button.
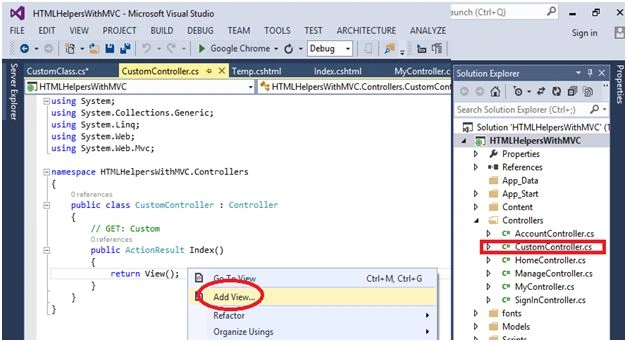
In the “CustomController.cs”, we need to add a View, so right click near view and click on “Add View”.
Click on the “Add” button.
In the view page take a button and a Label.
In the RouteConfig.cs, change the name of Controller and action.
Run the project by pressing F5.
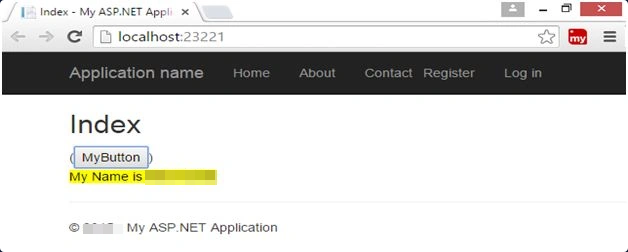
The final output is here.